KENR6932 89
Disassembly and Assembly Section
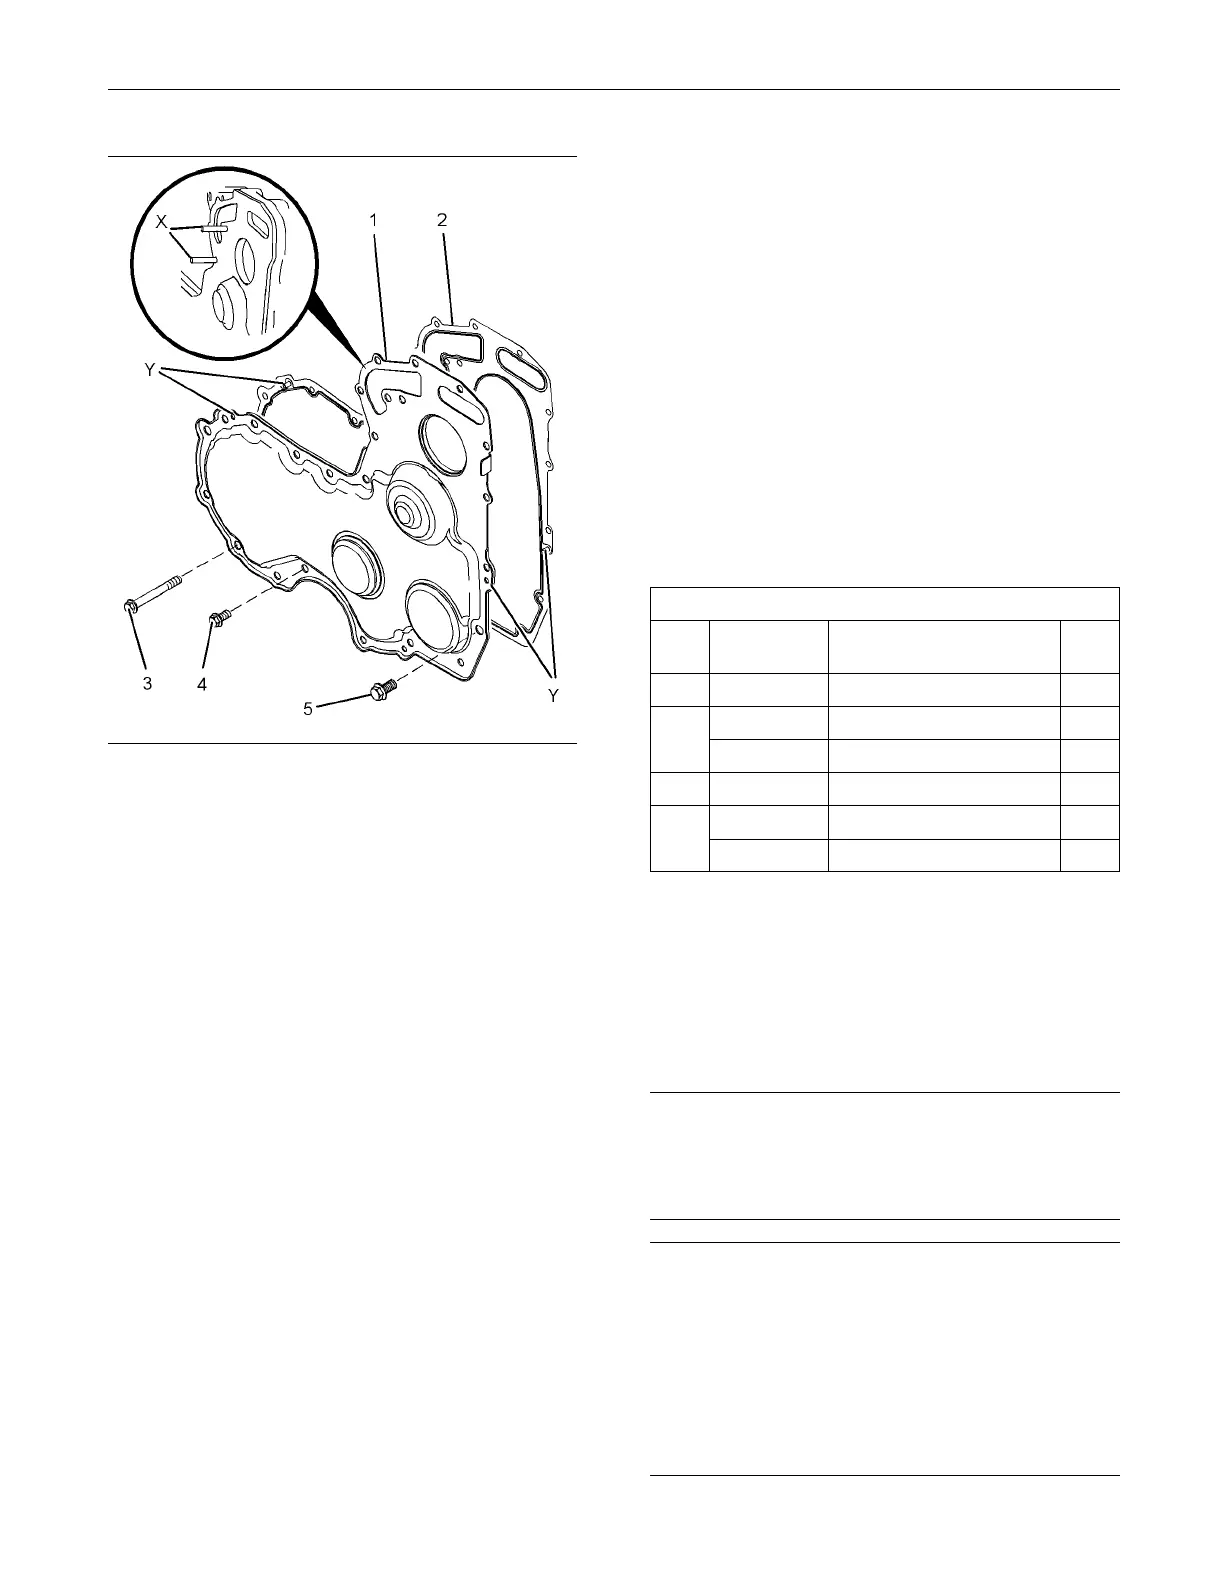
g01337874
Illustrat
ion 157
Typical exam p le
1. Thoroughly clean the mating surface of the front
housing.
2. If the original front cover is installed, follow Steps
2.a through 2.b.
a. Thoroughly clean front cover (1).
b. Install a
new joint (2) to front cover (1). Engage
three locators (Y) into the holes in the front
cover.
3. Install Tooling (A) into holes (X) in the front
housing.
4. Use Tooling (A) in order to position the front cover
assembly onto the front housing.
5. Install bolts (3) and (4). Install bolt (5) finger tight.
Ensure that the different bolts are installed in the
correct
positions.
Note: The bolt (5) may not be installed to some
engines
.
6. Loosely install the water pump assembly and
remove T
ooling (A). Refer to Disassembly and
Assembly, “Water Pump - Install” for the correct
procedure.
7. Tighten bolts (3), (4) and (5) to a torque of 22 N·m
(16 lb ft).
8. Tighten the bolts for the water pump to a torque of
22 N·m (16 lb ft)
.
End By:
a. If the engine has a fan, install the fan. Refer to
Disassembly and Assembly, “Fan - Remove and
Install”.
i02654515
Gear G roup (Fr
ont) - Remove
and Install
Removal Proc
edure
Table 38
Required Tools
Tool
Part
Number
Part Name
Qty
A
21825576
Crankshaft Turning Tool 1
27610291 Barring Device Housingl 1
A
27610289
Gear 1
B
27610212
Camshaft Timing Pin 1
27610286
Crankshaft T
iming Pin 1
C
27610287
Adapter 1
Start By:
a. Remove the front cover. Refer to Disassembly and
Assembly, “Front Cover - Remove and Install”.
b. Remove the valve mechanism cover. Refer to
Disassembly and Assembly, “Valve Mechanism
Cover-Remo
ve and Install”.
NOTICE
Keep all parts clean from contaminants.
Contaminan
ts may cause rapid wear and shortened
component life.
NOTICE
Care must be taken to ensure that fluids are contained
during performance of inspection, maintenance, test-
ing, adjust
ing and repair of the product. Be prepared to
collect the fluid with suitable containers before open-
ing any compartment or disassembling any compo-
nent conta
ining fl uids.
Dispose of all fluids according to local regulations and
mandates.

 Loading...


