KENR6932 99
Disassembly and Assembly Section
g01337985
Illustration 188
2. Remove bolts (7), (8) and (9) from front housing
(3).
Note: The bolts are three different lengths. Note the
positions of the different bolts.
3. Remove front housing (3) from the cylinder block.
4. Remove joint (6).
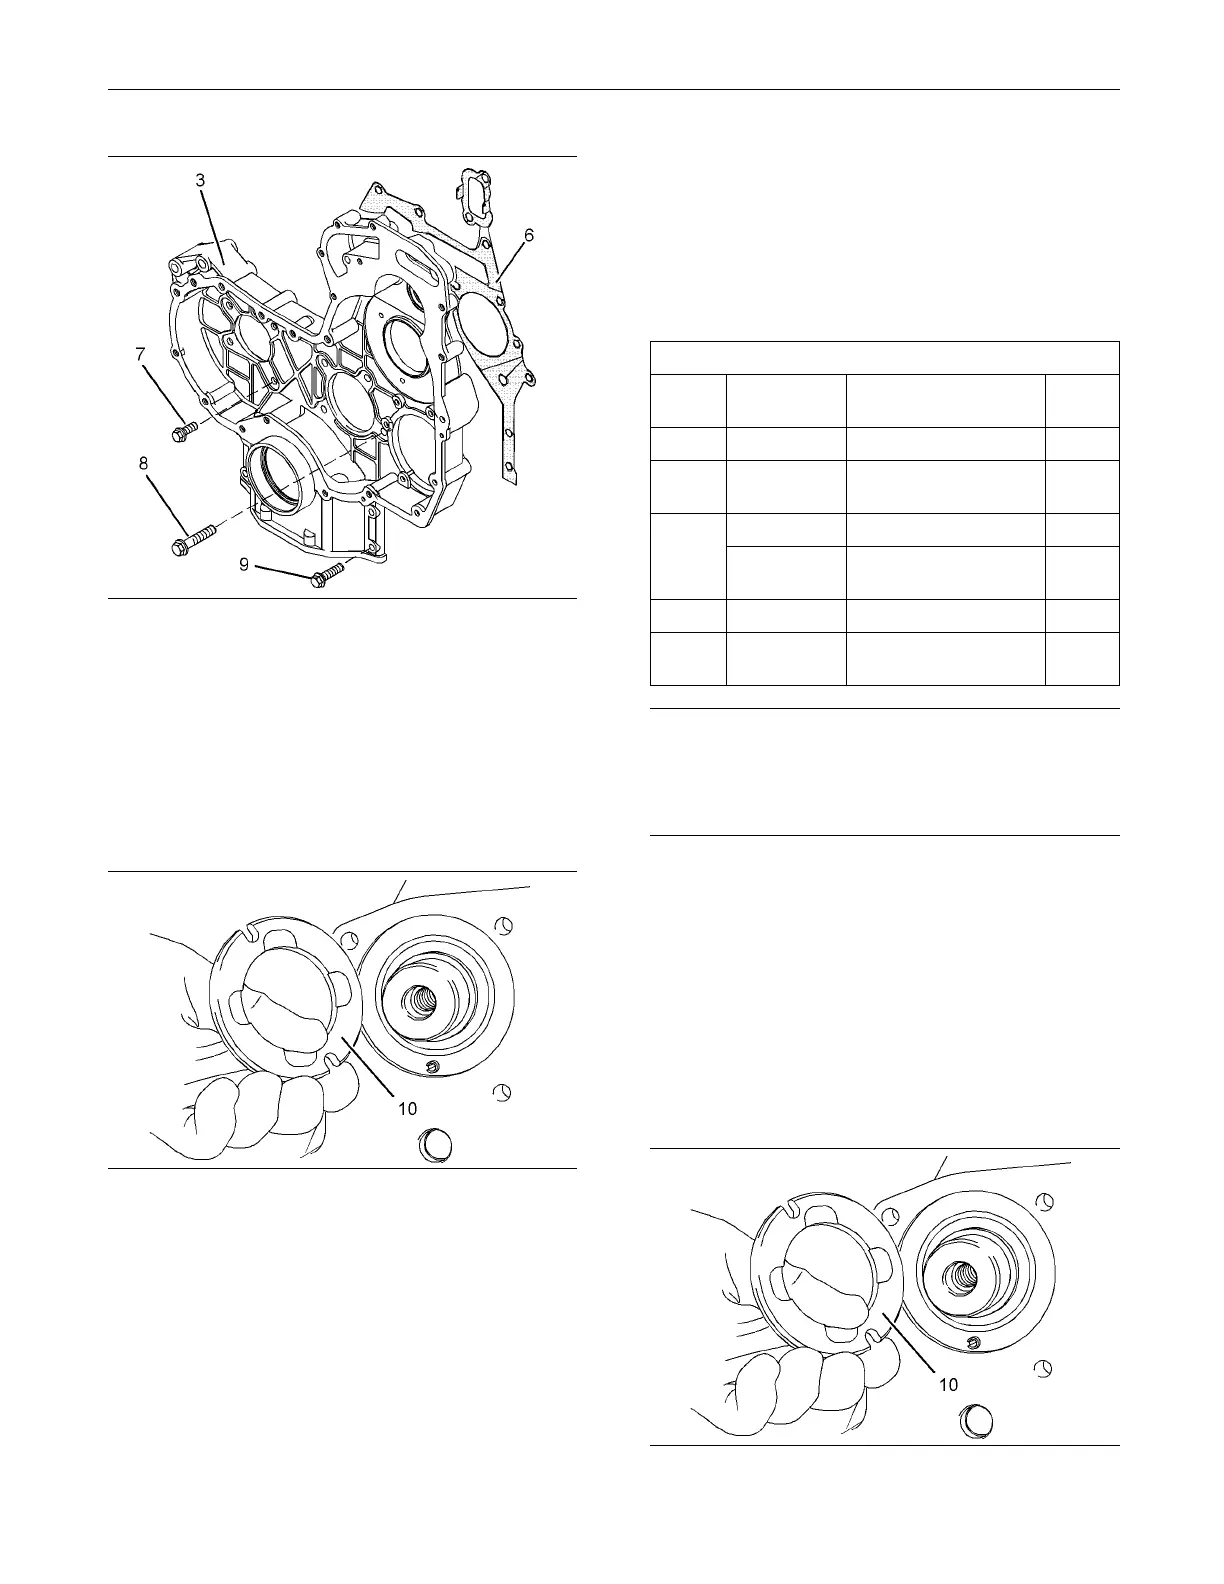
g01337987
Illustration 189
5. Remove th rust washer (10) from the cylinder
block.
i02654517
Housing (Front) - Install
Installation P
rocedure
Table 44
Required Tools
Tool
Part
Number
Part Description
Qty
A
21820117
3 Bond 1386D 1
B
-
Guide Stud
(M8by70mm)
2
27610216
Alignment Tool 1
C
-
studs
(M10 by 50 mm)
3
D
-
Straight Edge
1
E
21820221
POWERPART
Rubber Grease
1
NOTICE
Keep all parts clean from contaminants.
Contaminants may cause rapid wear and shortened
component life.
1. Ensure that the front housing is clean and free
from damage. If necessary, replace the front
housing.
Install blanking plugs to a new front housing. Use
Tooling (A) to seal all D-plugs.
2. Check the condition of the crankshaft front seal. If
the front seal is damaged, remove the front seal
from the front housing.
3. Clean all the mating surfaces of the cylinder block.
g01337987
Illustration 190

 Loading...


