SV63136 Rev. A
8-29
Scanning • 8
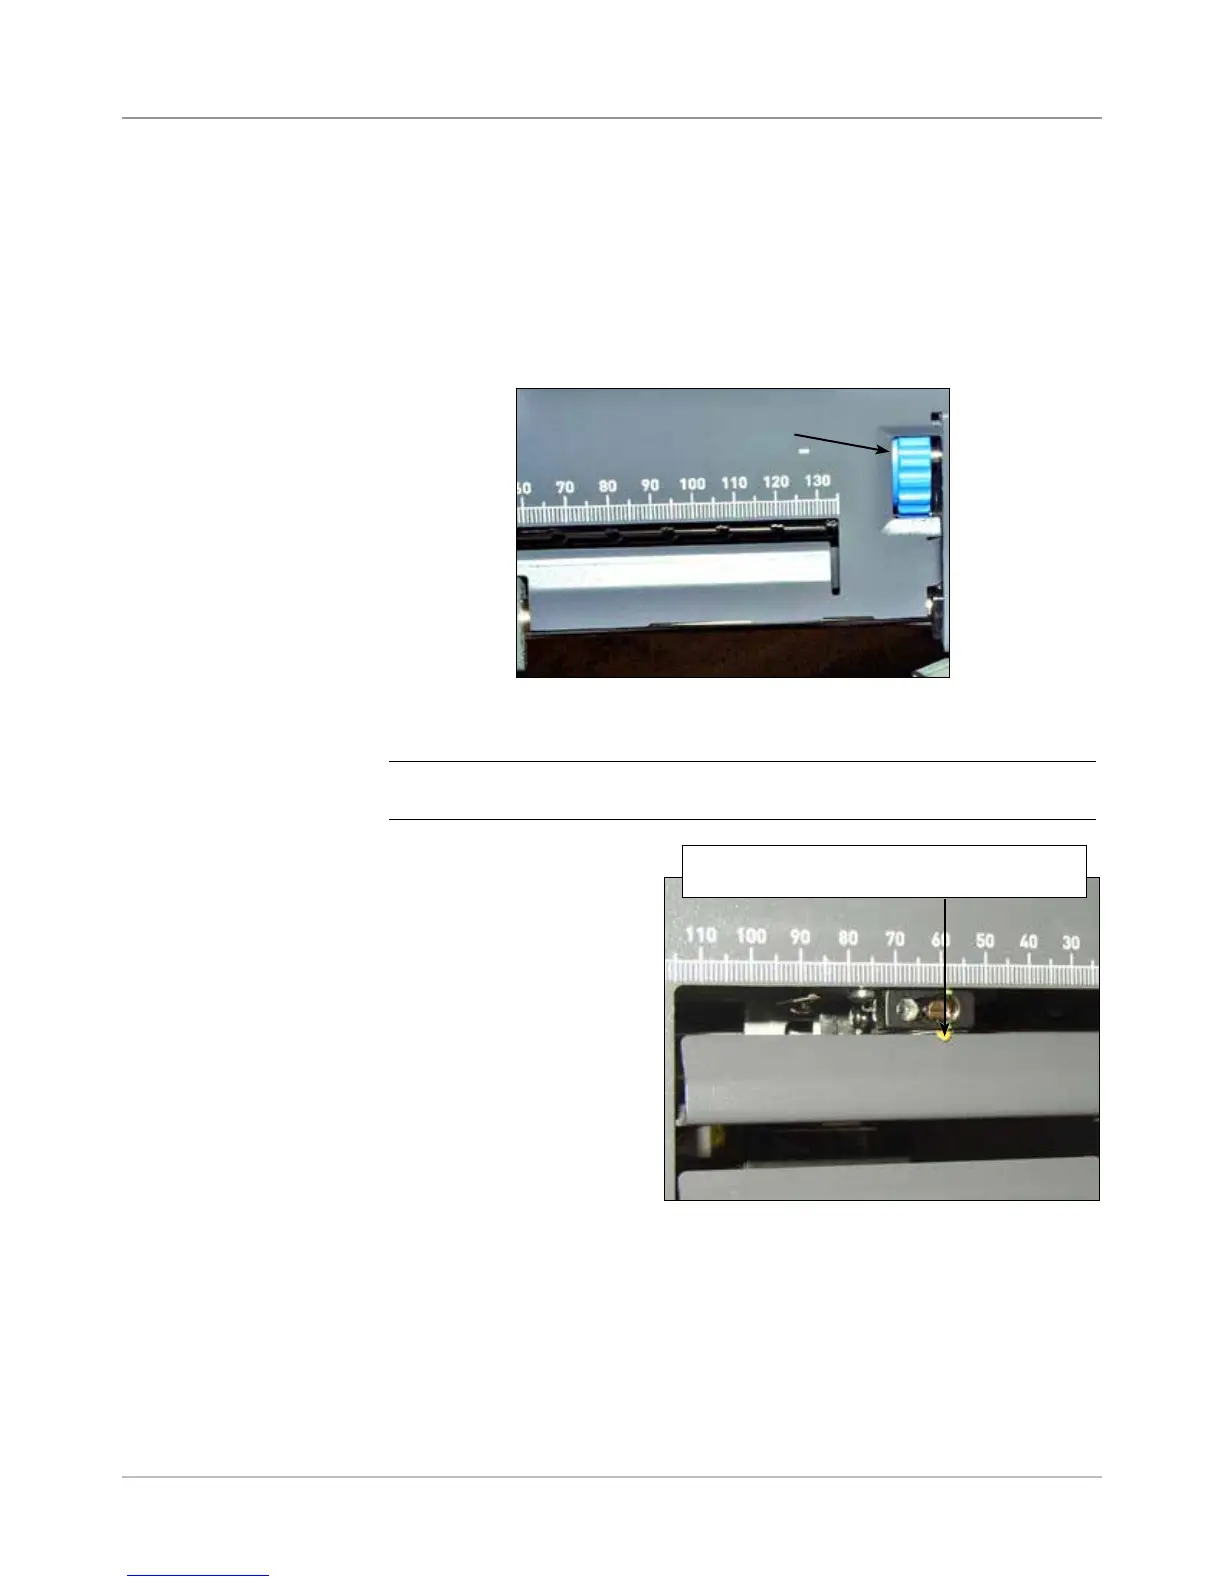
Figure 8.4: Use the Pointer to Ensure Correct
Scan Head Position
Move thumbwheel until pointer lines up
with the distance measured in Step 4.
7. Determine the direction the Scan Head needs to be moved (to the left or
right of 0 on the ruler):
• Make sure the center of the sheet (the vertical fold) is lined up with
the at the center of the machine (at 0 on the ruler.)
• If the sheet is loaded top first, make sure the arrows point DOWN.
• If the sheet is loaded bottom first, make sure the arrows point UP.
8. Use the blue thumbwheel to move the scan head.
Blue thumbwheel
Figure 8.3: Use the Blue Thumbwheel to
Adjust Scan Head Position
Move the thumbwheel
until the pointer lines up
with the measurement
(distance from the
center of the page to
the center of the mark)
defined in step #7.
9. If additional scan heads
are to be used, repeat
step #1 to 8 for each.
10. To verify the adjustment is correct:
a. From the home screen, select Loading Instructions>Pre-Run
Adjustments>Scanner Setup.
b. Use the UP/DOWN arrow keys to select a feeder to run.
c. Press TRIAL PIECE to feed a piece from the highlighted feeder.
d. Select Finish when done.
Adjusting the
Scan Heads
for Picket
Orientation
Marks (continued)
NOTE: The scanning area on your system may appear different, but opera-
tion concepts are the same.