SV63136 Rev. A
8-39
Scanning • 8
Material is scanned as it feeds through the machine. This means that the
scanner reads a vertical strip or margin down the page, defined by the
specifications.
The system must be told if the entire margin (the strip down the page that is
scanned for marks) is clear of any other printing or punched holes, etc.
• If the area is clear, the machine can normally detect the marks with no
further setup.
• If the entire margin is not clear, or the machine cannot set itself automat-
ically, it will ask questions to ascertain where it needs to look for marks
and where it should ignore other printed matter. Depending on the type
of code being used, the machine will ask you to define either the first
mark position and code length OR the Clear Zone as described on the
following pages.
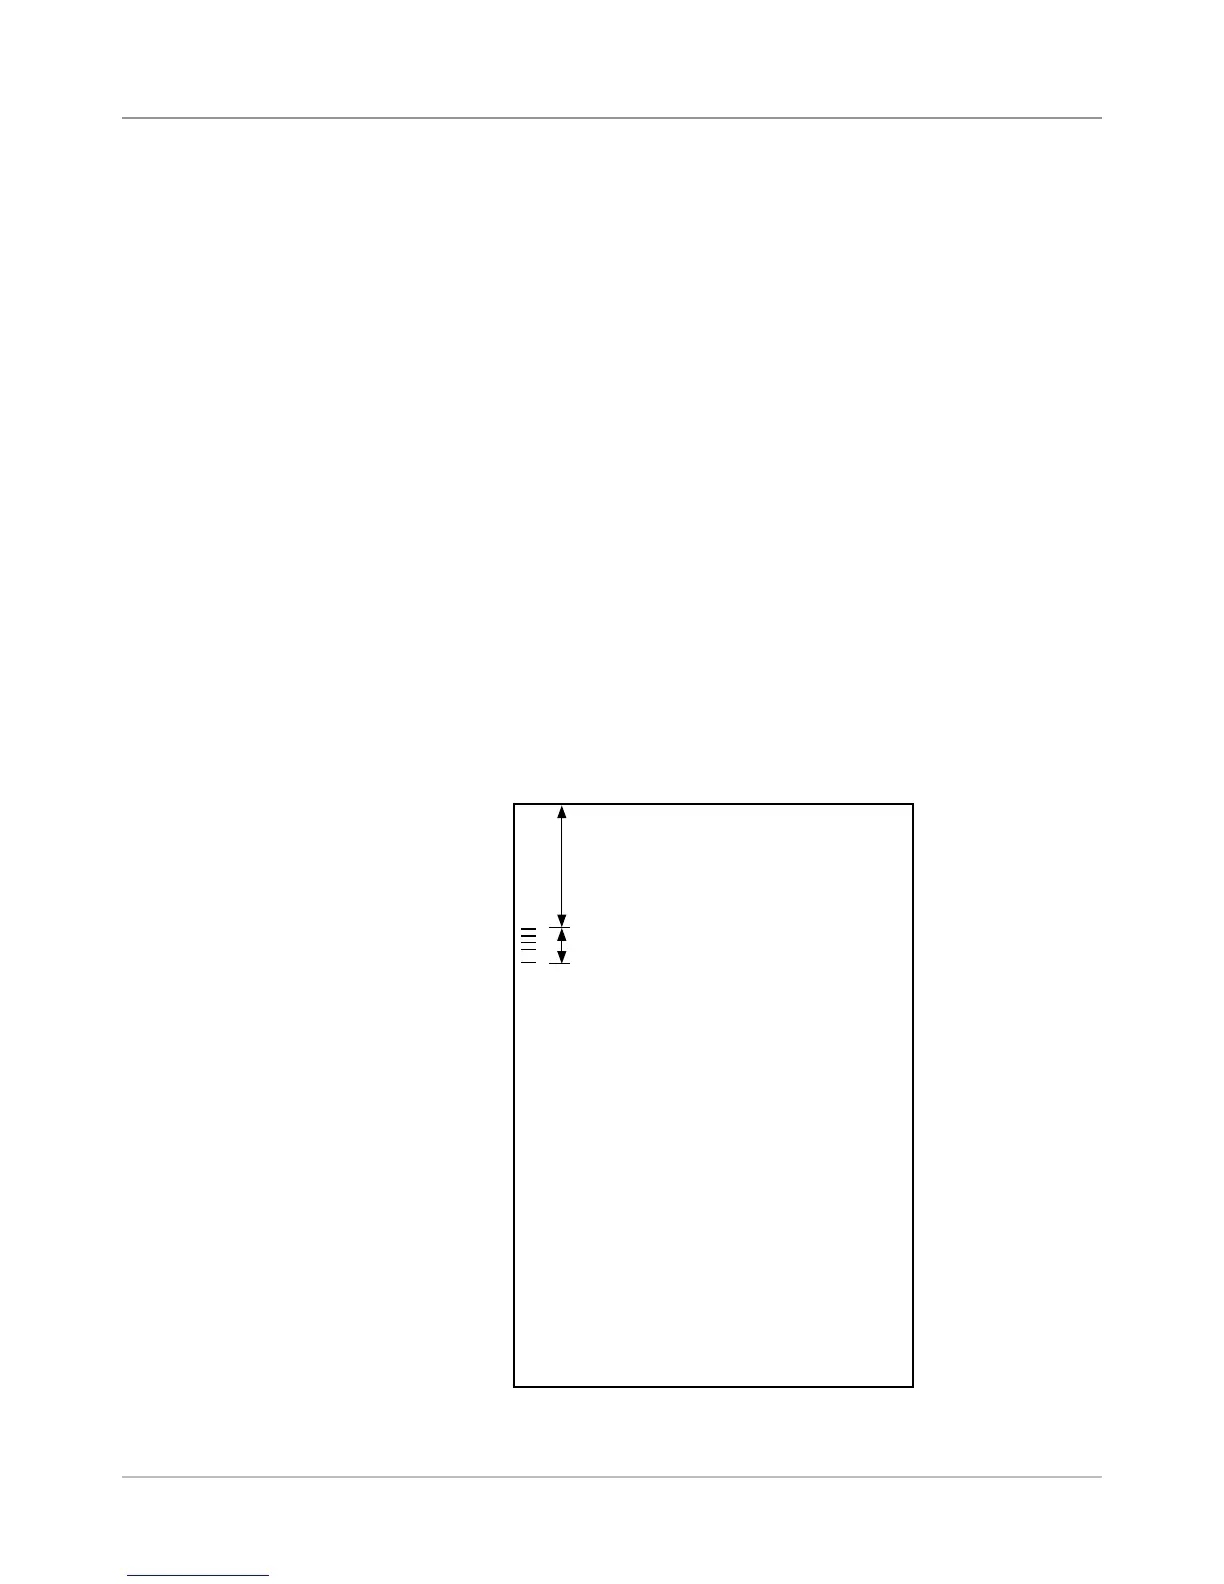
1. Take a sheet that has at least the FIRST and LAST mark printed on it.
2. When requested by the machine, measure and enter the distance (A)
from the top edge of the sheet to the FIRST mark, in millimeters.
3. When requested by the machine, measure and enter the distance (B)
from the FIRST mark to the LAST mark, in millimeters.
A
B
TOP OF SHEET
Defining the
First Mark
Position and
Code Length
Setting the
OMR Scanning
Area
 Loading...