249
Polyend Tracker Mini Manual
248
Polyend Tracker Mini Manual
NOTESNOTES
MIDI
11
MIDI
11
11.3 Typical MIDI Congurations
There are many congurations that can be set up with MIDI gear. Some are
complex and involve multiple devices while a simple set up can have two
devices communicating. Some typical examples are shown.
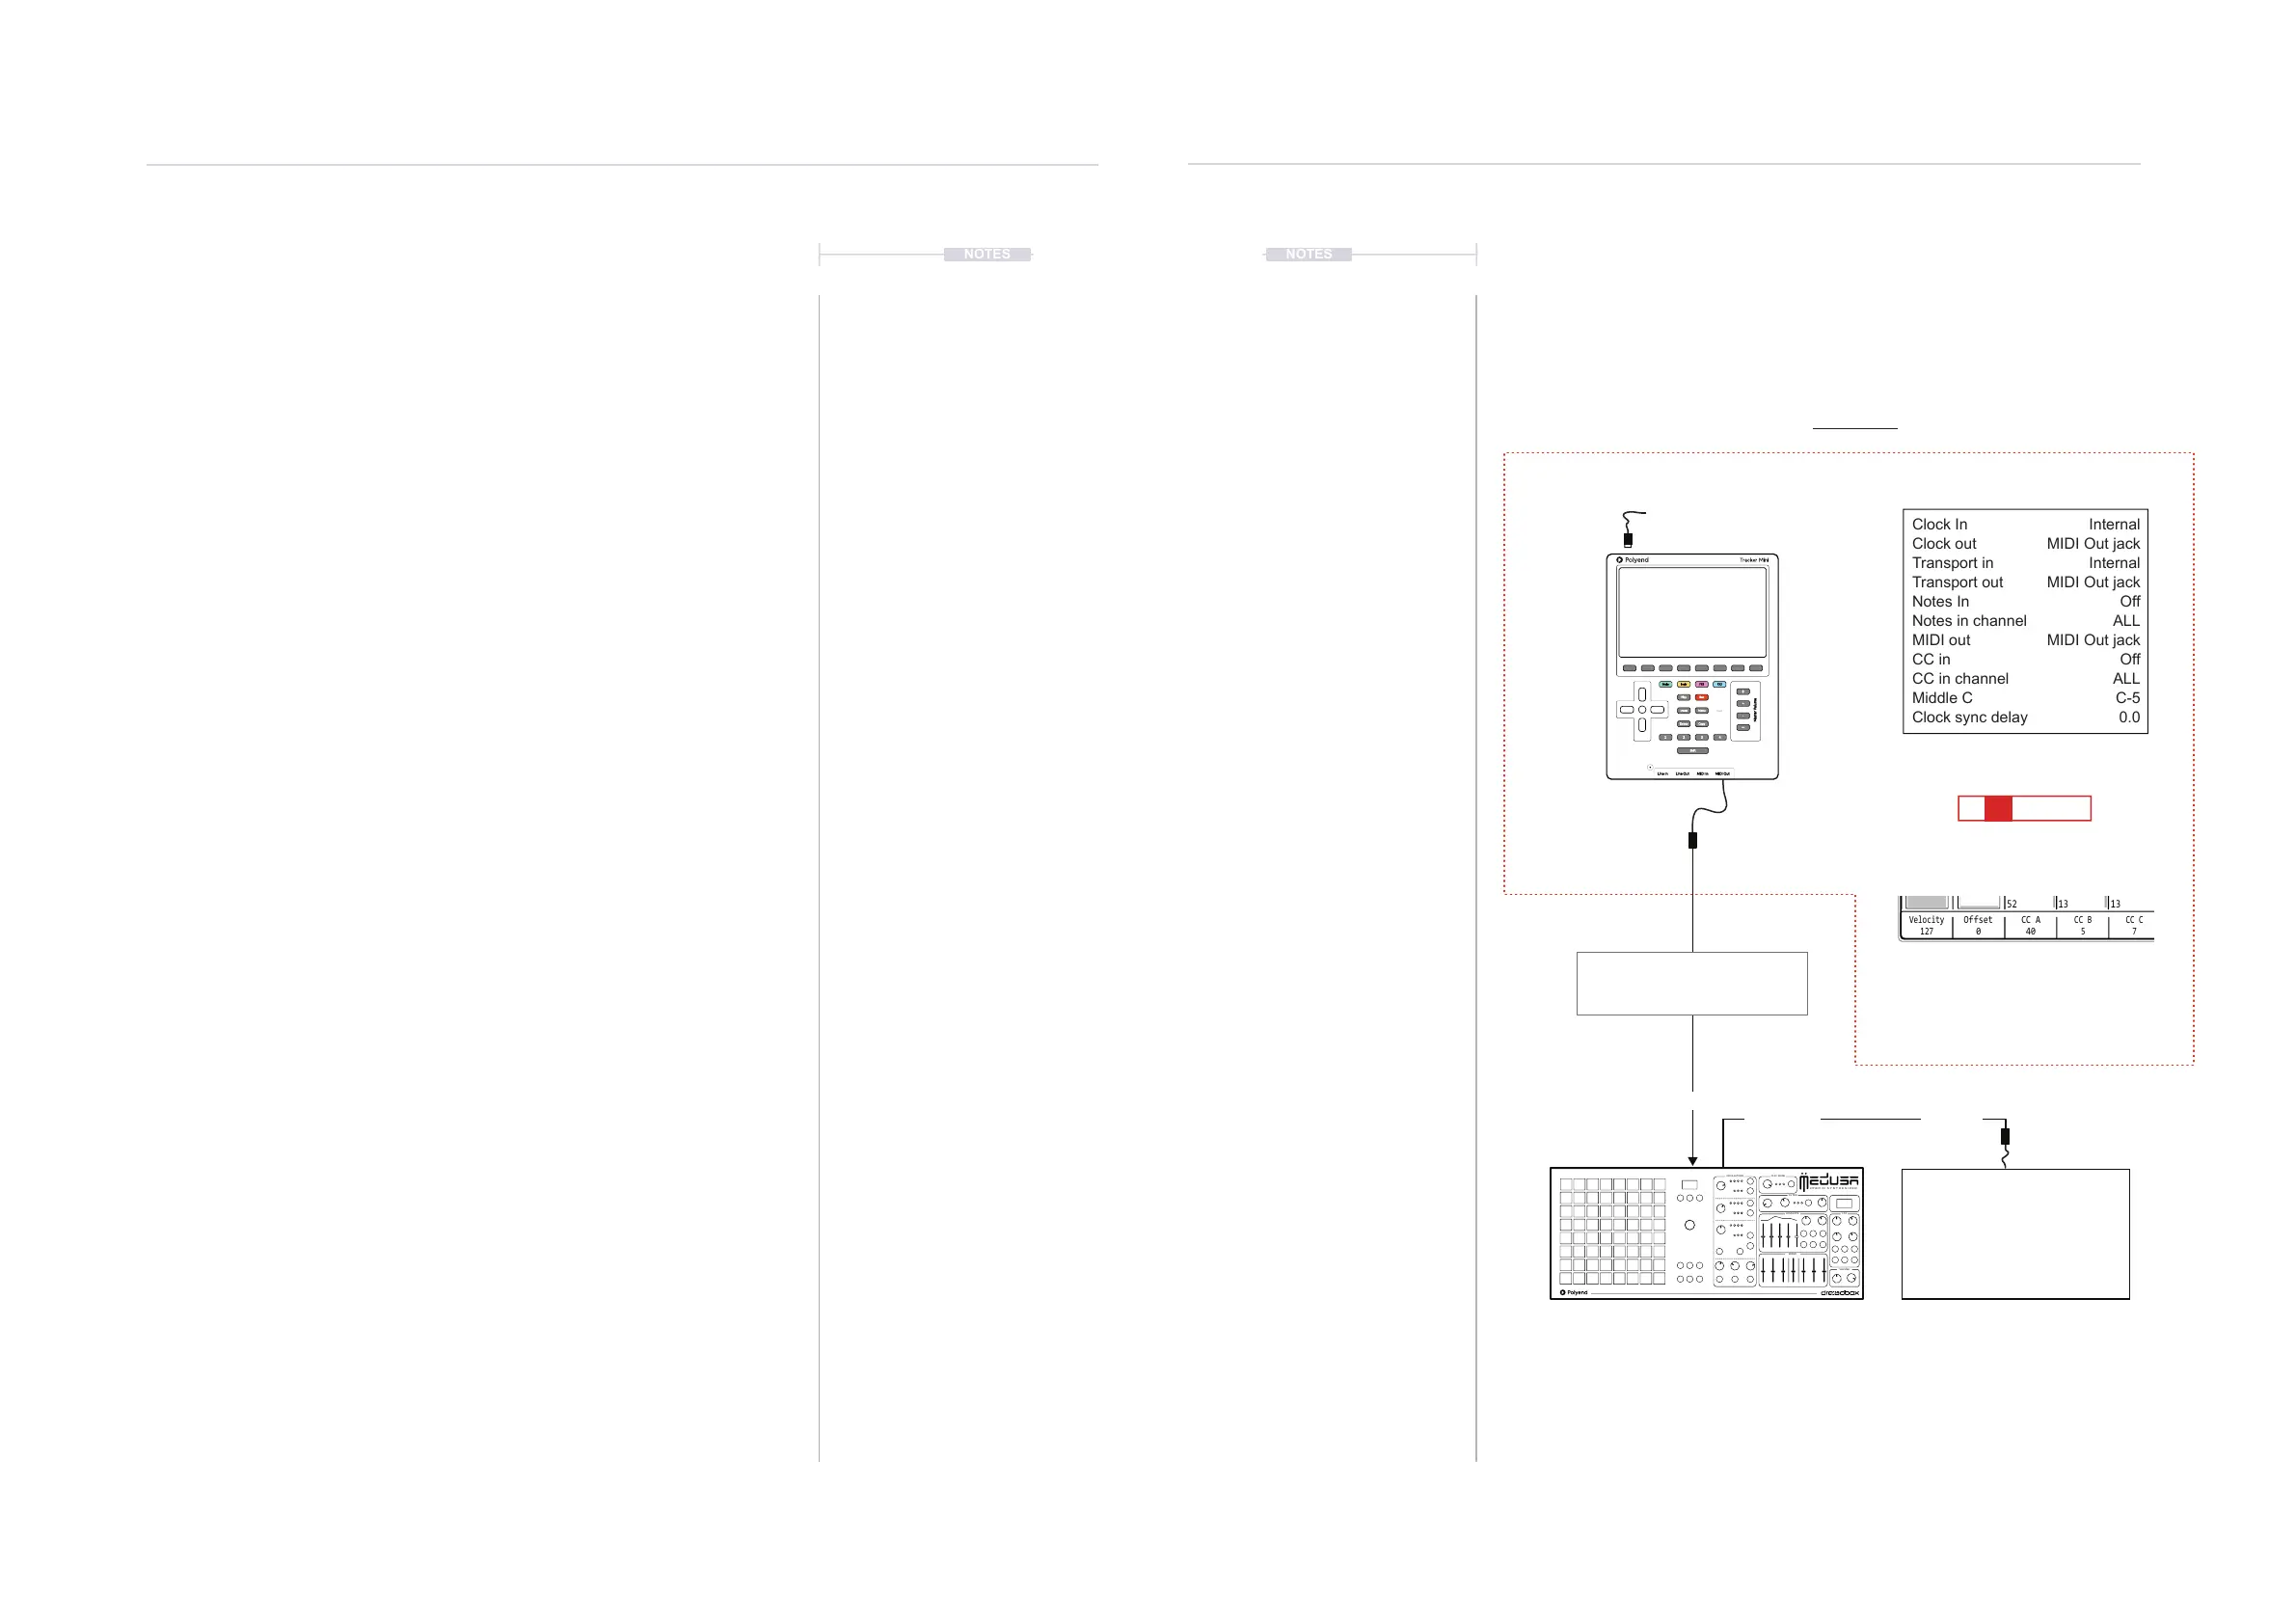
Tracker Mini: Cong > MIDI
Tracker Mini: Steps Set for MIDI
Output
USB MIDI
Instrument; M01 = MIDI Channel 1
FX1; a 50 = MIDI CC A, Value of 50
Clock In
Clock out
Transport in
Transport out
Notes In
Notes in channel
MIDI out
CC in
CC in channel
Middle C
Clock sync delay
Internal
MIDI Out jack
Internal
MIDI Out jack
Off
ALL
MIDI Out jack
Off
ALL
C-5
0.0
Example Conguration 1: Tracker Mini as the primary lead.
MIDI OUT
Note Instr
FX1
FX2
Play Rec
Master Volume
Insert Menu
Delete Copy
Shift
Line In MIDI InLine Out MIDI Out
21 3 4
+
-
+
-
Master Volume
C5 M01 a 50 - - - -
The settings in the cong menu will depend on:-
• How the devices are connected together? Are the devices
connected by USB? Which will transmit and receive MIDI with the
MIDI 5 Pin connection using the MIDI Jack adapter?
• Which device will be a primary leader (main controller e.g. main
clock) or a secondary follower (will respond to other gear as the lead
control e.g. synchronised to another clock)?
• Will MIDI note data (melodies, chords, etc) be communicated?
• Will MIDI CC continuous control change data be communicated (to
change parameters like delay level or trigger performance effects)?
▌ ACCESSING THE MIDI CONFIG OPTIONS
1. Press [Shift] + [4] or [Menu] to select ‘Cong’ conguration menu.
2. In the rst column, select ‘MIDI’. Use the 1
st
and 2
nd
Screen button to
navigate. Alternatively use (Left) or (Right) to navigate across menus
and Press [+] / [-] or (Up), (Down) to select a function.
3. The ‘MIDI’ Options will be available in the central menu window. Use the
4
th
and 5
th
Screen button to navigate. Alternatively use (Left) or (Right)
to navigate across menus and Press [+] / [-] or (Up), (Down) to select a
function.
4. Press [Change], 6
th
Screen button to edit the option that is highlighted.
5. Use the 4
th
and 5
th
Screen button to navigate to the desired parameter
setting. Alternatively use (Left) or (Right) to navigate across menus and
Press [+] / [-] or (Up), (Down) to choose a setting.
6. Press [Apply], 6
th
Screen button to conrm the option that is highlighted.
CC D
11
Velocity
127
CC A
40
CC B
5
CC C
7
Offset
0
CC F
117
CC E
64
Prg Chg
Chan AT
64 Sust
65 Port
12
13
12
13
12
13
51
52
CC A can be set in the instrument
parameter page. CC A set to 40 for
control change in this example,
transmitted with the value in the step
HY B R I D S Y N T H E S I Z E R
OSCILLATO RS PLAY MOD E
FILTER
ENVELOPE
MIXER
VOLUME
LFO
Transport control e.g. Play, Stop and
Clock is dictated by Tracker Mini
and its current Tempo.
Polyend Medusa will follow the lead
of Tracker Mini as will other devices.
Devices should be congured to receive clock and transport and the MIDI Channel which Tracker
Mini communicates, for example, Channel 1. CC 40 In Medusa represents the Filter Cutoff
frequency in this example each step in Tracker will set the lter cutoff.
A 2
nd
device as an extended part of
the MIDI Network.
Drum Machine
MIDI IN
MIDI THRU MIDI IN