9
Polyend Tracker Mini Manual
8
Polyend Tracker Mini Manual
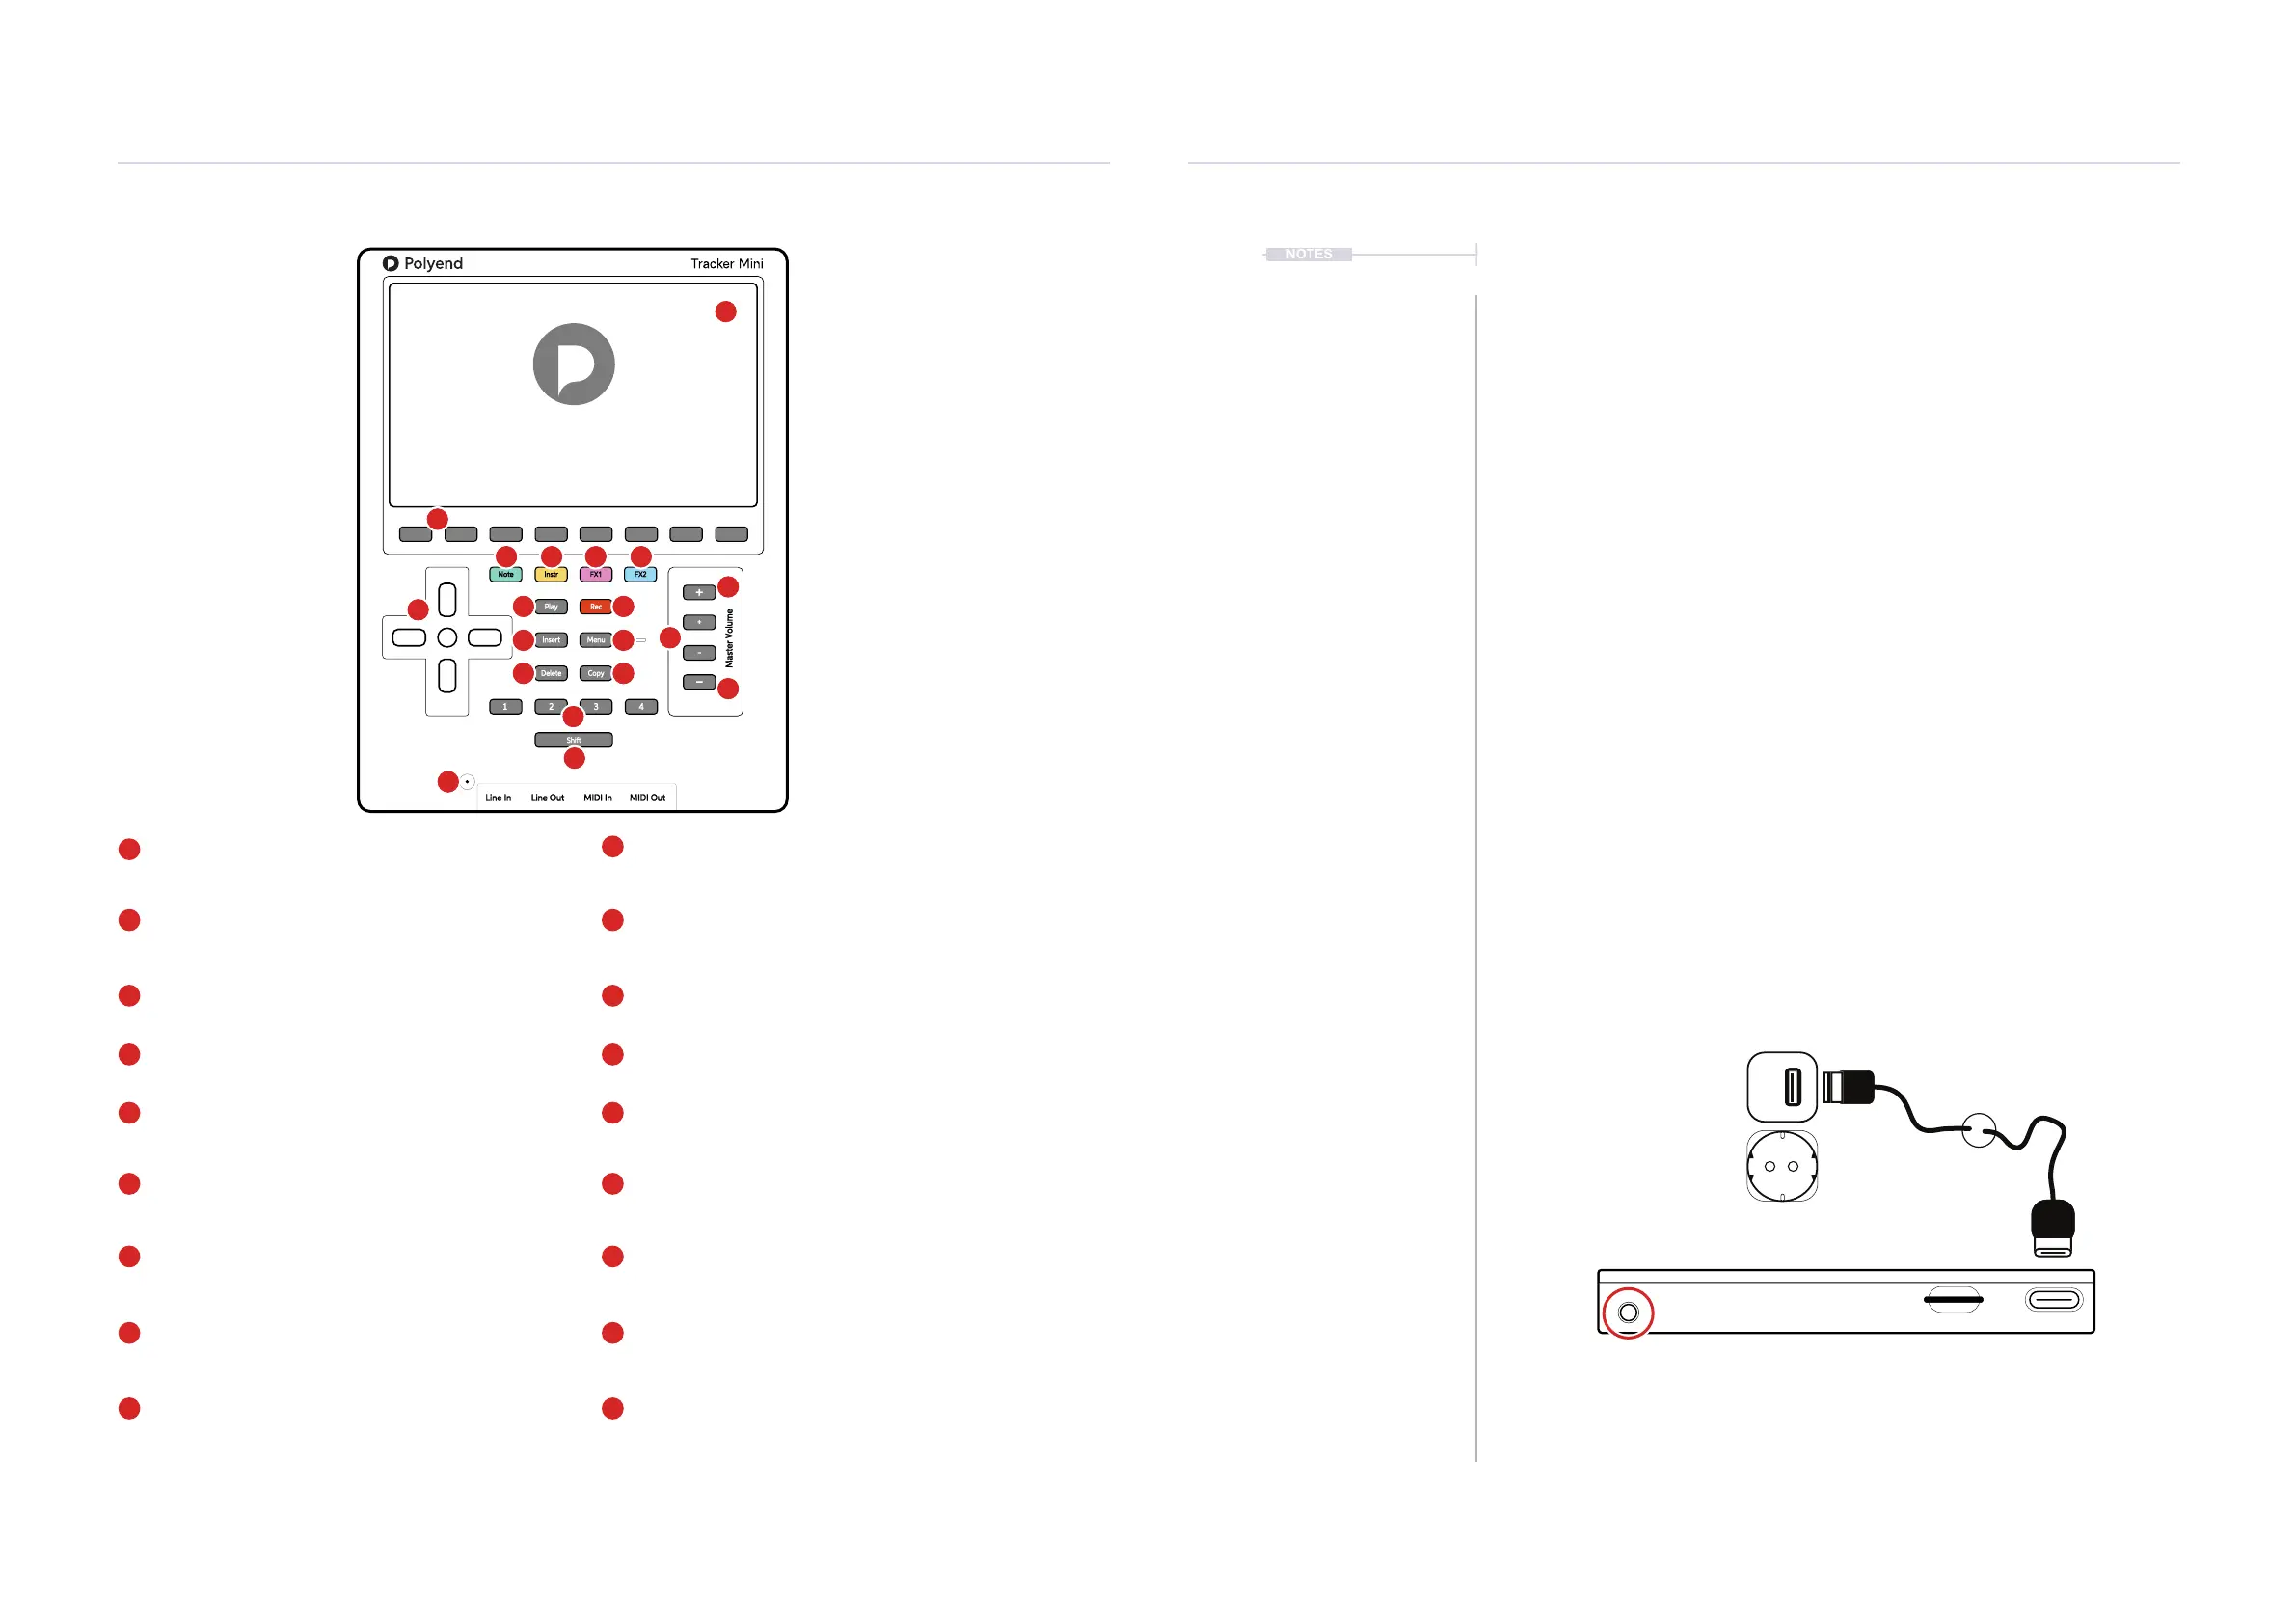
LCD Display
5 Inch, LCD TFT 800 x 480 Display.
Screen Buttons
Dynamic [Screen buttons] are dependant on the
function displayed above each button.
Dedicated Note Button
Selection of the [Note] element of a step.
Dedicated Instrument Button
Selection of the [Instrument] for a step.
Dedicated FX1 Button
Effect selection for [FX1] of a step.
Function Buttons
Assignable function buttons. Default: 1 - Pattern,
2 - Inst Automation, 3 - Sample Playback, 4 - Master.
Menu Button
Hold to open the menu. Navigate to highlight a selection
from the available options. Release to select.
Play Button
Plays when pressing [Play] the pattern or song. Pressing
again stops playback. Play again restarts.
Insert / Home Button
Pressing [Insert] will insert. Pressing [Shift] + [Insert] will
return ‘home’, to the top of the pattern.
Rec Button
Pressing [Rec] will toggle the record mode on or off for
editing patterns and perform settings.
D-Pad Navigator Buttons
Four navigation pad buttons (Up), (Down), (Left), (Right)
and one (Enter). Manoeuvre through the grid and options.
Dedicated FX2 Button
Effect selection for [FX2] of a step.
Master [+] / [-] Buttons - Course
Adjusts the master volume +/- in large increments. Also
navigates and adjusts values within certain menus.
Microphone
Internal microphone.
Master [+] / [-] Buttons - Fine
Increases the master volume +/- in ne increments.
Also navigates and adjusts values within certain menus.
Copy Button
Pressing [Copy] will copy the selected item.
Use [Shift] + [Copy] to paste any copied item.
Delete Button
Pressing [Delete] will reset or step back.
[Shift] + [Delete] will backspace delete the selected item.
Shift Button
Pressing [Shift] + Another button will select its
secondary function.
Overview
1
Overview
1
Note Instr
FX1
FX2
Play Rec
Master Volume
Insert Menu
Delete Copy
Shift
Line In MIDI InLine Out MIDI Out
21 3 4
+
-
+
-
Master Volume
1
5
4
10
15
5
7
15 16
1817
9 10
11 12
13 14
6
11
16
16
7
12
17
18
8
13
9
14
8
6
4
2
2
3
3
1
NOTES
1.3 Start Up
Tracker Mini is powered from the an internal rechargeable battery which is
charged using the supplied USB cable and charger. When restarting
Tracker Mini the previously open project will be be re-opened.
▌ POWERING ON / OFF TRACKER MINI
1. To recharge Tracker Mini, connect the supplied USB-C Mains cable
between Tracker Mini and the supplied USB plug to charge the unit.
Once charged Tracker Mini will operate without the USB power supply
being connected.
2. Ensure the SD Card is installed correctly for Tracker Mini to operate.
Pins should face up towards the front panel.
3. To power up, hold the small power on/off button located on the top right
(looking from the front) for 1 second. Start up will open the previously
opened project.
4. To power off, press and hold the small power button located on the top
right (looking from the top) until the timer bar ends. Tracker Mini will
then power off.
5. To check battery power charge when the unit is off, press quickly the
power button. The battery indicator will display for a short period to
indicate the charging state. The battery state is also displayed if the
power cable is connected while powered off.
The charging supply is 5V, 2A from the supplied mains to USB adapter.
Press the On/Off Button to Power Up
Hold the On/Off Button to Power Down