263
Polyend Tracker Mini Manual
262
Polyend Tracker Mini Manual
NOTESNOTES
MIDI
11
MIDI
11
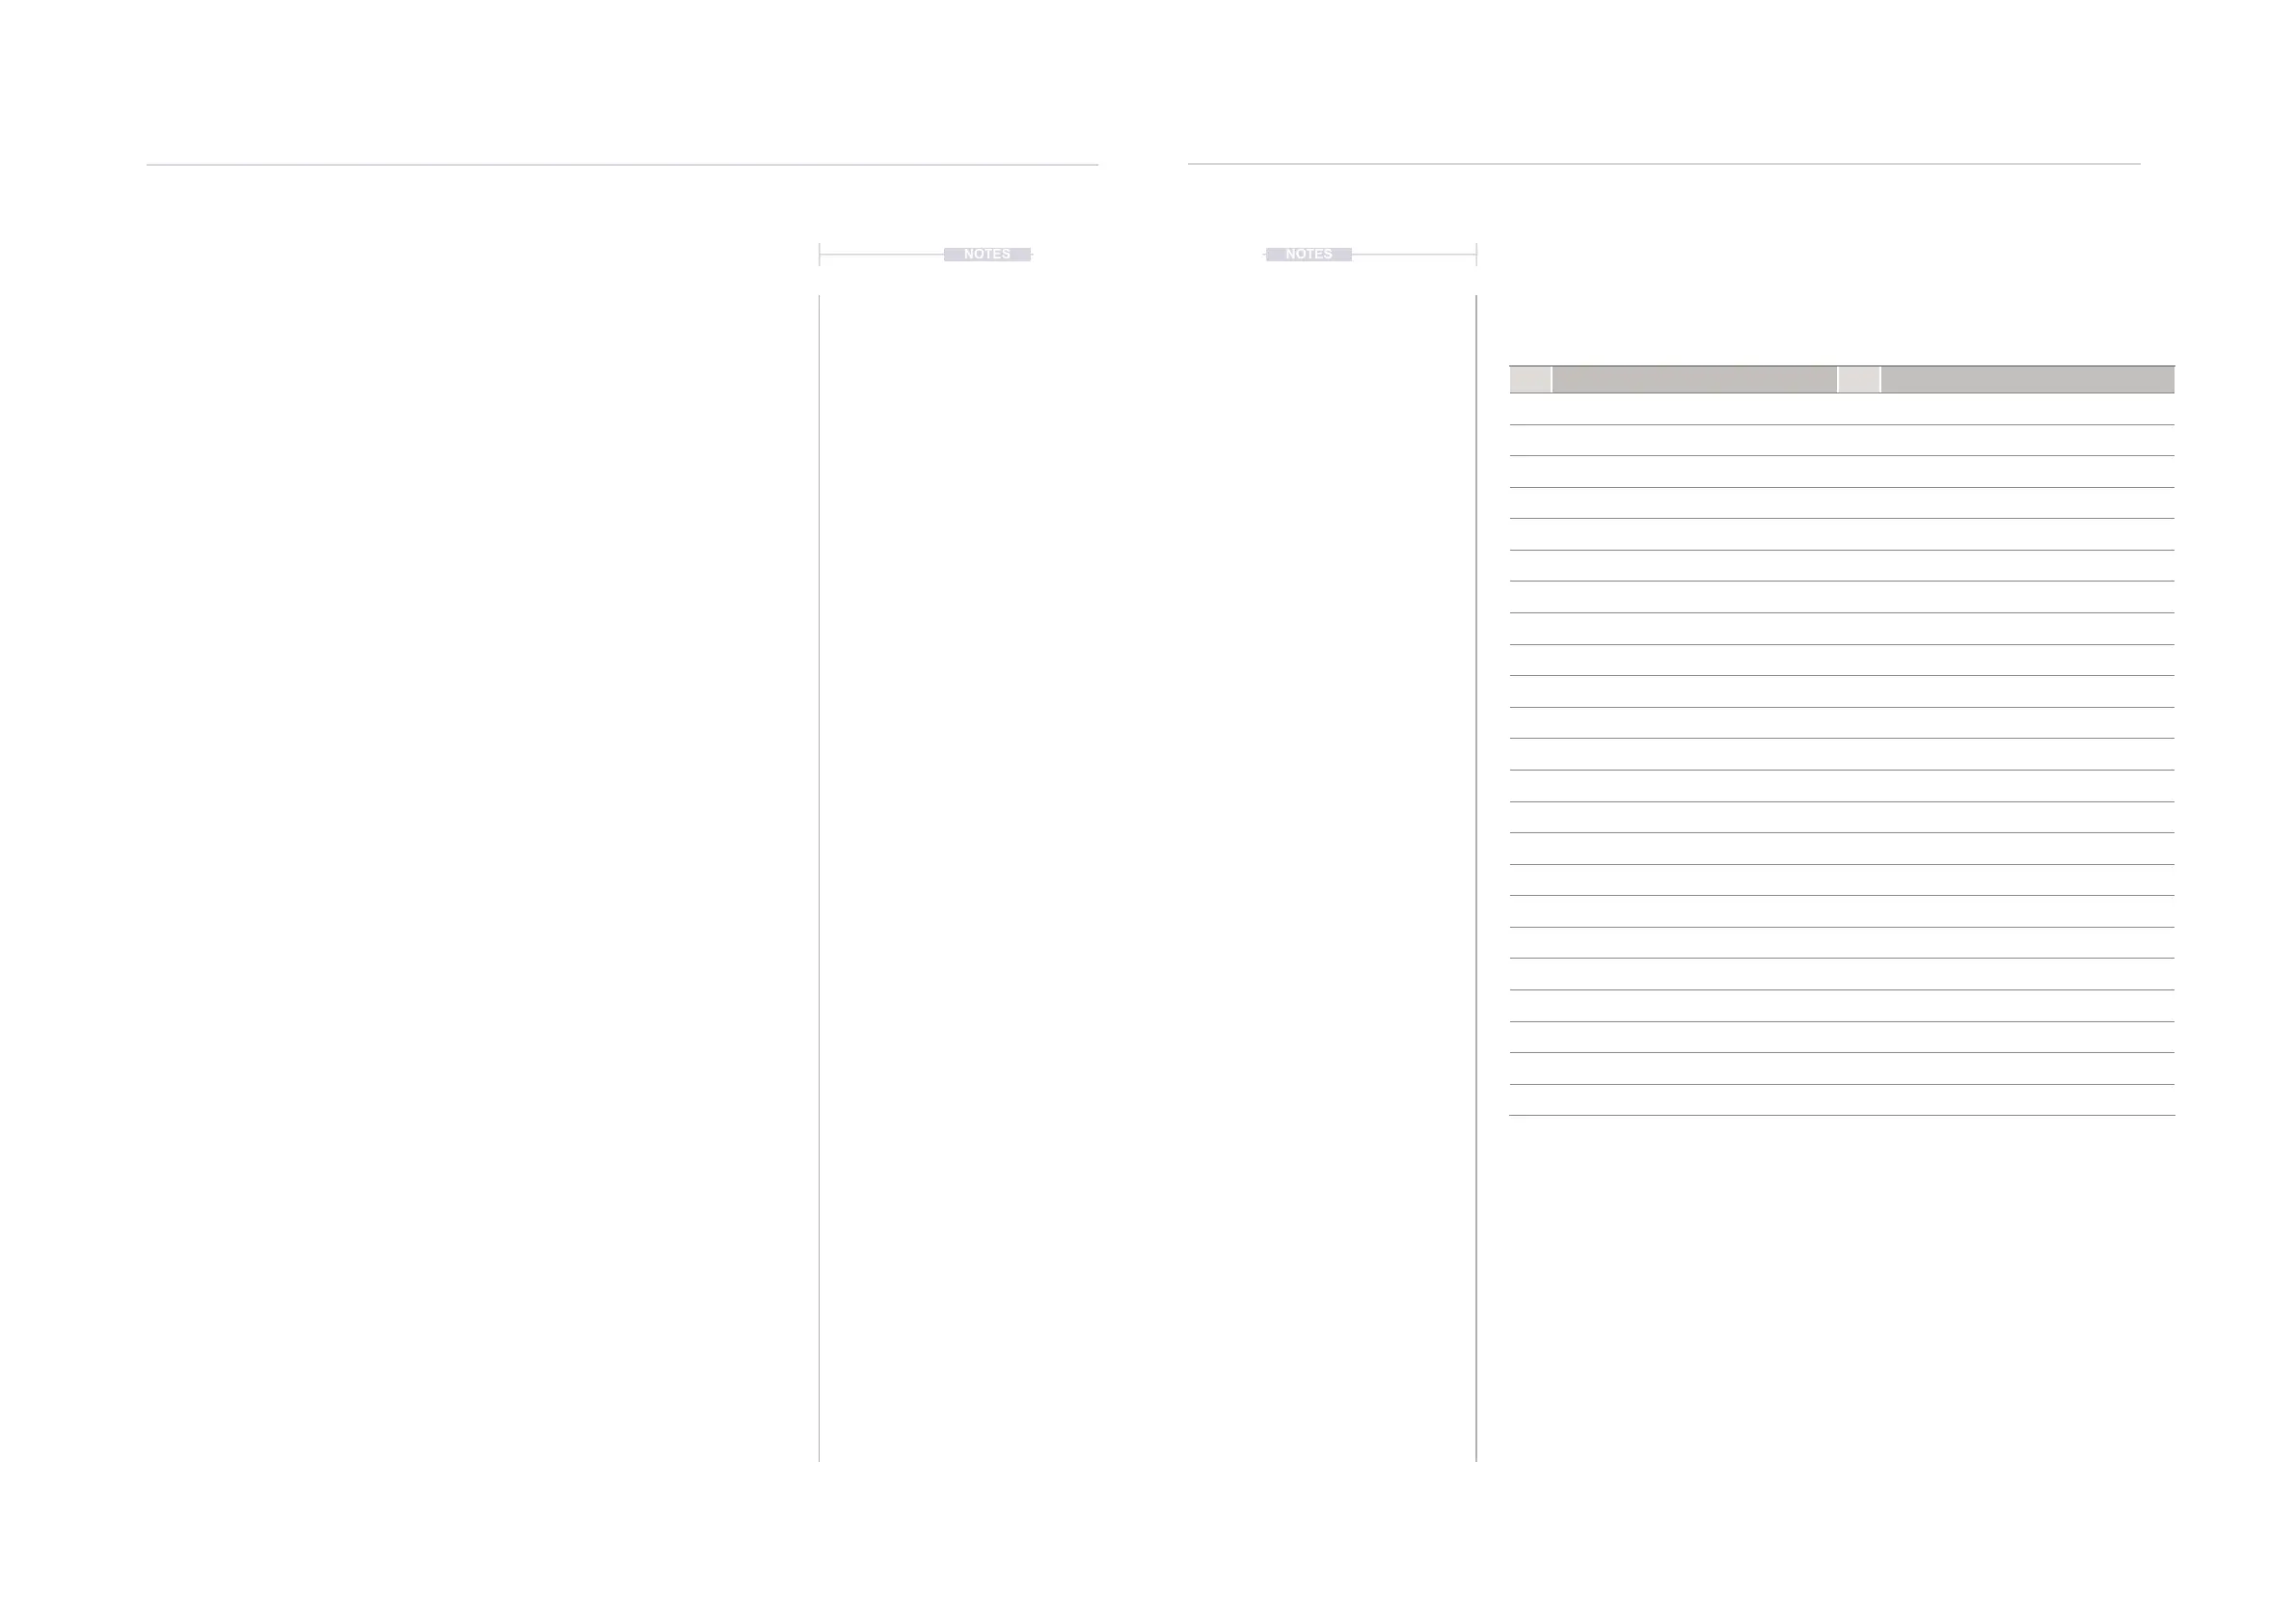
Synthesizer Mode - MIDI CC Congurations
CC # Function CC # Function
5 Tune 83 Cutoff Automation Type
3 Finetune 84 Cutoff - Attack - Shape LFO
7 Volume 85 Cutoff - Decay - Speed LFO
9 Filter Type 86 Cutoff Sustain
1 Cutoff 87 Cutoff Release
11 Resonance 88 Cutoff Amount
12 Overdrive 102 Wavetable Position Automation Type
13 Bit Depth 103 Wavetable Position - Attack - Shape LFO
14 Reverb Send 104 Wavetable Position - Decay - Speed LFO
15 Delay Send 105 Wavetable Position Sustain
20 Volume Automation Type 106 Wavetable Position Release
21 Volume - Attack - Shape LFO 107 Wavetable Position Amount
22 Volume - Decay - Speed LFO 108 Granular Position Automation Type
23 Volume Sustain 109 Granular Position - Attack - Shape LFO
24 Volume Release 110 Granular Position - Decay - Speed LFO
25 Volume Amount 111 Granular Position Sustain
26 Panning Automation Type 112 Granular Position Release
27 Panning - Attack - Shape LFO 113 Granular Position Amount
28 Panning - Decay - Speed LFO 114 Finetune Automation Type
29 Panning Sustain 115 Finetune - Attack - Shape LFO
30 Panning Release 116 Finetune - Decay - Speed LFO
31 Panning Amount 117 Finetune Sustain
118 Finetune Release
▌ SETTING UP A MIDI SYNTHESIZER
1. Ensure the external device is congured to set MIDI CC as per the
Tracker Mini CC assignments in the MIDI Synthesizer page. Also that
the MIDI conguration is matched, for example same MIDI channel.
2. Connect the external controller to Tracker Mini, for example using the
MIDI In connection and a MIDI cable between devices. Tracker Mini
uses a MIDI dongle to convert between MIDI 5 Pin DIN and Mini Jack.
3. To get the reference of CC congurations set up as default for Tracker
Mini, Press [2] for the Instrument Parameter page 1 or use the [Menu].
4. Press [More] which is the 8
th
Screen button to display the Instrument
effects page.
5. Press [Instrument Synthesizer] Screen Button.
6. The CC’s are displayed in the left window as a reference. There is no
selection in this page window as this is shown only as a guide.
7. To select an instrument as the destination target from the MIDI
controller and as the synthesizer instrument, scroll the right window to
select the desired instrument. This is also displayed in the top row.
8. The lists can be scrolled with the screen buttons. If the window is
selected, highlighted red, the (Up) and (Down) or the [+] / [-] buttons.
9. The instrument parameters will adjust when controlled by the external
MIDI controller. The changes are animated real time on the instrument
parameter displays.