191
Polyend Tracker Mini Manual
190
Polyend Tracker Mini Manual
NOTESNOTES
Audio
8
Audio
8
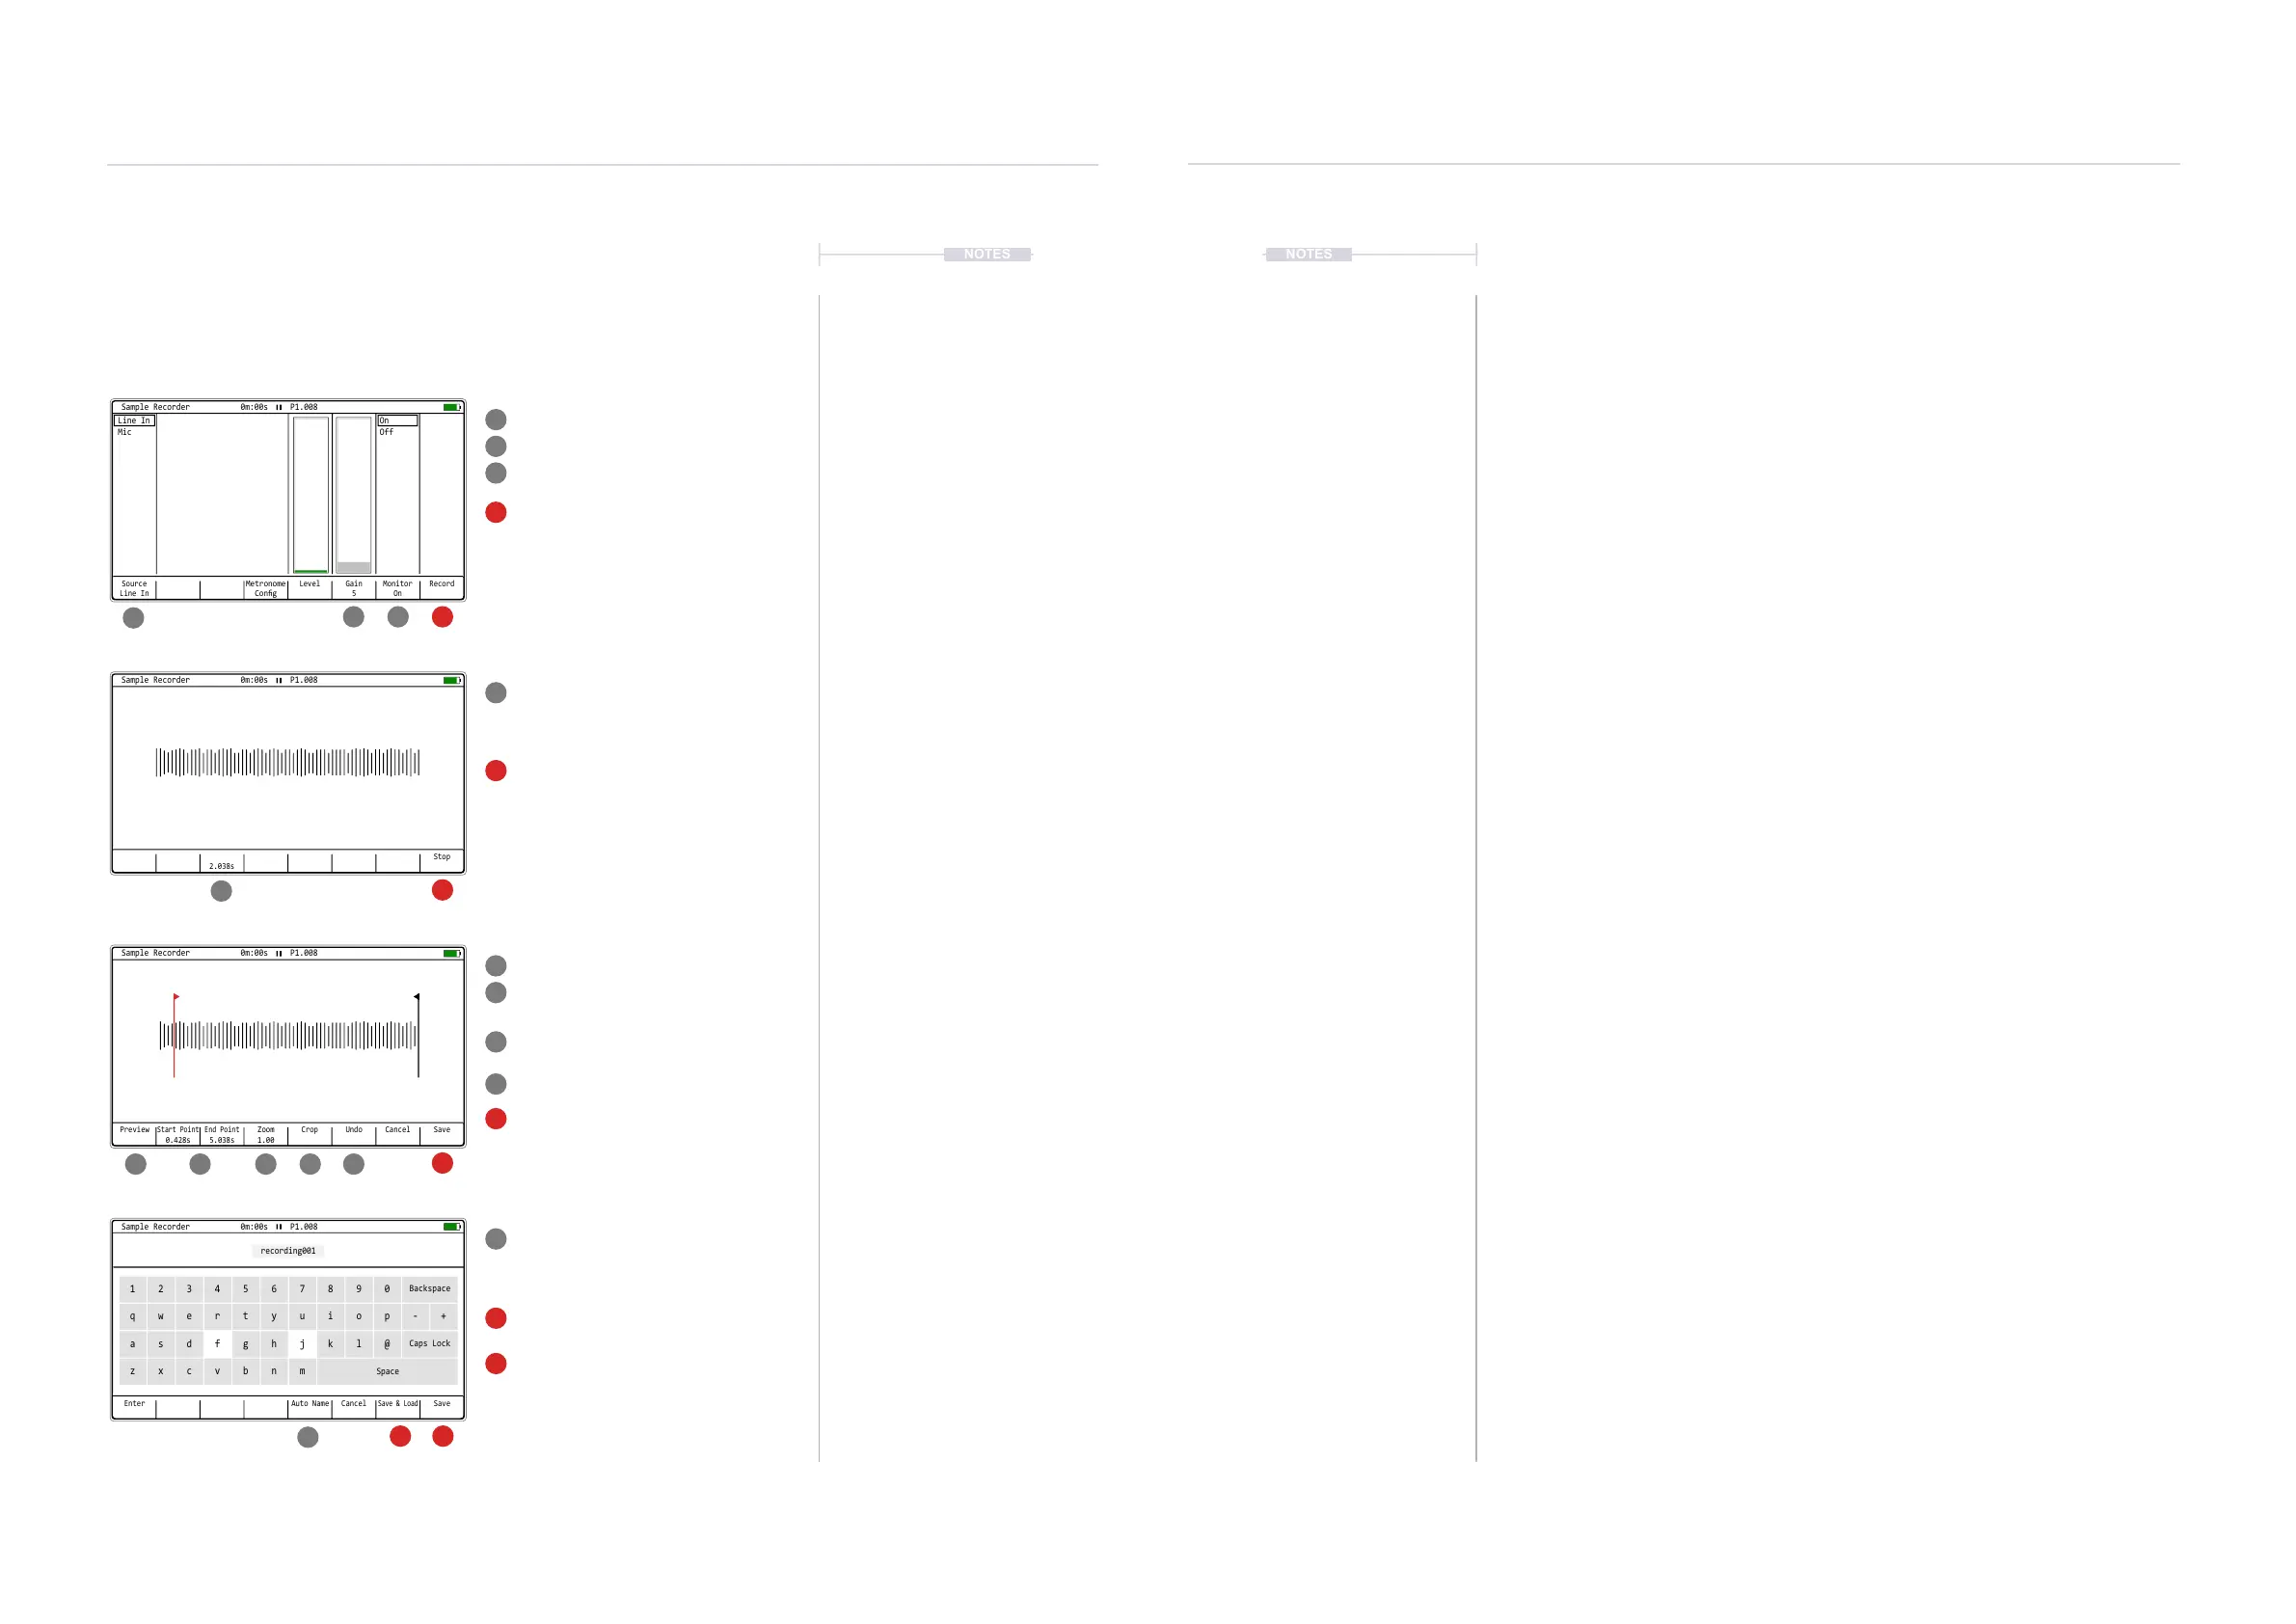
Sampling Process
Starting by selecting the ‘Sample Recorder’ page within the [Menu].
As pre-recording optional actions, select the
audio [Source], set [Monitor] to on and adjust
the [Gain] to establish a suitable recording
level. External devices should be auditioned
while adjusting the gain to hear the impact.
Press [Record]. 8th Screen Button, to start
sampling the incoming audio.
Play the external device.
Trim the [Start] and [End] points of the
recorded sample while previewing the audio
to get the positions correct. Also [Zoom] in or
out as a visual aid for precise editing.
If required use [Crop] to edit to the start and
end points selected.
The [Undo] option can reset previous state.
Press [Save] when editing is complete.
Alternatively Press [Cancel] to exit without
saving. Conrm cancel with [Yes].
The sampler will capture the audio into the
Tracker Mini memory buffer and display the
recording time. Recording will automatically
stop if the memory is full at ~45 Secs.
Press [Stop]. 8th Screen Button, to manually
stop the sampling process.
Type in a name for the sample or use [Auto
Name] to generate a system name. Pads act
as the qwerty keyboard, [Enter] will enter a
highlighted character.
Press [Save], 8th Screen Button, to save the
le into the SD Card ‘Recordings’ folder.
Press [Save & Load], 7th Screen Button, to
save the le into the SD Card ‘Recordings’
folder and also load the sample into the
instrument list. The instrument list will open
with this option.
1
78 8 109
5
12
1
7
5
12
3
3
10
9
2
2
8
4
11
6
14 13
4
11
6
13
14
Source
Line In
Gain
5
Monitor
On
RecordLevel
Metronome
Cong
On
Off
Line In
Mic
Sample Recorder 0m:00s P1.008
Start Point
0.428s
Preview UndoCrop Cancel Save
End Point
5.038s
Zoom
1.00
Sample Recorder 0m:00s P1.008
2.038s
Stop
Sample Recorder 0m:00s P1.008
Enter CancelAuto Name
Save & Load
Save
Sample Recorder 0m:00s P1.008
recording001
1
q
a
z
4
r
f
v
7
u
j
m
0
p - +
@
2
w
s
x
5
t
g
b
8
i
k
Backspace
Caps Lock
Space
3
e
d
c
6
y
h
n
9
o
l
▌ SAMPLING IN THE SAMPLE RECORDER
1. Press [Menu] then select ‘Sample Recorder’ to open the sampler page.
2. Setup the input and levels.
• Ensure the correct input to record is selected, Press [Source], 1
st
Screen button to toggle selections.
• Select monitoring ON, Press [Monitor], 7
th
Screen button to toggle.
• It may be useful to play the device to make it audible to record
before starting to record to allow the setting up of the level.
• Adjust gain to suit input level. Press [Gain] and Press (Up), (Down)
or [+] / [-] buttons. The Level meter should not be lit red but green /
amber, approx 70%.
3. Press [Record], 8
th
Screen button to start sampling. The recording time
that has lapsed will be displayed.
4. Press [Stop], 8
th
Screen button to stop sampling. It may be useful to
also stop playing the recorded device. If stop is not initiated, sampling
will continue until the memory is full.
5. The sample can be cropped before saving. This allows removal of any
gaps or unwanted audio at the start end. The [Zoom], 4
th
Screen Button
+ [+] / [-] may help to get close up to areas to trim.
6. Press [Start], 2
nd
Screen button, then Press [+] / [-] to set the start point.
Press [End], 3
rd
Screen Button, then Press [+] / [-] to set the end point. It
may be an iterative process to set both as desired.
7. Press [Crop], 5
th
Screen button to trim the sample to the selected start
and end points. The sample is cropped.
8. Save the sample, Press [Save], 8
th
Screen button.
9. The sample can be manually named in the text editor window.
Alternatively, Press [Auto Name], 5
th
Screen Button to set a system
generated name.
10. Press [Save & Load], 7
th
Screen button. This saves to the SD Card
‘recordings’ folder, selects the instrument and opens the instrument list.
11. Alternatively, Press [Save], 8
th
Screen button. This saves directly to the
SD Card ‘recordings’ folder only.