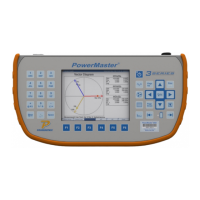
3. PowerMaster
®
External Digital Cable (separate accessory)
4. External power supply (current and voltage source)
5. Whr/VAhr/VARhr standard
6. AC adapter with a “pigtail” termination (line & neutral bare wires)
7. 10-terminal test switch
8. 18+ AWG wire for voltage and 12+ AWG wire for current
Hookup Instructions:
1. From the external power supply, connect the voltage output to the A phase potential on
the test switch
2. From the external power supply, connect the voltage output return to the N phase
potential on the test switch.
3. From the test switch, connect the N phase potential to a known earth ground.
4. From the test switch, connect a jumper wire from A potential to B potential. Connect
another jumper wire from B potential to C potential. This creates a parallel circuit for the
voltage.
5. From the W-hr/Var-hr standard, connect the line voltage to the A phase potential on the
test switch.
6. From the W-hr/Var-hr standard, connect the neutral voltage to the N phase potential on
the test switch.
7. From the external power supply, connect the current output to the bottom of the A phase
current on the test switch.
8. From the external power supply, connect the current output return to the “current out” of
the W-hr/Var-hr standard.
9. From the W-hr/Var-hr standard, connect the “current in” of the W-hr/Var-hr standard to the
C phase current return on the test switch.
10. From the test switch, a) connect a jumper wire from the top of the A phase current to the
top of the A phase current return. From the bottom of the A phase current return, b)
connect a jumper wire to the bottom of B phase current. From the top of B phase current,
c) connect a jumper wire to the top of B phase current return. From the bottom of B phase
current return, d) connect a jumper wire to the bottom of C phase current. From the top of
C phase current, e) connect a jumper wire to the top of C phase current return. This
creates a series circuit for the current.
11. From the PowerMaster
®
, connect the VOLTAGE leads to the voltage potentials on the test
switch (A=red, B=yellow, C=blue, N=white).
12. From the PowerMaster
®
, insert the CURRENT leads into the current return phases on the
test switch (A=red, B=yellow, C=blue).
13. From the PowerMaster
®
DIGITAL input, connect the External Digital Cable (STD IN) to the
pulse output on the W-hr/Var-hr standard.
14. From the W-hr/Var-hr standard, use the AC adapter to connect the auxiliary power from
the standard.
Rev 1.5 117
 Loading...