Getting Started GM300 Radio Service Software Manual
2-30 6880902Z36-B October, 1996
Navigating Through RSS Menus
2
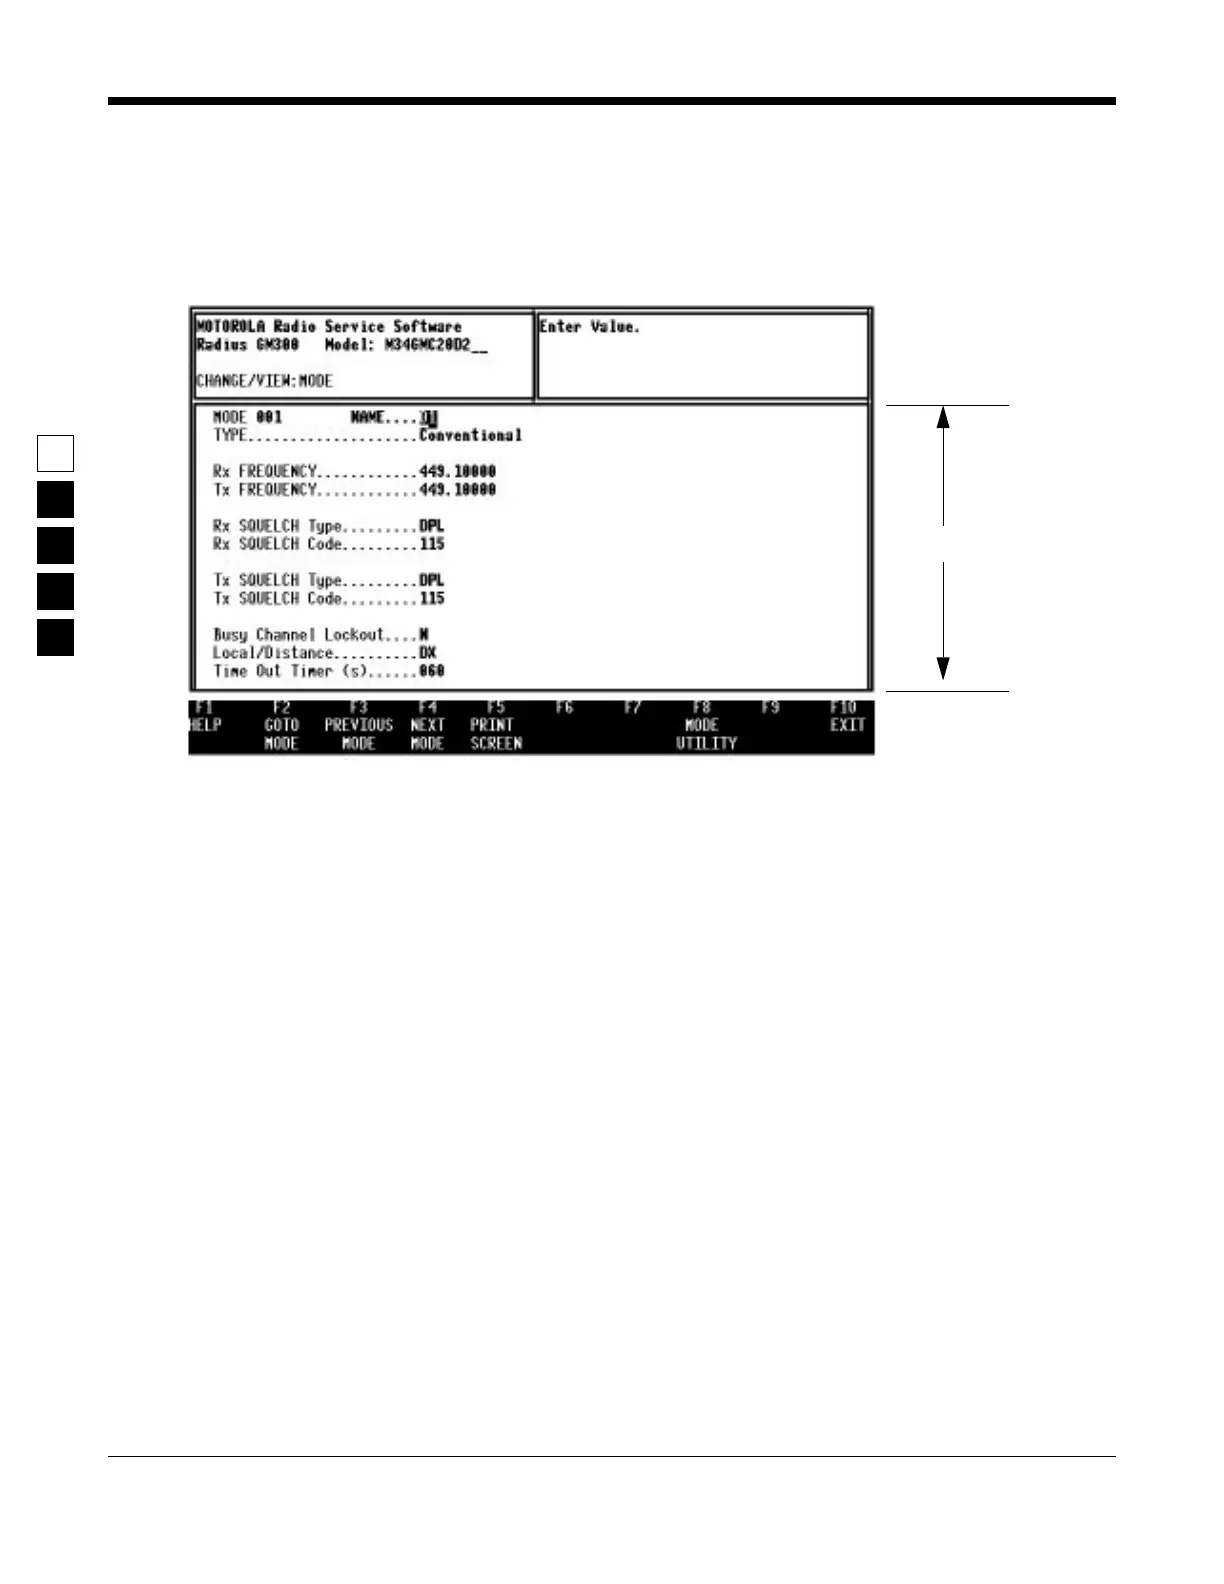
2.8.3 Anatomy of a Screen
As stated before, the only difference between a menu and a screen is the contents of the working area,
shown as 3 in Figure 2-7, and shown in Figure 2-8 as the “Working area”. Screens list features (fields) that
can be viewed or edited.
Figure 2-8. An RSS Screen
The working area of a screen contains a list of programmable features called “fields” that can be selected
or changed using the arrow, tab or return keys described earlier. On some screens are features that can be
selected for each individual channel (hereafter we will refer to a channel as a “mode”); these features are
selected on a “per-mode” basis. On other screens are features that can be selected for all modes of the
radio (“radio-wide” features). And still other screens list those features that perform a certain RSS func-
tion, such as servicing the radio or printing the personality data. Fields are further described in
Section 2.9 on page 2-33.
2.8.4 Complete Menu Mapping at a Glance
The screens are organized in a tree-root fashion as shown in Figure 2-9 on page 2-31. Though this tree-
root system is shown sideways in the following picture, it shows how the whole system starts with a
main root (MAIN MENU) at the left side and branches outward from the main root. This branching
grows deeper as you get closer to the precise screen which contains the feature you want to program into
the radio.
Traveling from one RSS menu or screen to another is similar to the way a car must use the road system to
drive to the other side of a lake, instead of flying directly as a plane would. To move forward from one
screen to another, use one of the F-keys until you've reached the menu that contains the other screen you
want. To back up, use the F10 key. Each time you press F10 you retreat to the previous screen or menu,
moving closer to the MAIN MENU. For example, to move from A to B in Figure 2-9 on page 2-31, from
the READ CODEPLUG screen you would press F10 to retreat to the GET/SAVE MENU, then F10 to
retreat to the MAIN MENU, then press F4 to advance to the CHANGE/VIEW MENU (Figure 2-10), then
finally press F5 to proceed to the MODE CONFIGURATION screen.
Working area