e) Basic Trim „Subtrim“
As previously mentioned when installing the servo, always mount the servo stick at a 90° angle to the linkage rods
(seeg.13).Thetrimdisplaysatthetransmitter(seeg.4,items5-8)shouldbeinthecentreposition.Onlythen
willyoubeabletoperformnetrimminginbothdirectionsusingthetrimbuttonsduringight(seeg.1,item6,8,
16 and 18).
However,thecogteethonservoleversareoftensolargethattheexact90°anglecannotbeset(seegure13).
This is why the basic trim helps to set the correct centre position of the servo arm without the need to adjust the trim
buttons.
Important!
Before setting the basic trim, check with the operating display whether the four trim displays are set cen-
trally.
Setting the basic trim:
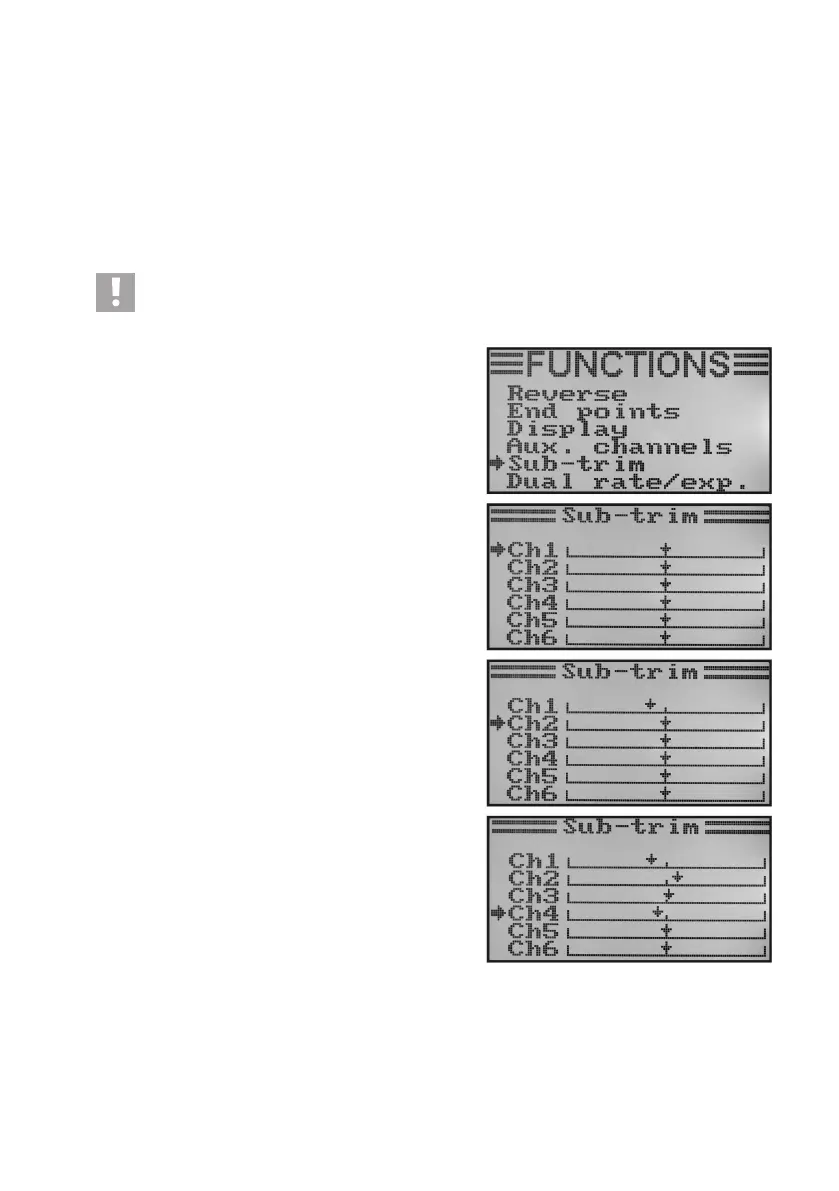
• Switchonthetransmitterandcallthefunctionsettingmenu.
• Movethecursorarrowtothemenuitem„Subtrim“withthetwo
buttons „UP“ and „DOWN“.
• Brieypushthebutton„OK“toactivatethemenuitem.
In the display you will see display items for the six control func-
tions with the respective currently set trim values.
• Pushthebuttons„UP“or„DOWN“toselectthebasetrimfor
channel 1.
• Briefpushingofthebutton„OK“willcausethecursorarrowto
jump to channel 2. If the button „OK“ is pushed and held, the
factory parameter will be called.
• Pushthebuttons„UP“or„DOWN“toselectthebasetrimfor
channel 2.
• Repeathisprocessuntilyouhavesetthedesiredbasictrimin
all six channels.
• Keepthebutton„CANCEL“pushedforalongerperiodtosave
the settings. The display then shows the function setup menu
again.
• Pushthebutton „CANCEL“repeatedlyuntilyou getbackto
the operating display.
Figure 39