Wrist Camera Instruction Manual
3.4. Mechanical Installation
Wrist Camera kit for Universal Robots
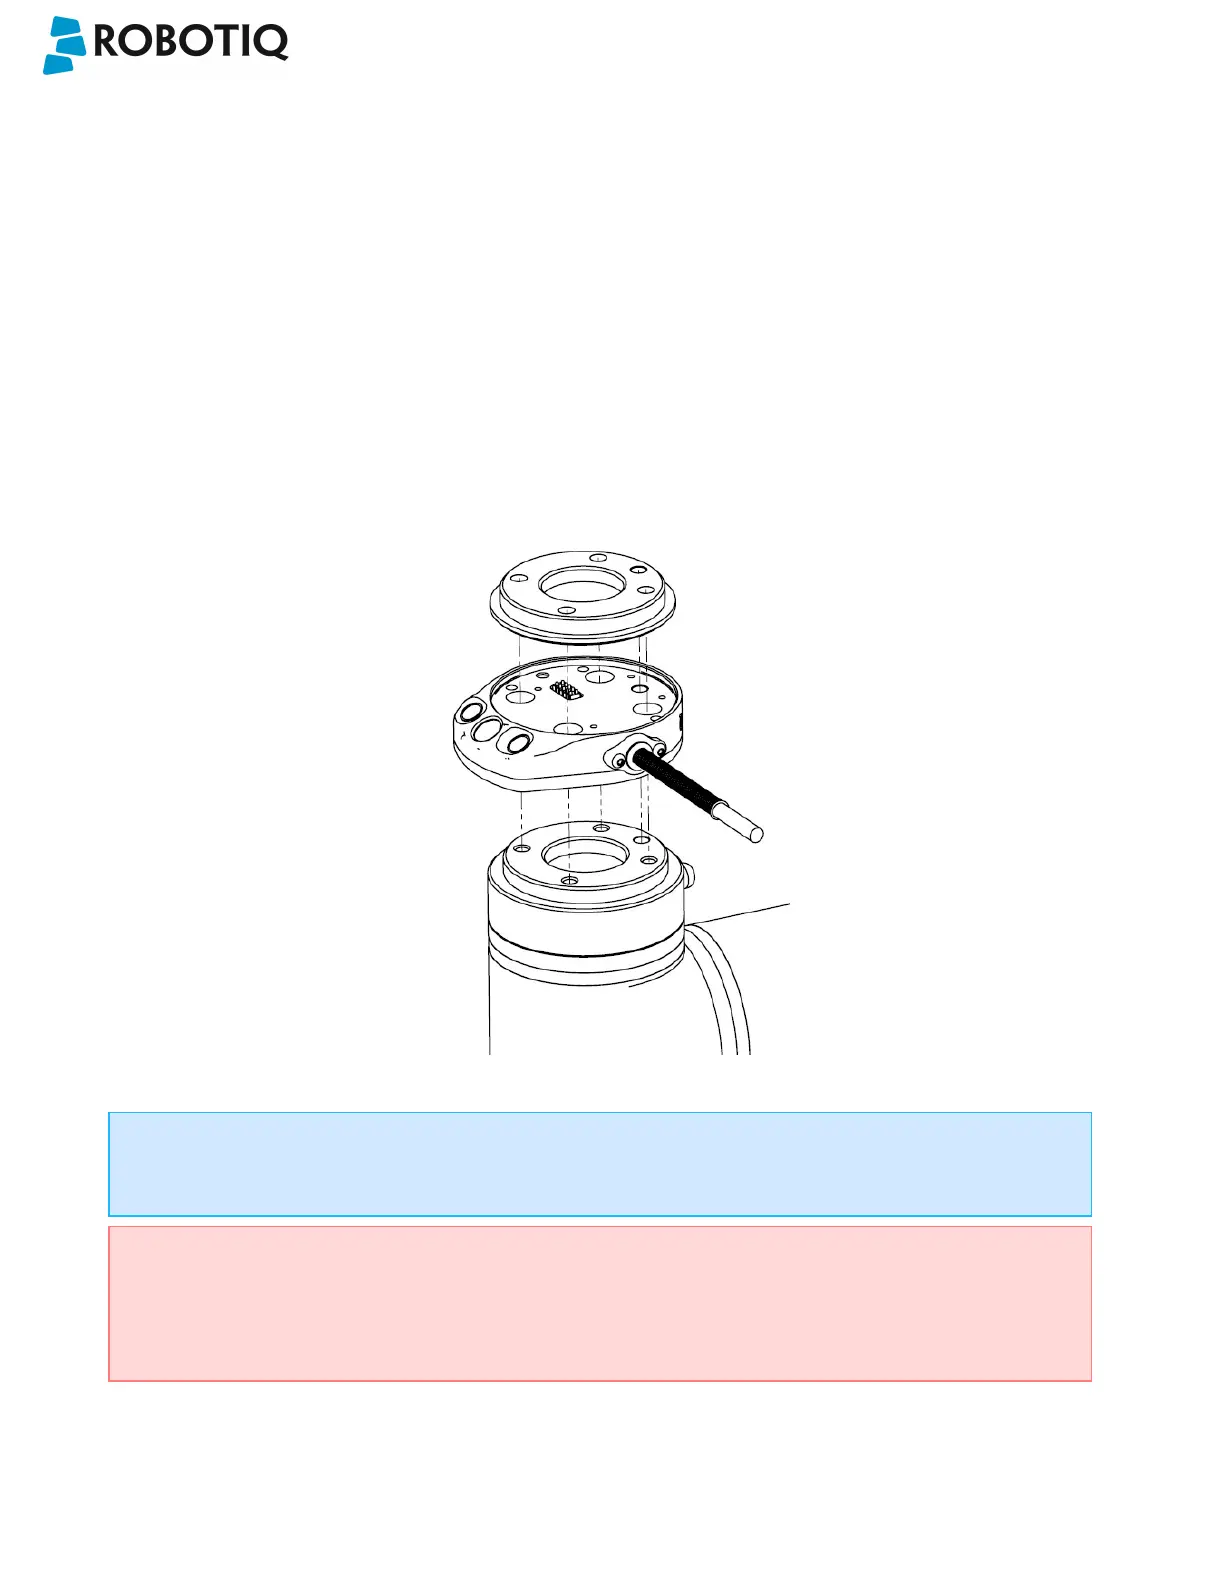
For mechanical installation of a Wrist Camera on a UR robot along with an end-effector (other than Robotiq's 2-
Finger Gripper), follow these instructions and refer to the figure below:
l Place the Wrist Camera (RWC-CAM-001) on the robot arm. Align the camera's indexing (dowel) pin properly in
Universal Robots' bolt pattern.
l Place the tool plate (RWC-TOOL-062) on the camera. Align the tool plate's indexing (dowel) pin correctly in the
Wrist Camera.
l Fix the desired end-effector on the robot arm, through the tool plate and the camera, using M6 screws.
l Fix the cable along the robot arm, please refer to the Cable Management section.
Fig. 3-1: Mechanical installation of the Wrist Camera kit for Universal Robots.
The end-effector is not screwed in the camera or the tool plate, but directly in the robot arm. Both camera
and tool plate have through holes for thisassembly.
Warning
Make sure the Camera is oriented properly.
Do not offset the Camera from the tool center point on the X and Y axes, or around the Z axis.
©Robotiq inc. 2016-2018
18