Wrist Camera Instruction Manual
Tools
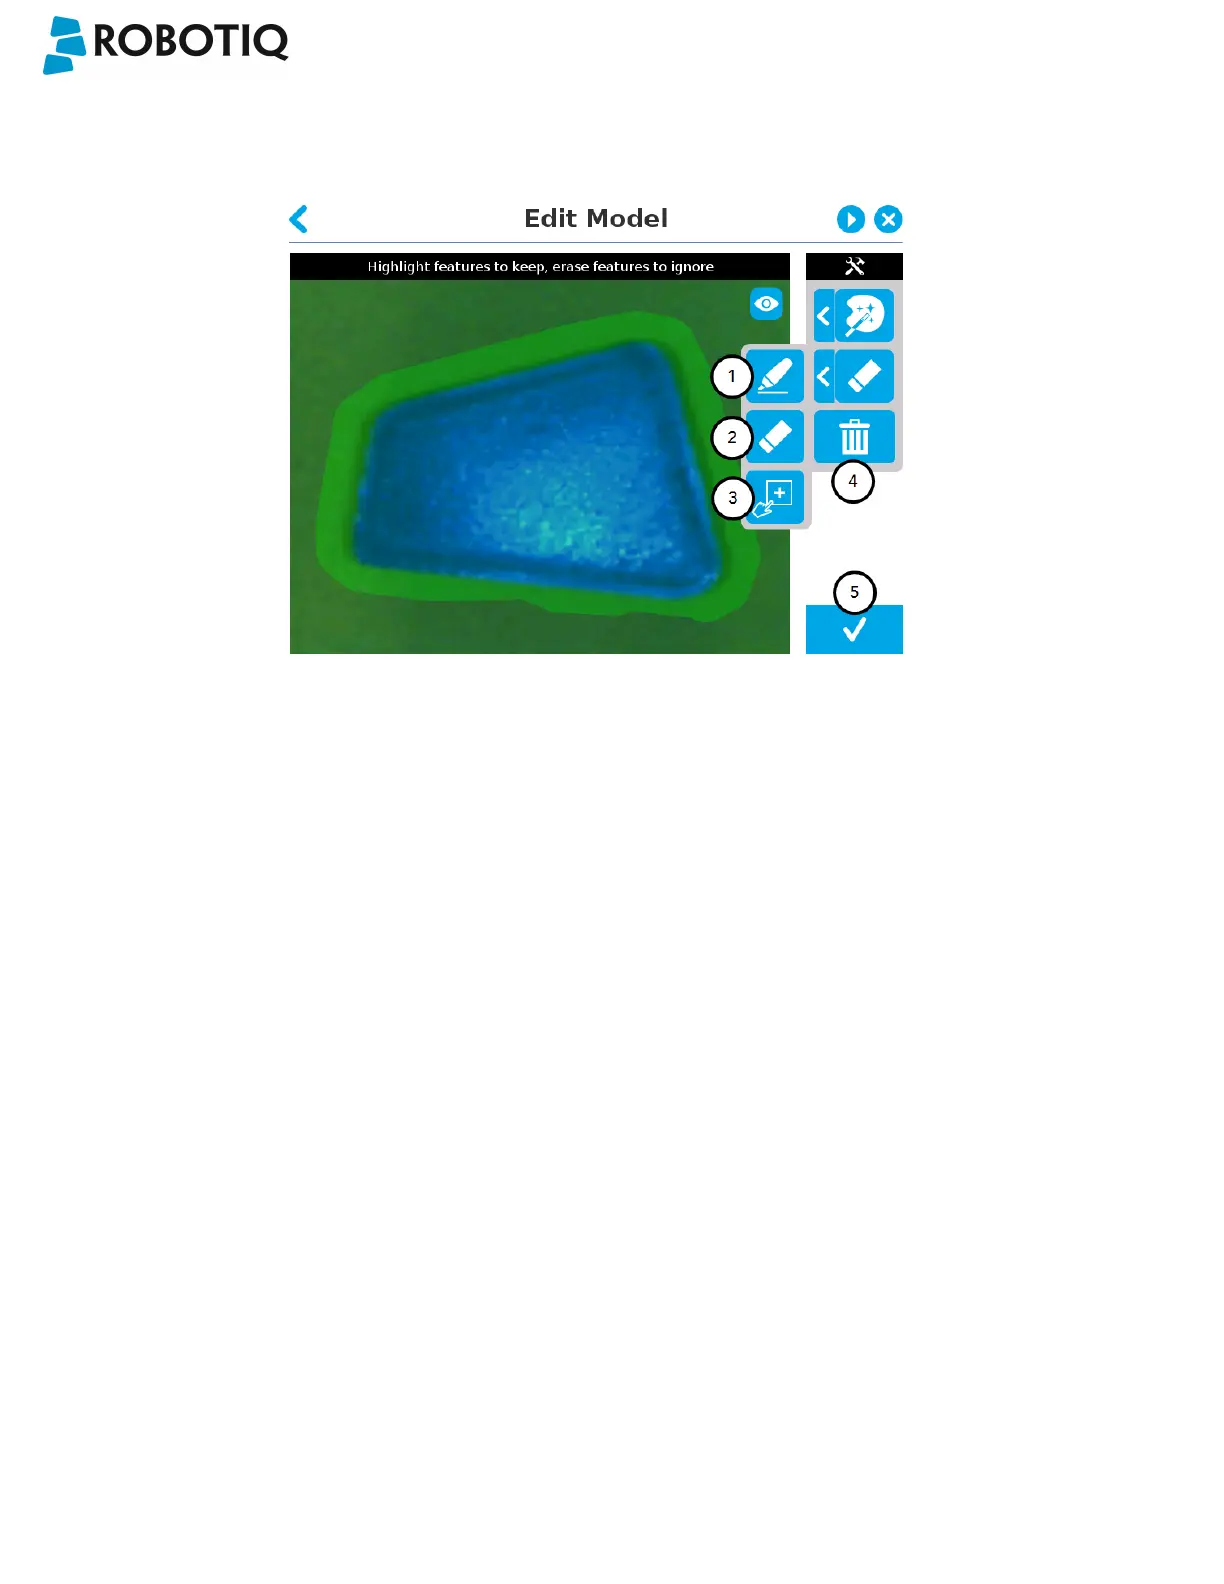
Tap the arrow to the left of the tools button to expand the tools menu.
1
Marker
The marker tool can be used to highlight features and edges to include and keep in the selection area.
Slide your finger or pointing device on the desired area(s) on the teach pendant. A green object layer mask will be
applied to the highlighted portion of the model.
2
Eraser
The eraser tool can be used to ignore features and edges in the selection area.
Slide your finger or pointing device on the undesired area(s) on the teach pendant. The object layer mask will be
replaced by the background layer mask.
3
Rectangle+ (add area)
The rectangle+ (add area) tool can be used to quickly highlight desired areas.
Tap and drag your finger or pointing device to draw rectangular shapes that will highlight presently available
features.
Deleting the selection area
4
Garbage can
Tapping the garbage can icon will clear the object layer mask, thus deleting the selection area.
Accepting the model
5
Check mark
When the view of the model is satisfactory and you wish to carry on with the teaching wizard steps, tap the button
with the check mark in the lower right corner of the teach pendant interface.
©Robotiq inc. 2016-2018
59