Protected by copyright. Copying for private or commercial purposes, in part or in whole, is not
permitted unless authorised by SEAT S.A. SEAT S.A does not guarantee or accept any liability with
respect to the correctness of information in this document. Copyright by SEAT S.A.
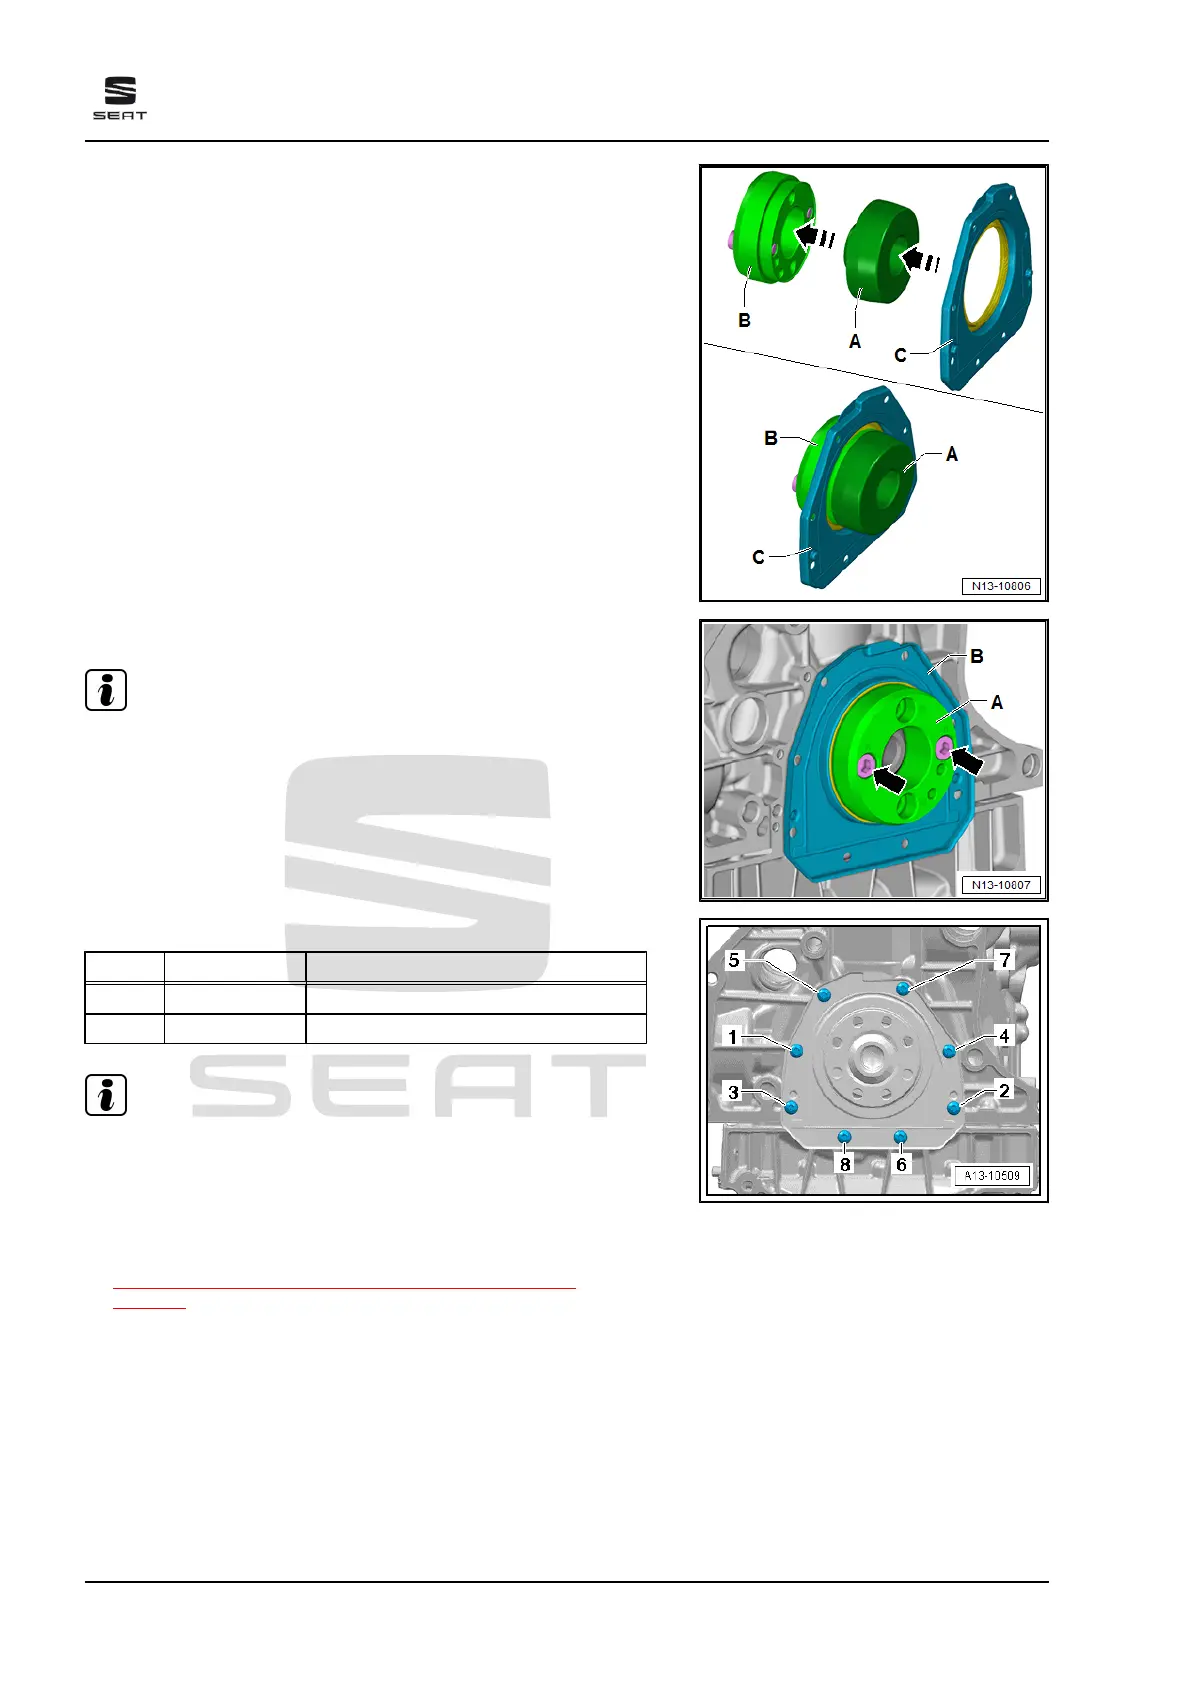
– Check guide - T10122/6- -B- for any deformations or sharp
edges.
– Attach assembly aid - T10122/1- -A- to guide - T10122/6-
-B-.
– Push sealing flange -C-, with outer side leading, onto guide
piece - T10122/6- -B-.
– Remove assembly aid -A-.
– Put guide -A- with sealing flange -B- onto crankshaft journal.
Note
It is not necessary to tighten the bolts -arrows-.
– Push sealing flange -B- over guide -A- onto crankshaft journal.
– Remove guide -A-.
– Tighten new bolts evenly in the sequence shown.
Stage Bolts Specified torque/turning further angle
1. -1 - 8- Screw in by hand as far as stop
2. -1 - 8- 9 Nm
Note
After installing the sealing flange, wait about 30 minutes for the
sealant to dry. Then (and only then) fill the engine with engine oil.
Continue installation following reverse order for removing.
Specified torques
♦ ⇒ “2.1 Exploded view - cylinder block, gearbox end”,
page 73
Ateca 2017 ➤ , León 2013 ➤ , León ST 2013 ➤
4 cyl. petrol engine (1.8 l and 2.0 l with direct injection, 4 V, exhaust gas turbocharger, timing chain,
EA 888 III. Gen) - Edition 10.2018
78 Rep. gr.13 - Crankshaft group