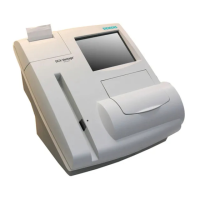
DCA Vantage Operator’s Guide 87
Quality Control
Quality Control
5 Quality Control
Run controls according to your laboratory’s accrediting agency. Quality
Control (QC) testing ensures that the reagent cartridges are reacting and
being read correctly. Quality control testing also detect errors resulting from
user techniques. Refer to your laboratory quality assurance program to ensure
quality throughout the entire testing process. Follow the manufacturer’s
storage and handling instructions for quality control material. Improper storage
and handling of control materials can cause erroneous results. Refer to the
control material package insert for proper handling instructions.
Run controls under the following conditions:
• at regular intervals determined by the laboratory procedures
• when using a new shipment of reagents
• when using a new lot number of reagent
• each time a calibration card is scanned
• whenever test results are in doubt
• when training new operators
All control results must be within the acceptable range before any patient
sample is tested and the results are reported. If a control result is out of range,
troubleshoot the system, correct any problems identified, and run the controls
again. When control results are within range, you can test and report on
patient samples.
For information about ordering control kits, refer to Appendix C, Orderable
Supplies.
Collecting Control Specimens
Use the following procedure to collect control specimens:
NOTE: Prepare the controls according to the manufacturer’s instructions.
1. Remove and unwrap the capillary holder from the Reagent Kit.
2. Mix the sample well by inversion or using a tube mixer.
3. Open the control bottle.
NOTE: Avoid introducing air bubbles into the sample.
4. While applying pressure to the bulb of the dropper (found in the control kit),
insert the tip of the dropper into the control solution.
5. Release the pressure on the bulb to aspirate a small amount of control
solution.
6. Fill the glass capillary tube by touching it to the tip of the dropper and fill
the tube.