9 Installing the Left Enclosure Lid
SMA Solar Technology AG
Replacement Manual STPxxx-60-DC-SPD-RM-xx-11 19
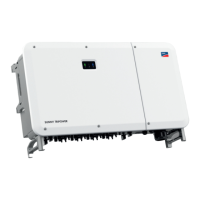
4. Fasten the 4 marked fixing screws on the DC SPD
(PH2, torque: 1.5Nm). For this, use the additional 4
screws (M4) included in the scope of delivery.
5. Fasten all 24 cables on the DC SPD with 20 M4
screws (PH2, torque: 1.5Nm) and 4 M5 screws
(PH2, torque: 2.6Nm) from the scope of delivery.
Ensure that the cables are connected according to
the label on the DC SPD.
6. Ensure that all cables are tight and that the screws are not twisted.
7. Reconnect and lock the ribbon cable connector.
8. Reinstall the left enclosure lid (see Section9, page19).
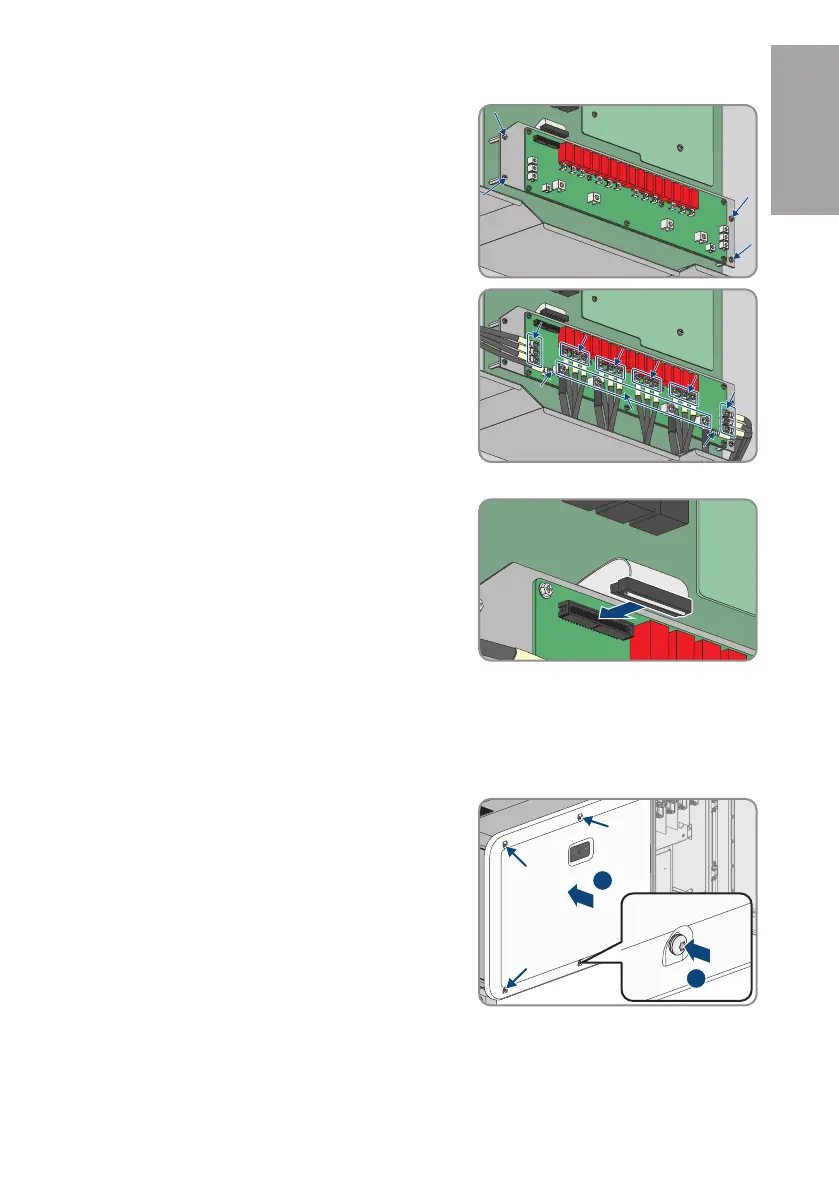
9 Installing the Left Enclosure Lid
1. Ensure that the seal and contact plates on the inside of the enclosure lid are undamaged.
2. If necessary, remove any remains of the seal and dirt from the edge of the inverter enclosure.
3. Attach the left enclosure lid with 4 M6x14 screws.
Loosely tighten all screws.
ENGLISH