3.
Activatetheinverteraccordingtotheactivationinstructionssuppliedintheinverterpackage:
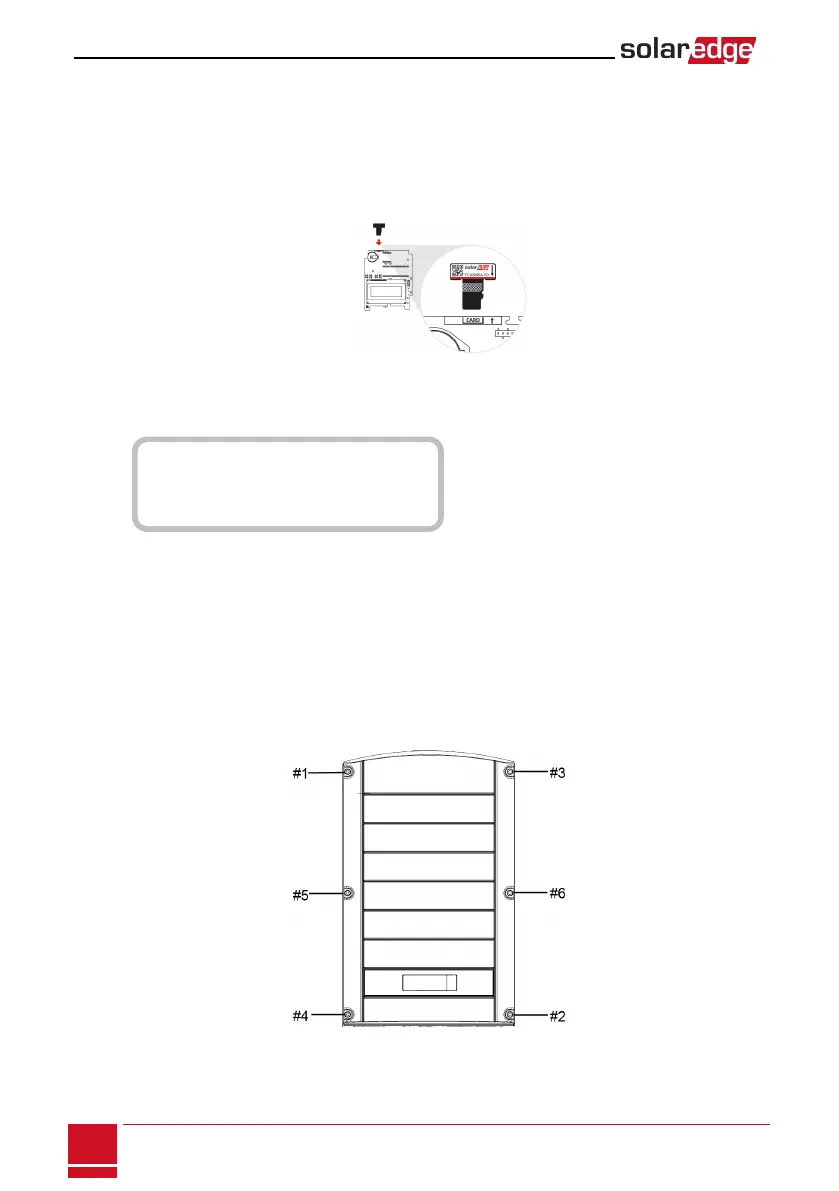
a. VerifythatthecardS/NmatchestheinverterS/N.
b. Insertthecardintotheslotmarked"CARD"onthecommunicationboard.
c. TurnACON.
d. LCDshows:Running Script...èDone!
e.
IfLCDshows:Script error,contactSolarEdgeSupport.
Figure 27: Activation card
4. Verifythattheinverterisconfiguredtothepropercountry:PresstheLCDlightbuttonuntilreaching
theIDstatusscreen:
I D : # # # # # # # # # #
D S P 1 / 2 : 1 . 0 2 1 0 / 1 . 0 0 3 4
C P U : 0 0 0 3 . 1 4 x x
C o u n t r y : U S A 1
5. Ifrequired,performthefollowingadditionalstepsbeforeclosingtheinvertercover:
l CountrysettingsorinverterconfigurationusingtheinternalLCDuserbuttons–refertoCountry
andGridonpage45.
l Communicationoptionsconnection–refertoSettingUpCommunicationtotheMonitoringPortal
onpage71.
l StorEdgeapplicationconfiguration-refertoSystemConfigurationonpage62.
6.
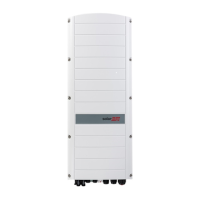
Closetheinvertercoverbytighteningthescrewswithatorqueof9.0N*m/6.6lb*ft.Forproper
sealing,firsttightenthecornerscrewsandthenthetwocentralscrews.Thefollowingfigure
illustratesrecommendedorder:
Figure 28: Tightening order of the screws
7. MakesuretheACBypassswitchisswitchedtotheleft(position1).
SolarEdge-StorEdge Installation Guide MAN-01-00262-1.0
56
Step 1: Activating the System



 To Next Page