EasyManuals Logo

SolaX Power X3-IES Series User Manual

SolaX Power X3-IES Series
228 pages
To Next Page IconTo Next Page
To Previous Page IconTo Previous Page
Page #83 background imageLoading...
Page #83 background image
75
Mechanical Installation
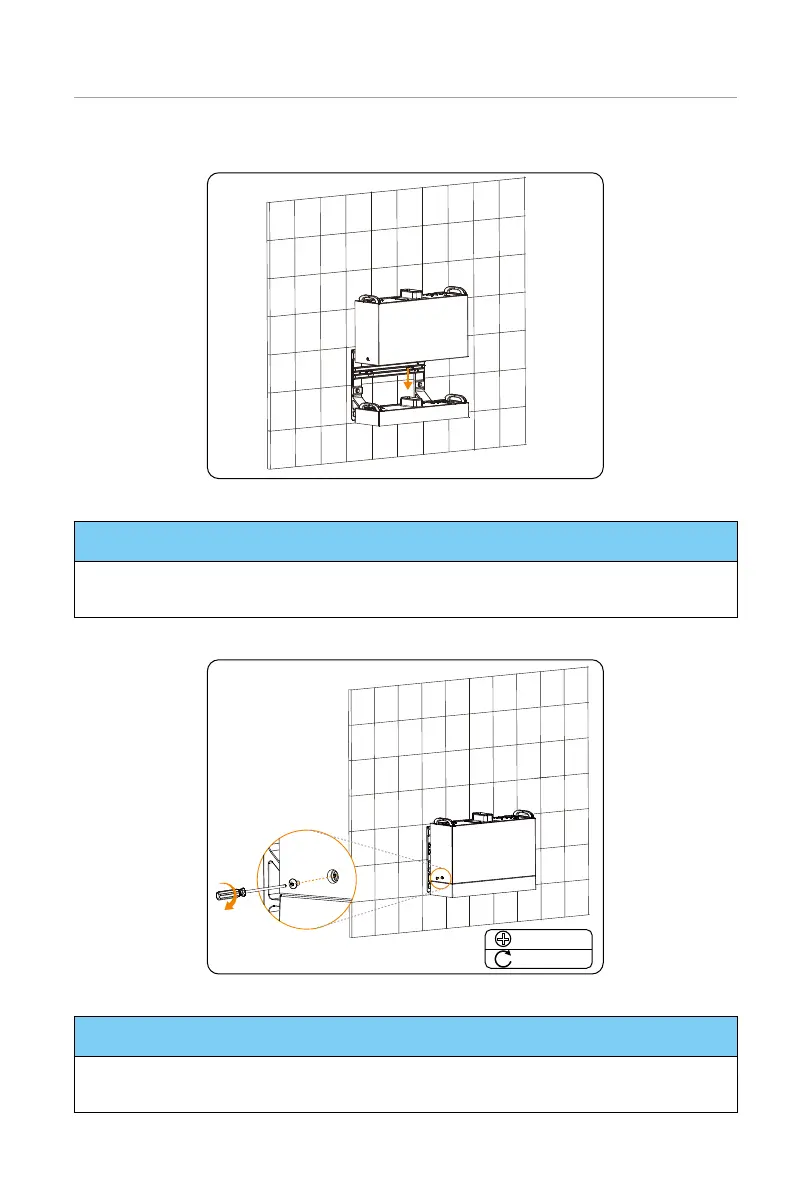
Step 7: Place the battery module on the base.
Figure 6-36 Placing battery module
NOTICE!
At least two persons are required to move the battery module.
Please ensure that the side with "R" shall be against the wall.
Step 8: Insert and tighten M5*14 screws on both sides (torque: 2.2-2.5 N·m).
M5*14
2.2-2.5 N·m
Figure 6-37 Tightening screws
NOTICE!
Please make sure that the corners and edges of the base and battery module are
aligned before tightening screws.

Table of Contents

Questions and Answers:

Question and Answer IconNeed help?

Do you have a question about the SolaX Power X3-IES Series and is the answer not in the manual?

SolaX Power X3-IES Series Specifications

General IconGeneral
BrandSolaX Power
ModelX3-IES Series
CategoryInverter
LanguageEnglish

Related product manuals