74
Mechanical Installation
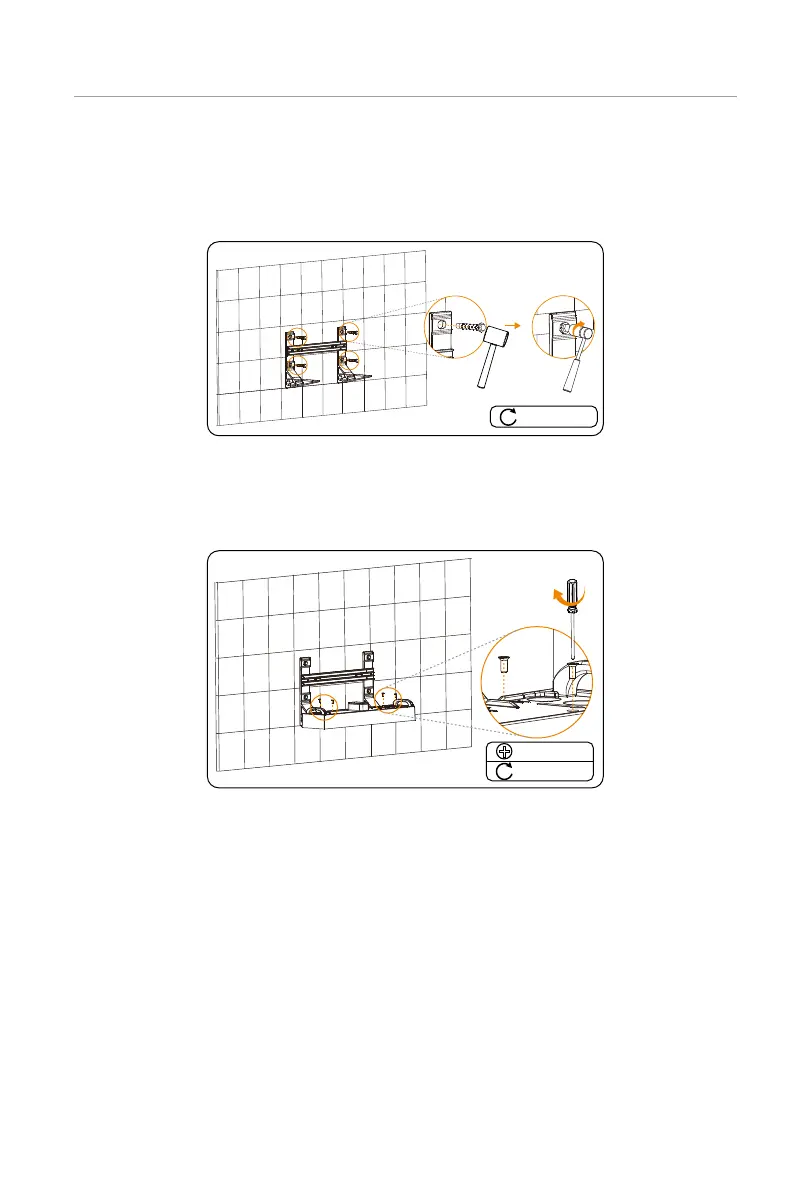
Step 5: Place the assembled base support and transverse plate on the wall again, and
check whether the bubble is in the centre.
Attach the expansion screws to such four holes, hit it by using rubber mallet, and
then tighten it by using torque wrench (torque: 20-25 N·m)
20-25 N·m
Figure 6-34 Tightening expansion screws
Step 6: Place the base on the base support, and secure both left and right sides with
M5*20 screws (torque: 2.2-2.5 N·m). There are totalling 4 M5*20 screws shall be
tightened.
M5*20
2.2-2.5 N·m
Figure 6-35 Securing the base

 Loading...