2-43
DSR-70/70P
CN79
Manual
EJECT gear
Flexible card wire
CC-79 board
Fixing screws
Fixing screws
A
Fig.-1
Flat head (_)
screwdriver
Cassette tape
Slackened tape
Lever
Cam
Claw
Claw
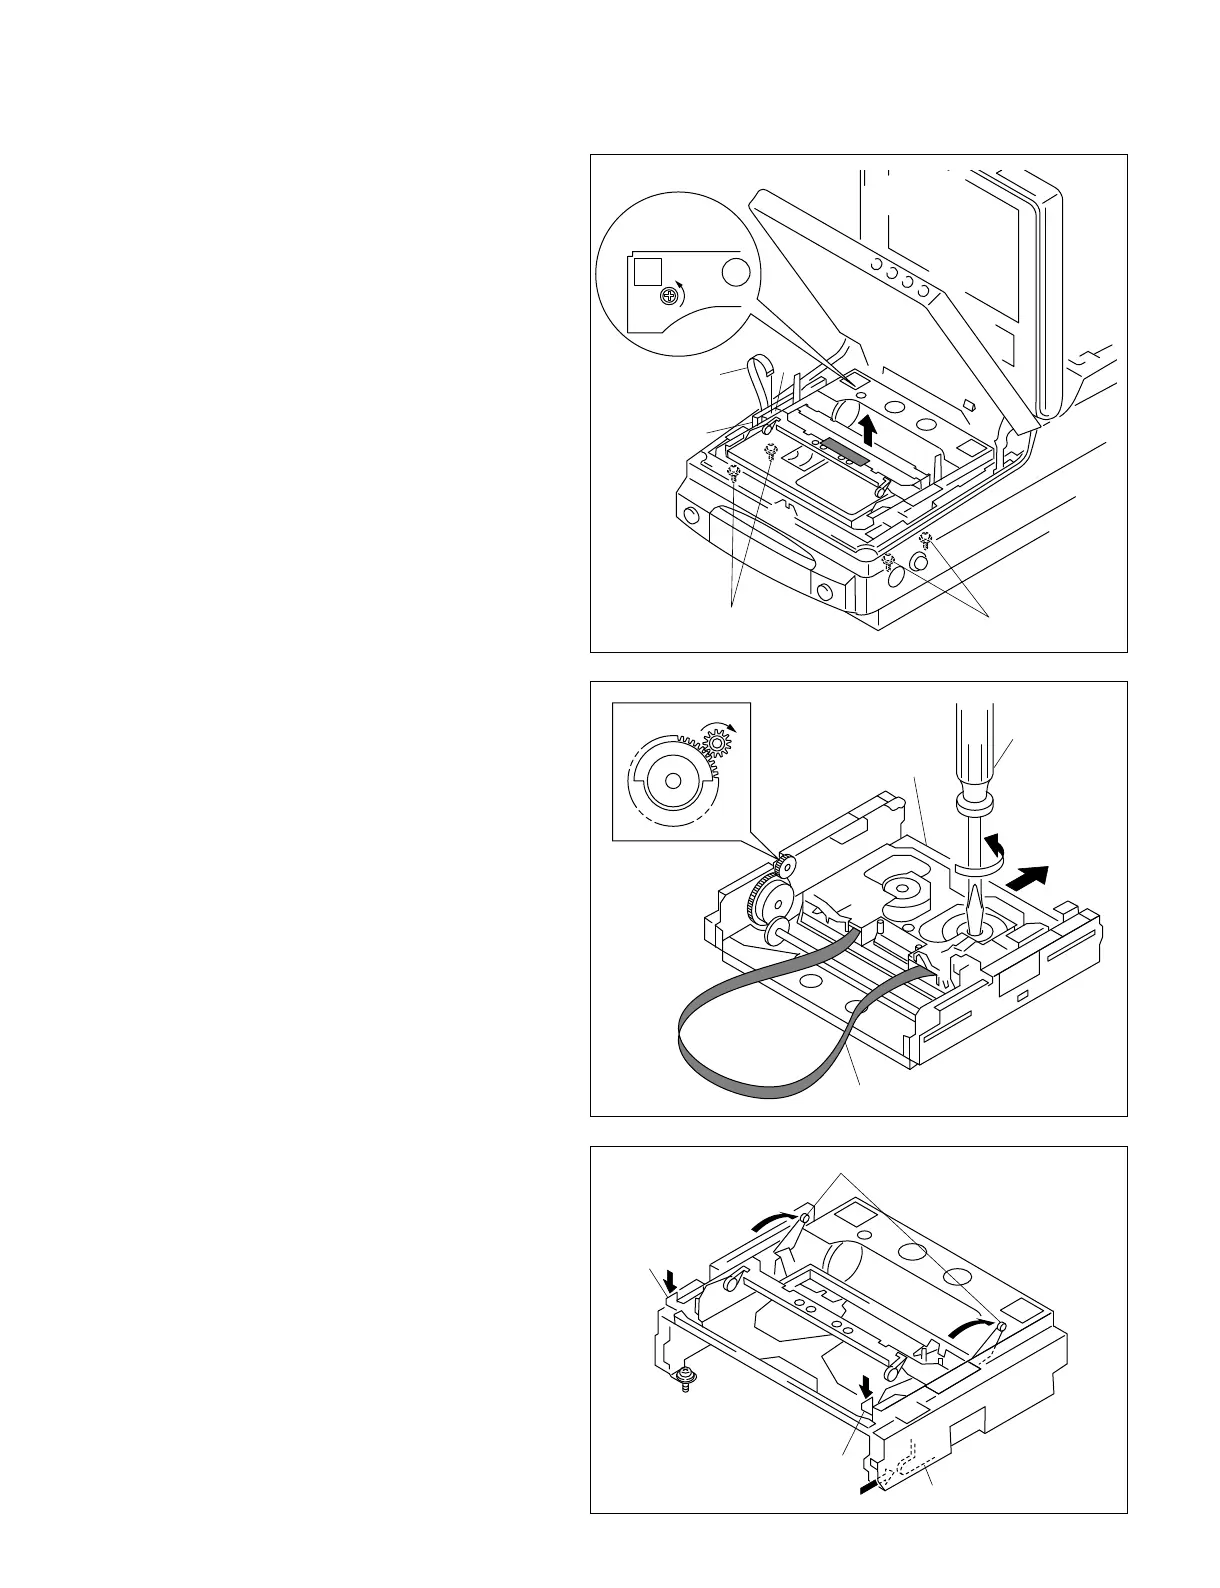
. How to remove a cassette compartment
and to remove a cassette tape when the
main power cannot be turned on
(1) Turn off the main power.
(2) Remove the flexible card wire from the
connector (CN79) on the CC-79 board.
(3) Fix the cassette compartment lid with an
adhesive as shown so as not the cassette
compartment lid should not be closed. Rotate
the manual EJECT gear in the direction of the
arrow by pressing the gear with the Philips
(+) head screwdriver until the cassette
compartment is raised vertically as far as it
can go.
(4) Remove the four screws and remove a
cassette compartment.
(5) Rotate the reel hub with a flat head (_)
screwdriver until tape is taken up to remove a
tape slack. Close the cassette lid.
(6) Rotate the gear in the direction of the arrow
until the cassette compartment moves to the
“cassette out” state. (Refer to Fig.-1.)
(7) Remove a cassette tape from the cassette
compartment.
3. How to attach the cassette compartment
(1) Push the lever in the direction of the arrow.
(2) Press down the claws (two claws in the right
and left) in the direction of the arrow until the
cassette compartment is raised vertically as
far as it can go.
(3) Push in the cam until it is locked.
(4) Attach the cassette compartment.
(Refer to section “2-7-4. Cassette
Compartment Assembly”.)