Black plate (141,1)
一般Model "A2470GE-B" EDITED: 2010/ 9/ 24
– Inside the glove box
– Inside the door trim pocket
– On the rear seat
– On the rear shelf (Sedan)
– Inside the trunk (Sedan)
– At the corner of the cargo area
(Station wagon)
. When operating the pu sh-button
ignition switch, if the battery of the
access key is discharged, perform the
procedure described in “When access
key does not operate properly” F3-10.
In such a case, replace the battery
immediately. Refer to “Replacing bat-
tery of access key” F2-19.
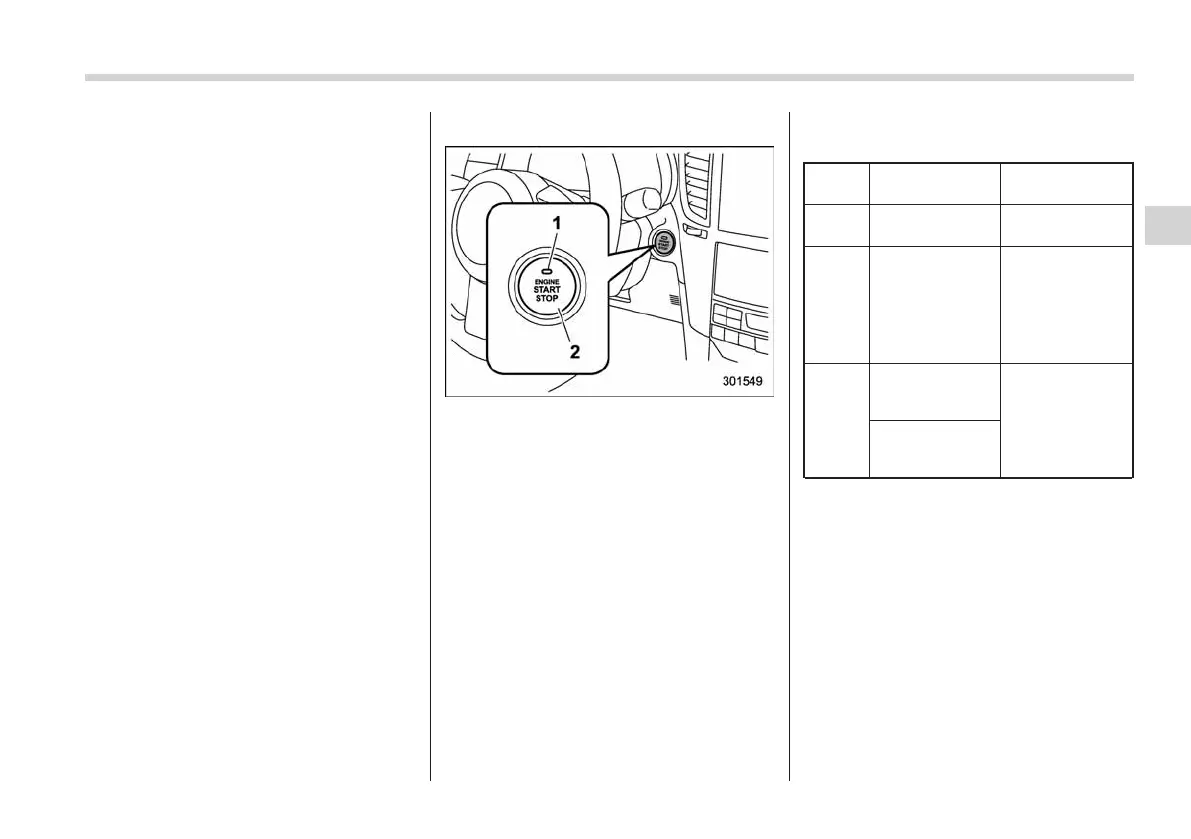
& Switching power
1) Operation indicator
2) Push-button ignition switch
The power is switched every time the
push-button ignition switch is pressed.
1. Carry the access key, and sit in the
driver’s seat.
2. Shift the shift lever in neutral (MT
models) or the select lever in the “P”
position (AT and CVT models).
3. Press the push-button ignition switch
without depressing the clutch pedal (MT
models) or the brake pedal (AT and CVT
models). Every time the button is pressed,
the power is switched in the sequence of
“OFF”, “Acc”, “ON” and “OFF”. When the
engine is stopped and the push-button
ignition switch is in “Acc” or “ON”, the
operation indicator on the push-button
ignition switch illuminates in orange.
Power
status
Indicator color Operation
OFF Turned off
Power is turned
off.
Acc Orange
The following
parts can be
used:
wipers, washer,
audio and ac-
cessory power
outlet.
ON
Orange
(while engine is
stopped)
All electrical
parts can be
used.
Turned off
(while engine is
running)
! Battery drainage prevention func-
tion
When the push-button ignition switch is
left in “Acc” for approximately 1 hour, the
push-button ignition switch will be auto-
matically switched to “OFF” to prevent the
battery from going dead. (In AT and CVT
models, this function is activated when the
select lever is in the “P” position.)
Instruments and controls 3-9
– CONTINUED –
3