Innagator | Technical Pack81
Mounting the Inverter
Select installation locations that are adequate to support the weight of the converter.
Install this inverter at eye level to allow the LCD to be read anytime.
Toensureoptimaloperation,anappropriateambienttemperatureisbetween-25and60°C.
Besuretokeepotherobjectsandsurfaces,asshownintheguretoguaranteesucientheatdissipa-
tion and have enough space to remove wires.
For proper air circulation to dissipate heat, allow a clearance of approximately 50cm to the side.
WARNING
Risk of injury (Heavy Object).
Remember that this inverter is heavy, so users must carefully handle the unit during installation,
especially when mounting or removing it from a wall.
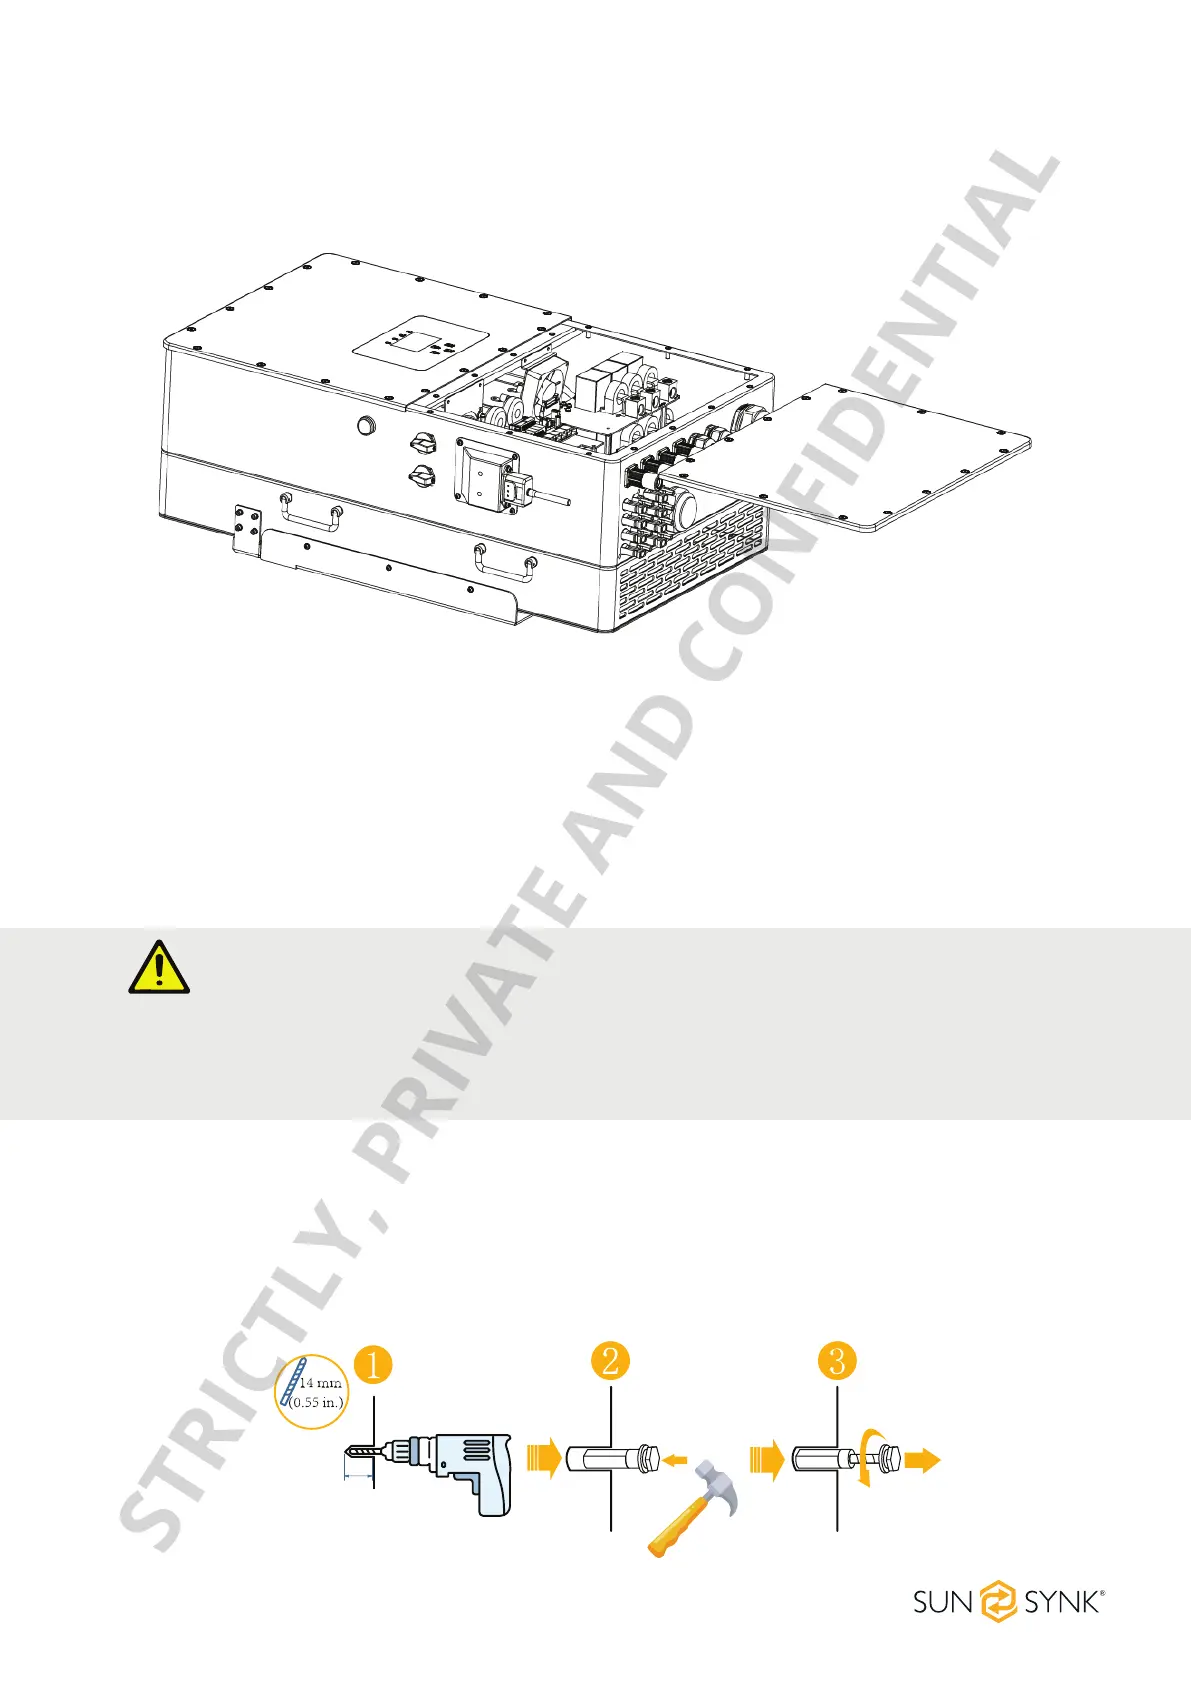
Choose the recommended drill head (as shown below) to drill 4 holes on the wall, 62-70mm deep.
1. Useaproperhammertottheexpansionboltintotheholes.
2. Carrytheinverterandholdit,ensurethehangeraimsattheexpansionbolt,andxtheinverteronthe
wall.
3. Fastenthescrewheadoftheexpansionbolttonishthemounting.
If children under 10 years old may approach the unit, take preventive measures so they cannot reach
and touch the unit.
Installtheindoorunitonthewallwheretheoorheightishigherthan1600mm.
Beforeconnectingallwires,pleasetakethemetalcovero,removingthescrewsasshownbelow:
62-70mm
[(2.44in) to (2,75in)]
STRICTLY, PRIVATE AND CONFIDENTIAL