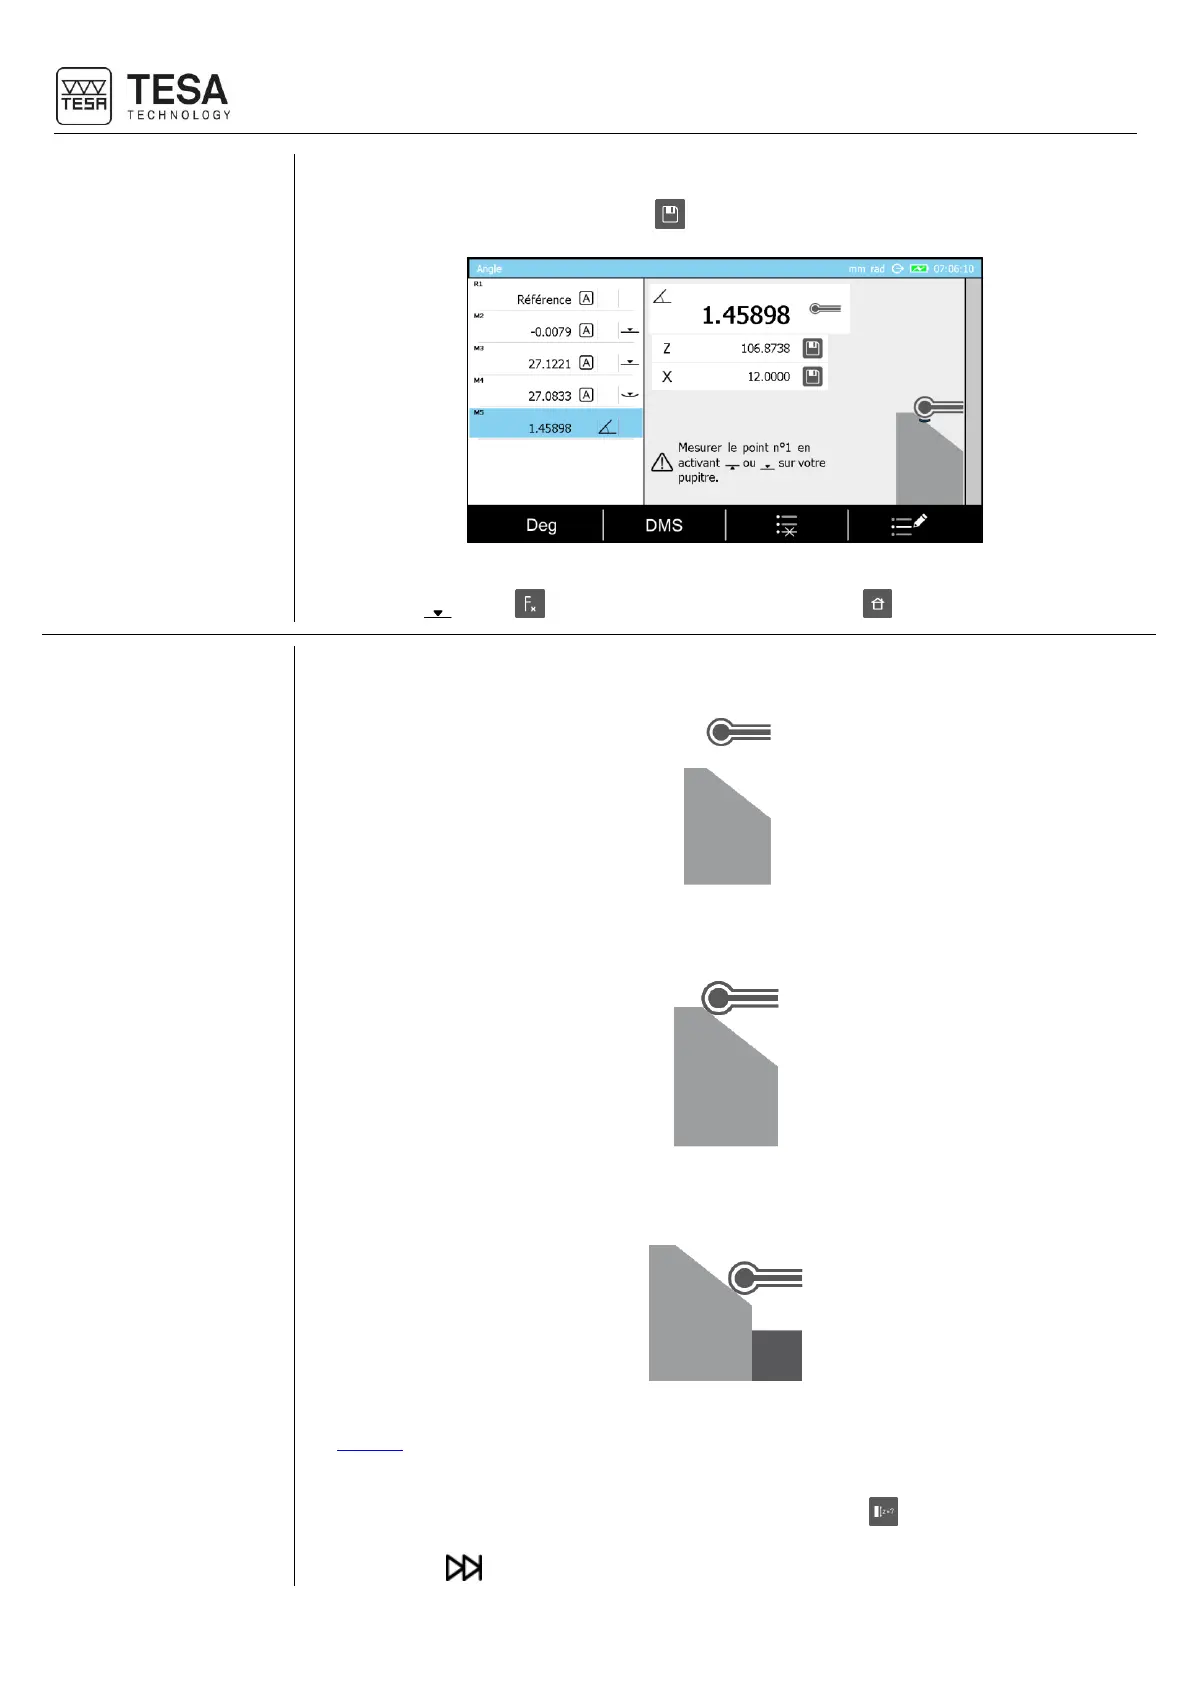
6. The measurement results are displayed on the screen. The angle value is automatically
saved in the measurement programme. The values of the secondary results can also be
stored in the memory by clicking on .
7. It is possible to restart the process by measuring the first point defining another angle by
means of , press to go back to ST1 mode (or ST2) or to go back to the main page.
1. Once the measurement mode is activated, position the probe above the surface to be
measured.
2. Move the probe, so that it establishes contact with the surface of the workpiece to be
measured.
3. Place a gauge block (+ intermediate piece) between the workpiece to be measured and the
instrument. Measure the second point.
4. At this step of the procedure, ΔZ (or Z) has been calculated (for further details, see this
chapter). It is now necessary to define ΔX (or X), which corresponds to the size of the
standard used. There are two possibilities for the user to do so:
→ Enter the gauge block’s value manually by clicking on . Once the value has been
entered and validated, it is necessary to finalise the process ignoring the last steps by
pressing (see step No. 6).