31
1. Unscrew top door hinges from countertop and remove doors.
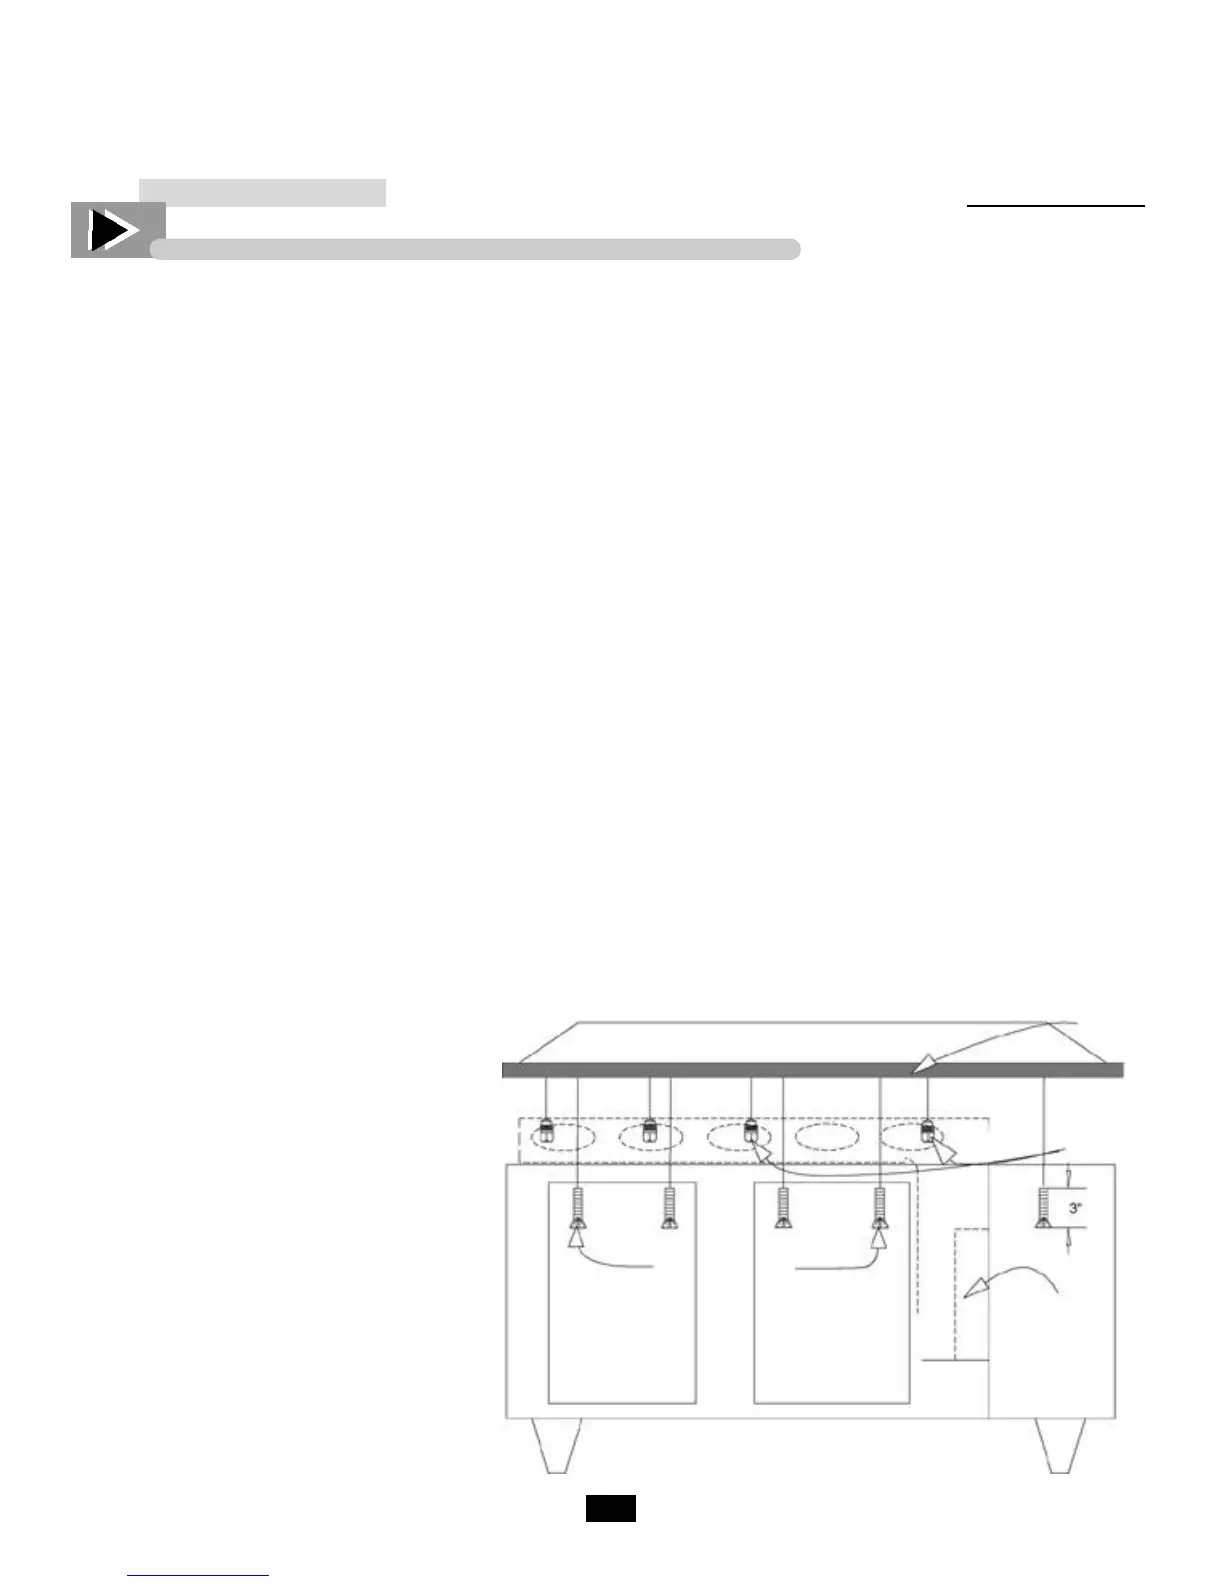
2.
Locate & remove 2-2 3/4 inch screws in the black plastic trim in the top of each door or top
drawer opening.
3. Remove front louvered grill. Remove screw from L-bracket that connects countertop to cabinet.
4. Remove screws from the following parts inside of cabinet.
A. Airduct, which extends from evaporator housing to far left end of cabinet. (After all screws are
removed lower duct into cabinet floor).
B. Fan area housing (after air duct is lowered, screws connecting this housing to the countertop will be
exposed, remove these screws)
5. Cut silicone seal that seals countertop to cabinet.
6. Lift up on front of countertop and push towards rear of cabinet. (Countertop slips into groove on rear of cabinet)
7. Clean all excess silicone from cabinet before reinstalling countertop.
8. To reinstall onto cabinet, sliding it to front of cabinet so it will catch in the lip on the rear of cabinet. Countertop
should be flush with the rear of the cabinet when installed correctly.
9. Reinstall screws through the top of the door openings. Holes in top should align with holes in frame
Reinstall all L-brackets.
10. Reinstall screws into interior parts, first the pan area housing and then the air duct.
11. Set cabinet upright and silicone seam between countertop and cabinet.
The following steps help to install the
new counter top.
1 . Follow step #8 vut you will have to
pre-drill 5/28” holes to reinstall 2 3/4”
screws through the door/drawer opening.
2. Lay the cabinet on its back, place doors
into position. Mark holes for top
hinges. Pre-drill these holes with a
7/32” drill bit. Mount doors.
3. Remount doors making sure spacing
between doors is even.
To install new top change steps 7, 8, and
9 to steps 1, 2, & 3.
TPP COUNTERTOP REPLACEMENT INSTRUCTIONS

 Loading...


