86
REQUIRED TOOLS
• Pencil or Marker
• Slotted Screwdriver
• Center Punch
• Power Drill
• Masking tape
SURFACE PREPARATION
__________ STEP 1 __________
Tape off both sides of the elevated
ingredient pan area where the over-
shelf legs will be anchored. (this, so
that errant drilling will not mar the
side of the cabinet).
__________ STEP 2 __________
Remove service shelf from box and
place shelf legs on top of mounted
cutting board. Legs that measure
18” (shorter legs), are to positioned
toward the front of prep table.
__________ STEP 3 __________
Center legs on elevated ingredient
pan area - left to right. The shelf is
not the exact width of the pizza
prep table.
__________ STEP 4 __________
Using a level placed on top of the
service shelf, adjust, (raise or
lower) the rear legs for anchor posi-
tioning.
__________ STEP 5 __________
Using the pre-drilled holes of the
service shelf as a template, place a
pencil mark on the elevated surface.
Create a pilot hole with a nail or
small drill bit.
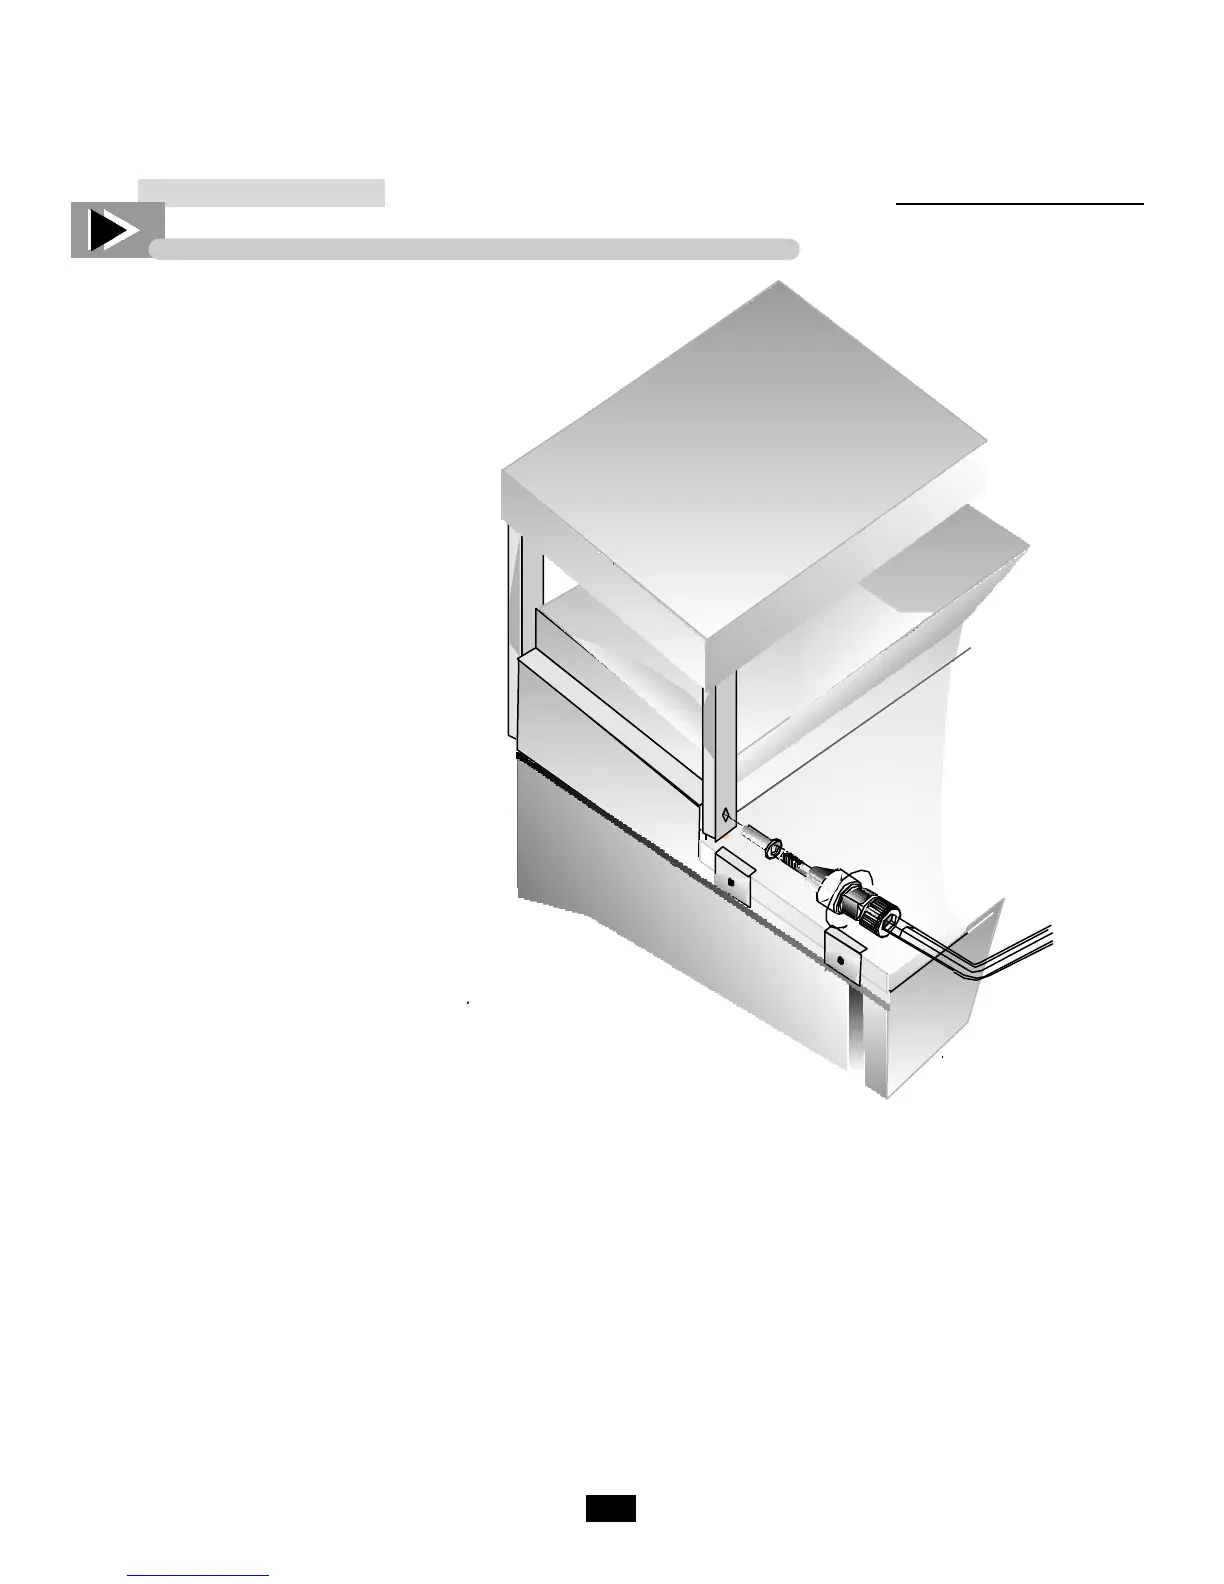
__________ STEP 6 __________
Assemble riv-nut tool provided and
lubricate, (WD-40, etc), the
threads. Ensure that the flange of
the riv-nut seats against the knurled
edge.
__________ STEP 7 __________
Insert allen wrench into top of
crimping tool and place entire riv-
nut assembly into recently drilled
holes
__________ STEP 8 __________
Secure crimping tool with a wrench
and turn allen wrench in a clock-
wise rotation until resistance is felt
(overtightening will strip riv-nut)
__________ STEP 9 __________
When minor resistance is felt, riv-
nut has expanded to fill the drill
hole. Remove tape from sides.
Repeat these steps each of the four
anchor positions, and replace
anchor bracket. Use a slotted
screwdriver to tighten thumb
screws.
NOTE:
Hardware is tapped to rear leg
of service shelf.
FIELD INSTALLING THE TPP SERVICE SHELF

 Loading...


