85
REQUIRED TOOLS
• Pencil or Marker
• Slotted Screwdriver
• Center Punch
• Adhesive Tape or Equivalent
• Power Drill With 11/32" Bit
• Adjustable Wrench
• Pilot hole drill bit
__________ STEP 1 __________
SURFACE PREPARATION -
Mask off the mounting surface of
your Pizza Prep or Sandwich/Salad
unit with adhesive tape. (this will pre-
vent scaring on the cabinet surface.
__________ STEP 2 __________
Remove service shelf from box and
place 3" from the rear of the cabinet
(for sandwich/salad units) and 3
3/4" from the front (for pizza prep
units) rivnut will strip out.
__________ STEP 3 __________
a. Using the predrilled holes of the
service shelf as a template, place
a pencil mark in each of the
mounting holes.
b. Remove the service shelf.
c. Lightly punch a starter mark and
drill a pilot hole in each of the
two mounting areas. (be careful
not to drill beyond an inch and
three quarters.
d.Using a 11/32" drill bit, complete
the hole.
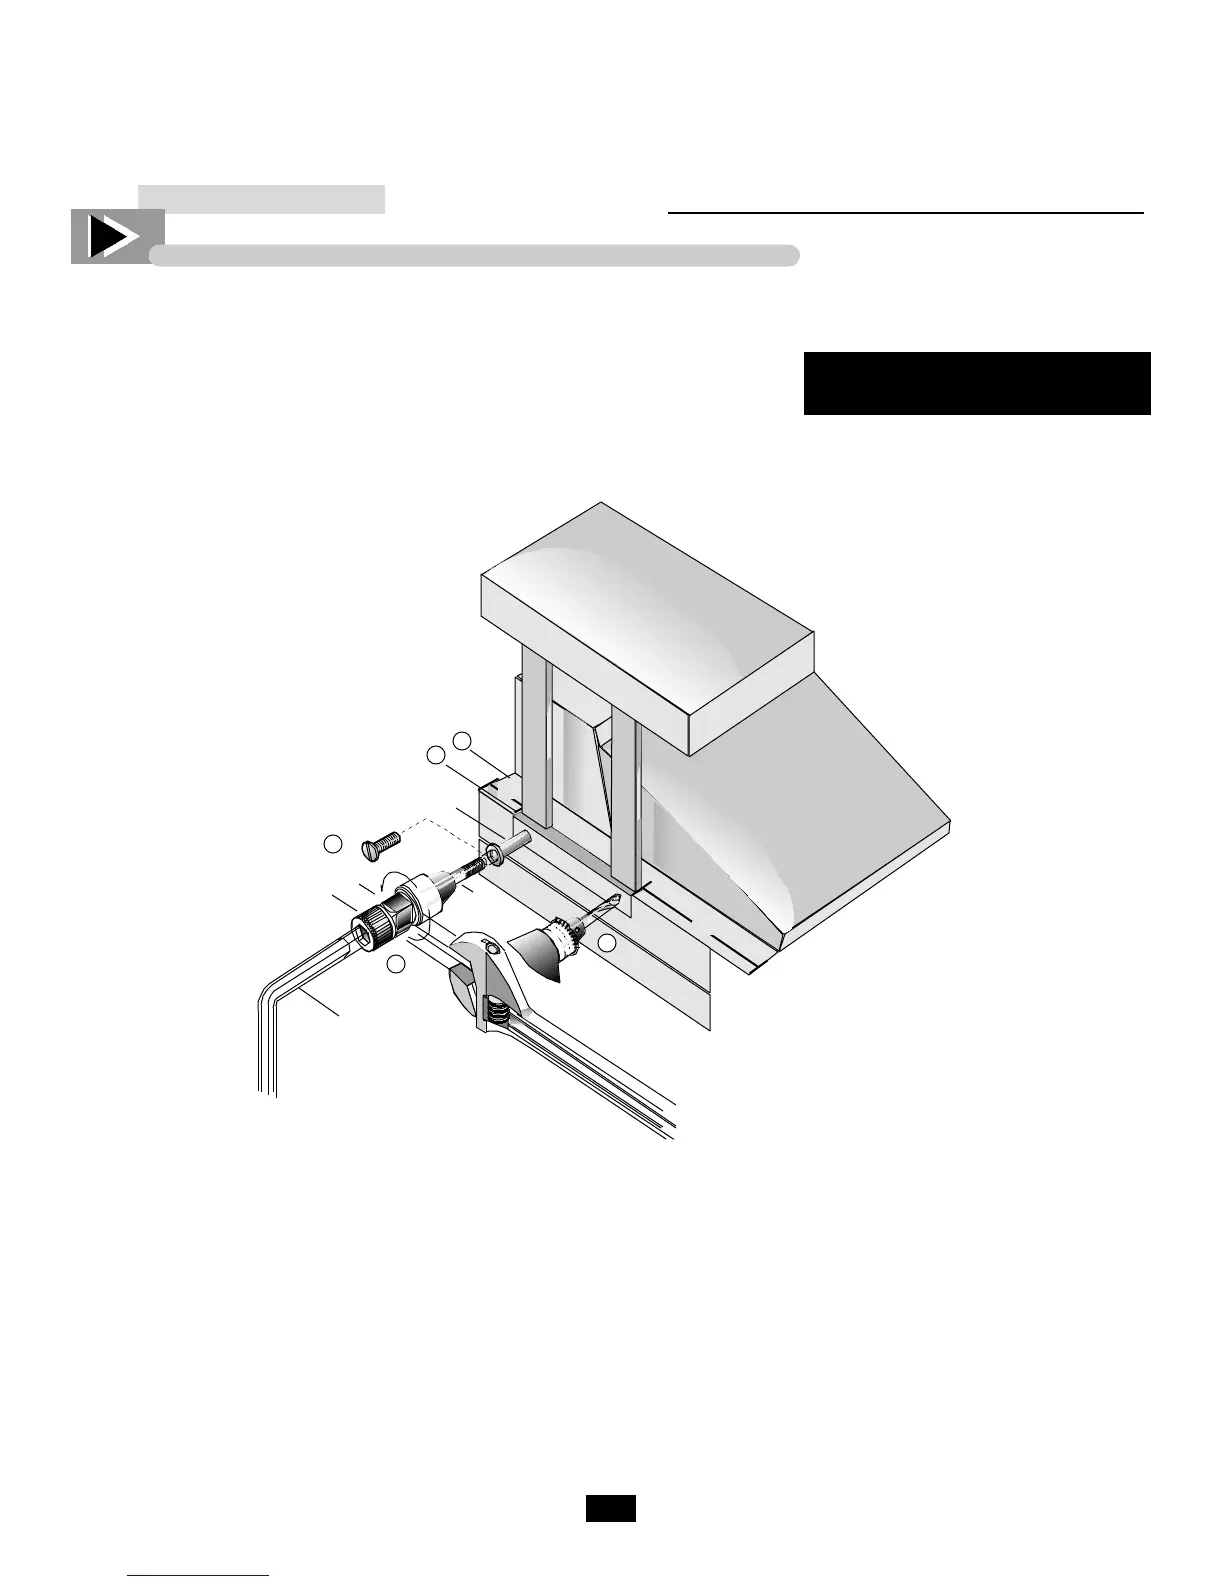
__________ STEP 4 __________
a.Thread the 1/4 - 20 rivnut on the
pull-up stud of the rivnut tool
until tight and insert into drilled
hole.
b.Place hex wrench in the socket of
the jackscrew and hold stationary.
CAUTION
Do not turn hex wrench or rivnut
will strip out.
__________ STEP 5 __________
c.Turn hex nut in a counterclock-
wise direction, two full turns,
with a wrench while holding tool
at right angles to the work area.
d. Break nut loose with a
clockwise movement, and
remove both wrenches from
the tool.
e.Remove rivnut tool
from the rivnut by
revolving entire
tool in counter-
clockwise direction.
__________ STEP 6 __________
FINAL POSITIONING -
a.Remove masking tape, and
replace shelf. Seal bracket if
required.
b.Align mounting holes of shelf
with rivnut holes and screw 1/4
- 20 round head bolts into
threaded rivnuts.
Figure 1.

 Loading...


