50
INSTALLATION INSTRUCTION
Replacing Temperature Controls in GDM-7, GDM-10, and GDM-12 Models
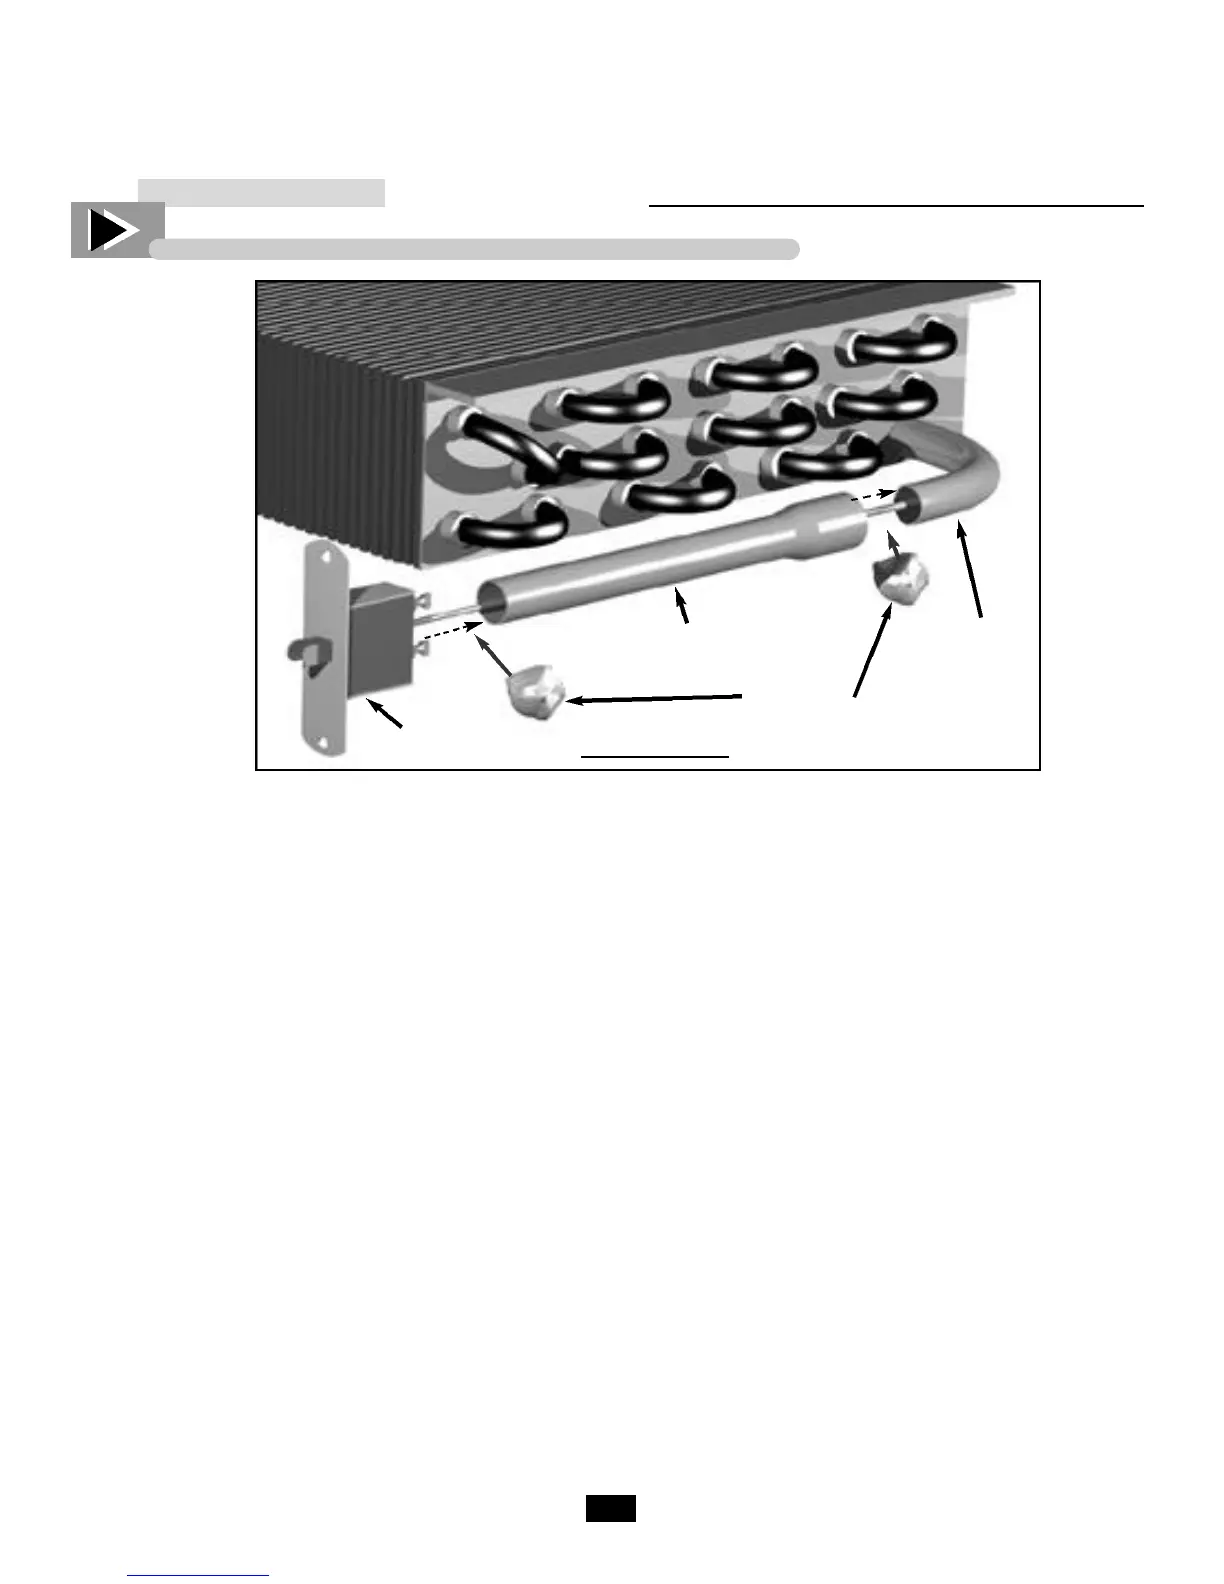
Standard
Copper
Sleeve
New Copper
Sleeve Extension
Temperature
Control
Evaporator
Permagum
F
r
o
n
t
o
f
C
o
o
l
e
r
___________ STEP 1 ___________
Unplug Cooler and turn temperature
control to “off” (0˚) position.
___________ STEP 2 ___________
Pull off the black control knob from
the control.
___________ STEP 3 ___________
Remove the mounting plate from the
evaporator housing.
___________ STEP 4 ___________
Remove the temperature control from
the plate and disconnect the 2 wires.
___________ STEP 5 ___________
Remove the lamp from the front of the
cooler and remove the front panel.
___________ STEP 6 ___________
Reach in to the side of the evaporator
coil and remove the permagum from
around the control bulb. Then remove
the old thermostat control bulb from
the sleeve completely.
___________ STEP 7 ___________
Insert the new thermostat control bulb
into the new copper sleeve exten-
sion until about 1/2 inch protrudes
from the swaged end. Using a low
temperature lubricant on the control
bulb is advisable.
___________ STEP 8 ___________
Using the protruding end of the con-
trol bulb as a guide, insert it into the
copper sleeve (elbow) in the rear of
the evaporator. Then push the sleeve
extension over the end of the elbow to
lock the two
tubes together.
___________ STEP 9 ___________
Gently push the control bulb through
the joined sleeves in 1-2 inch incre-
ments until it reaches the end inside
the evaporator, taking care not to kink
the line.
___________ STEP 10 ___________
Seal both ends of the new control
sleeve with permagum to keep mois-
ture out.
___________ STEP 11 ___________
Remove the mounting plate from the
evaporator housing.Connect the 2
wires to the new control, the control to
the mounting plate, the plate to the
cooler, and replace the control knob.
___________ STEP 12 ___________
Turn the control knob to the #5 set-
ting.
___________ STEP 13 ___________
Reassemble front of cooler and plug it
in.

 Loading...


