The pro c e d u r e listed below will enable you
to create a frame around the end panel and
will secure your new replacement panel.
REQUIRED TOOLS
• 1/2" drill
• Rivet tool
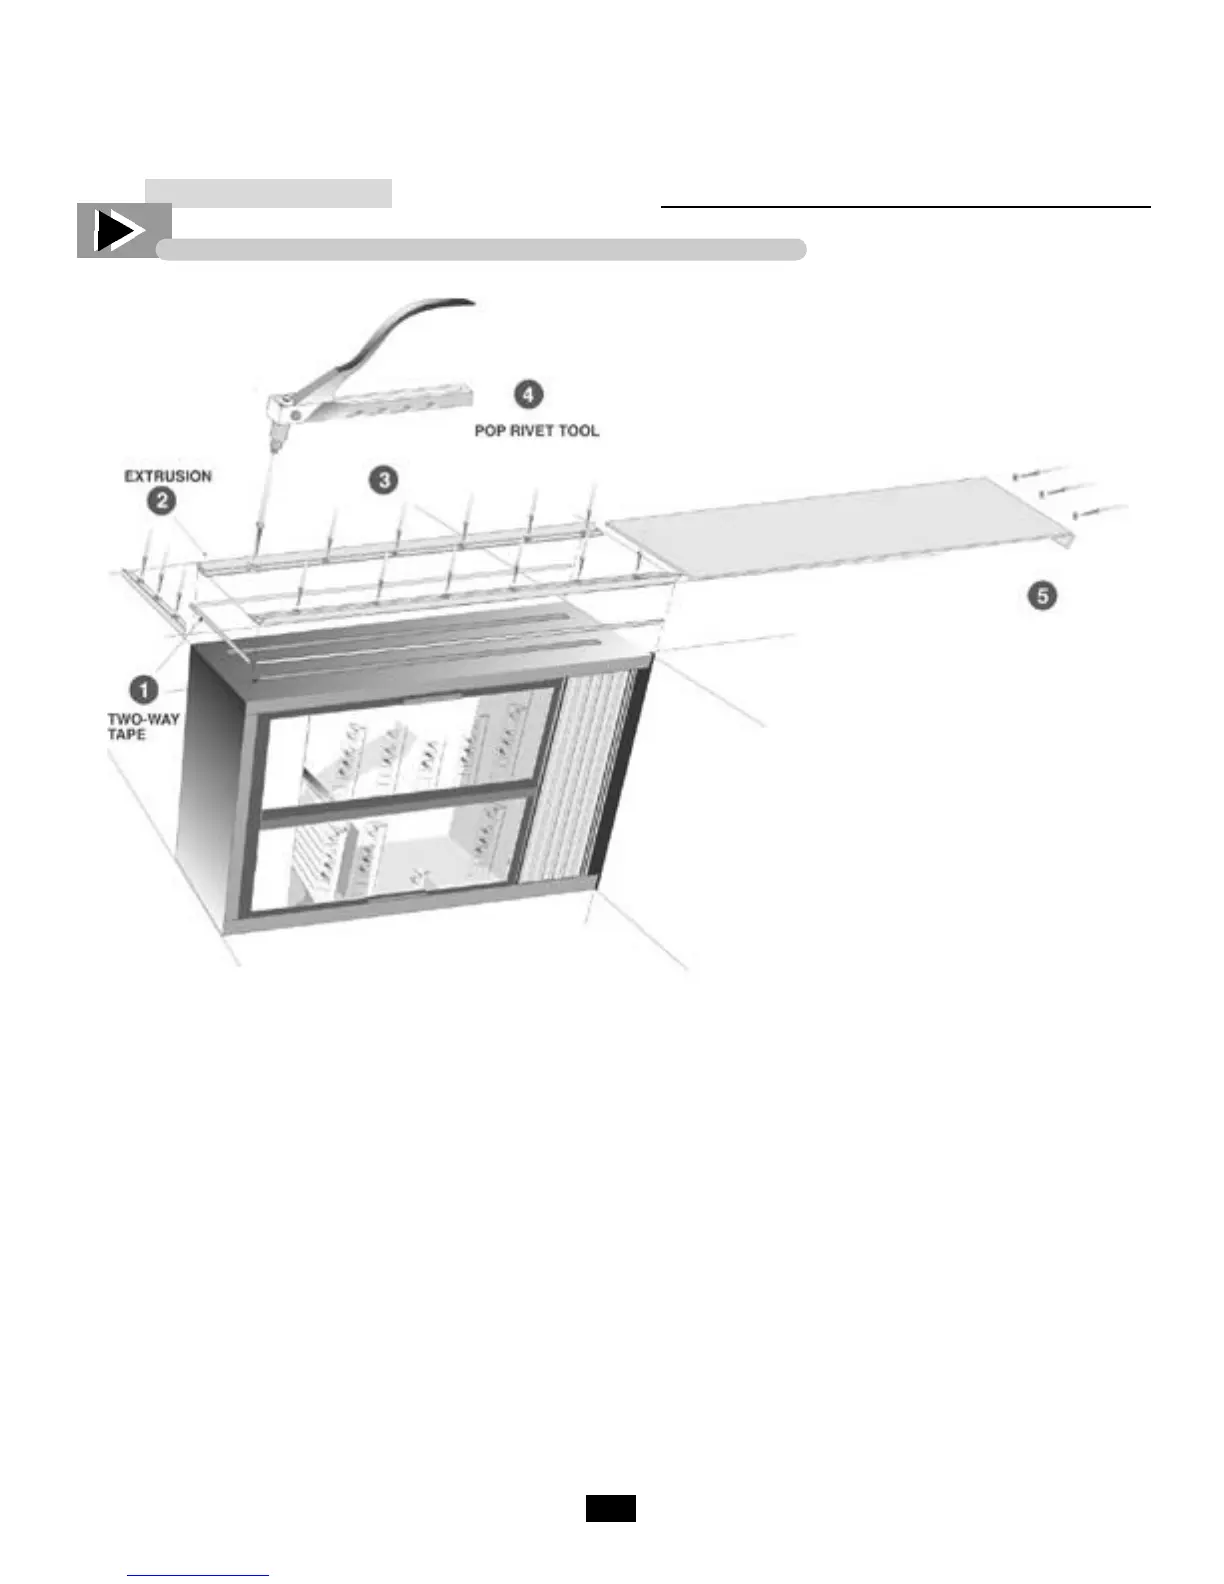
____________ STEP 1 ____________
Peel backing on two-way tape and attach
as indicated in figure 1. Apply tape in two
areas as shown. this will secure replace-
ment panel when inserted into frame.
____________ STEP 2 ____________
Peel backing away from two-way tape and
secure to black plastic extrusion. Peel
other side of tape and adhere extrusion to
panel in the three locations indicated.
____________ STEP 3 ____________
For the two longest extrusions, drill six
holes. (1/2" deep), through both the extru-
sion and the cooler end panel. Drill three
holes into the top extrusion and into the
cooler top. Place at equal distance.
____________ STEP 4 ____________
Anchor all three plastic extrusions with
poprivets. (6 poprivets for the sides and
three for the top panel.)
____________ STEP 5 ____________
Slide replacement panel into newly created
frame and anchor bottom flange with three
poprivets.
Figure 1.
INSTALLATION INSTRUCTION
SIDE PANEL REPLACEMENT - GDM-33C-PT

 Loading...


