87
KIT CONTENTS
• Clear Plastic Shield, 1 ea.
• Supports, 2 ea.
• 1/4-20x1-1/2" Hex Head Bolt, 4 ea.
• 1/4" Flat Washer, 4 ea.
• #8-32 Knurled Waferhead Screw,
4 ea.
REQUIRED TOOLS
• 7/16 Wrench
INSTALLATION
___________ STEP 1 ___________
Place one flat washer on each of the
1/4-20" hex head bolts.
___________ STEP 2 ___________
Insert one 1/4-20 x 1-1/2" bolt into
each of the two holes on the support
component and position the support
next to the two threaded inserts that are
mounted to the outer edge on the back
of the TSSU cabinet.
___________ STEP 3 ___________
Screw the bolts into the threaded
inserts until they are hand tight.
___________ STEP 4 ___________
Repeat steps 2 and 3 for the remaining
support components which will be
mounted to the other end of the cabinet
back.
___________ STEP 5 ___________
Remove the protective covering from
the clear plastic shield so that it rests
on top of the two support components.
Be careful not to scratch the plastic
shield.
___________ STEP 6 ___________
Secure the clear plastic shield to the
supports by installing the four #8-32
knurled waferhead screws into the
threaded inserts that are located; one
on the top, and one on the rear surface
of each support component. Hand
tighten these four screws.
___________ STEP 7 ___________
Adjust the two support components so
that they are positioned straight up,
and tighten the four 1/4-20 x 1-1/2"
hex head bolts until the support com-
ponents are held firmly in position.
CLEANING AND CARE
The support components are
made of stainless steel and may
be cleaned with any food service
stainless steel cleaner.
The clear plastic shield should
be cleaned only with mild soap,
warm water and a soft cloth.
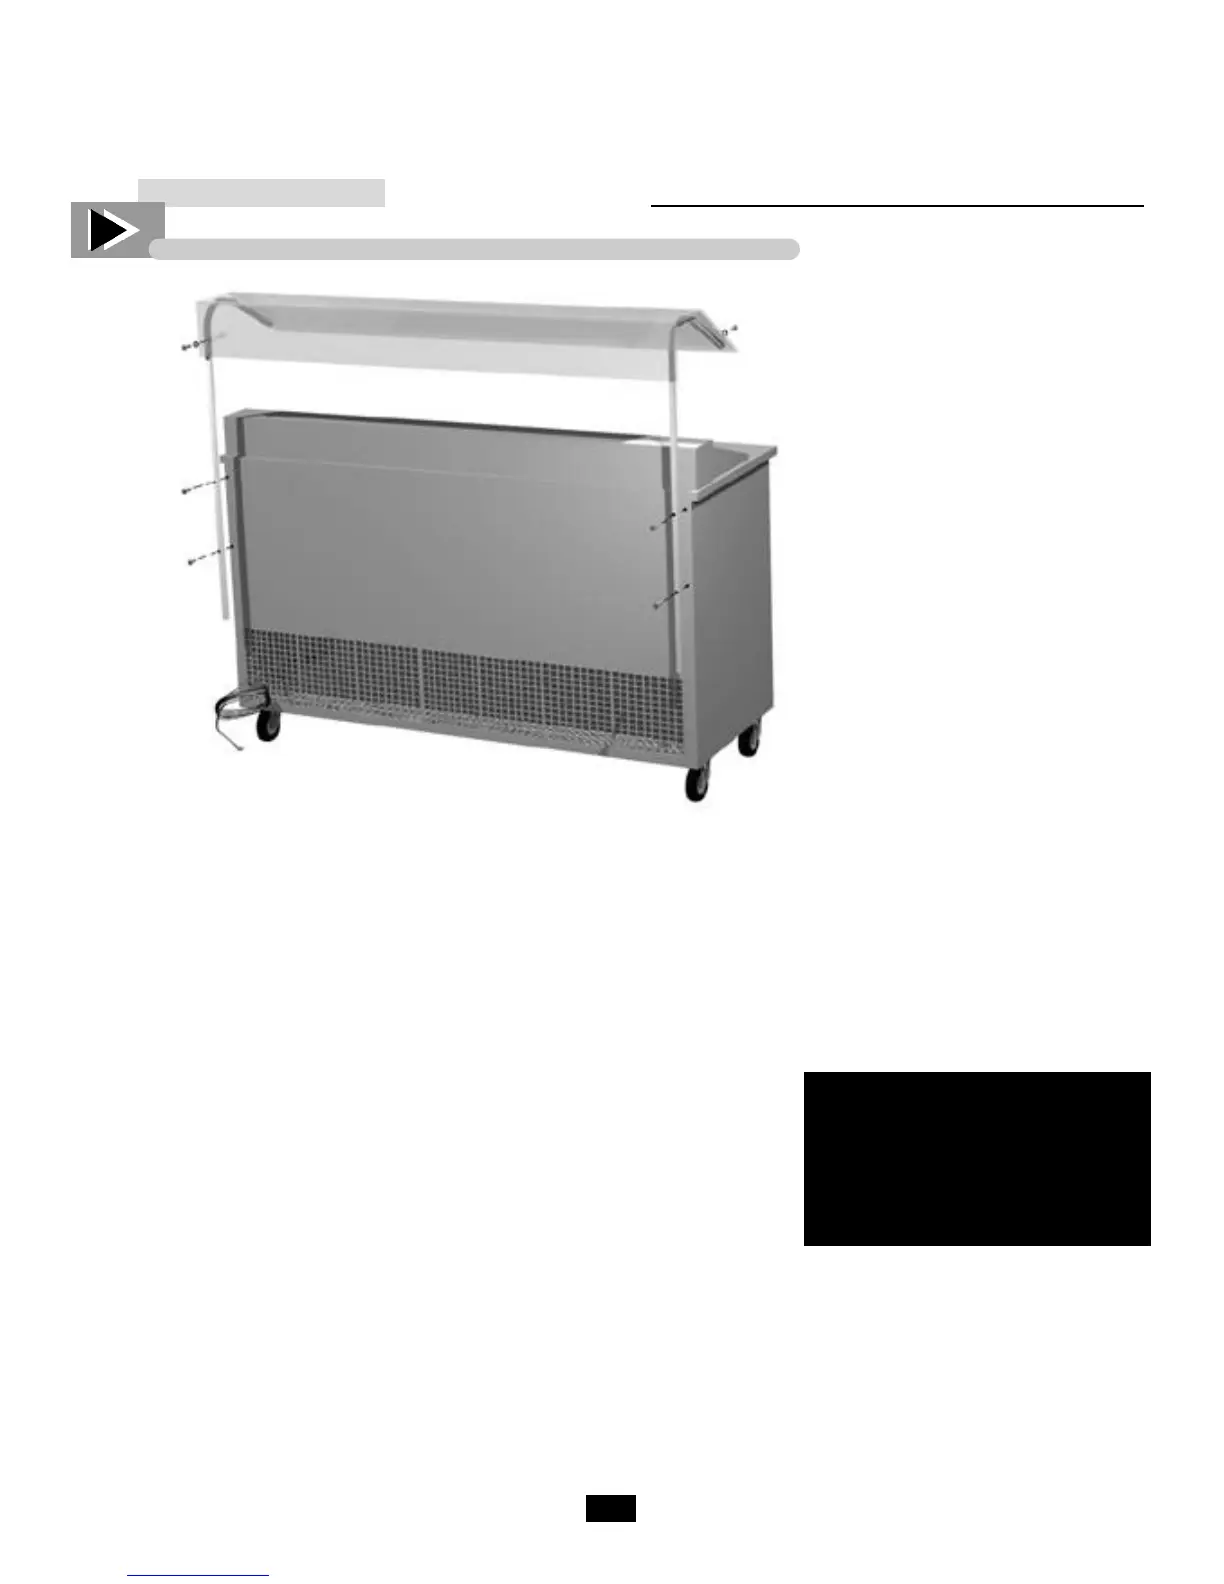
Figure 1.

 Loading...


