___________ STEP 5 ___________
Remove all 4 anchor screws from lou-
vered grill and remove grill.
NOTE:
If cabinet is equipped with
integrated door light be sure to
unplug from ballast box.
NOTE:
Freezer doors have heater wires
which must be unplugged before
doors can be removed.
___________ STEP 6 ___________
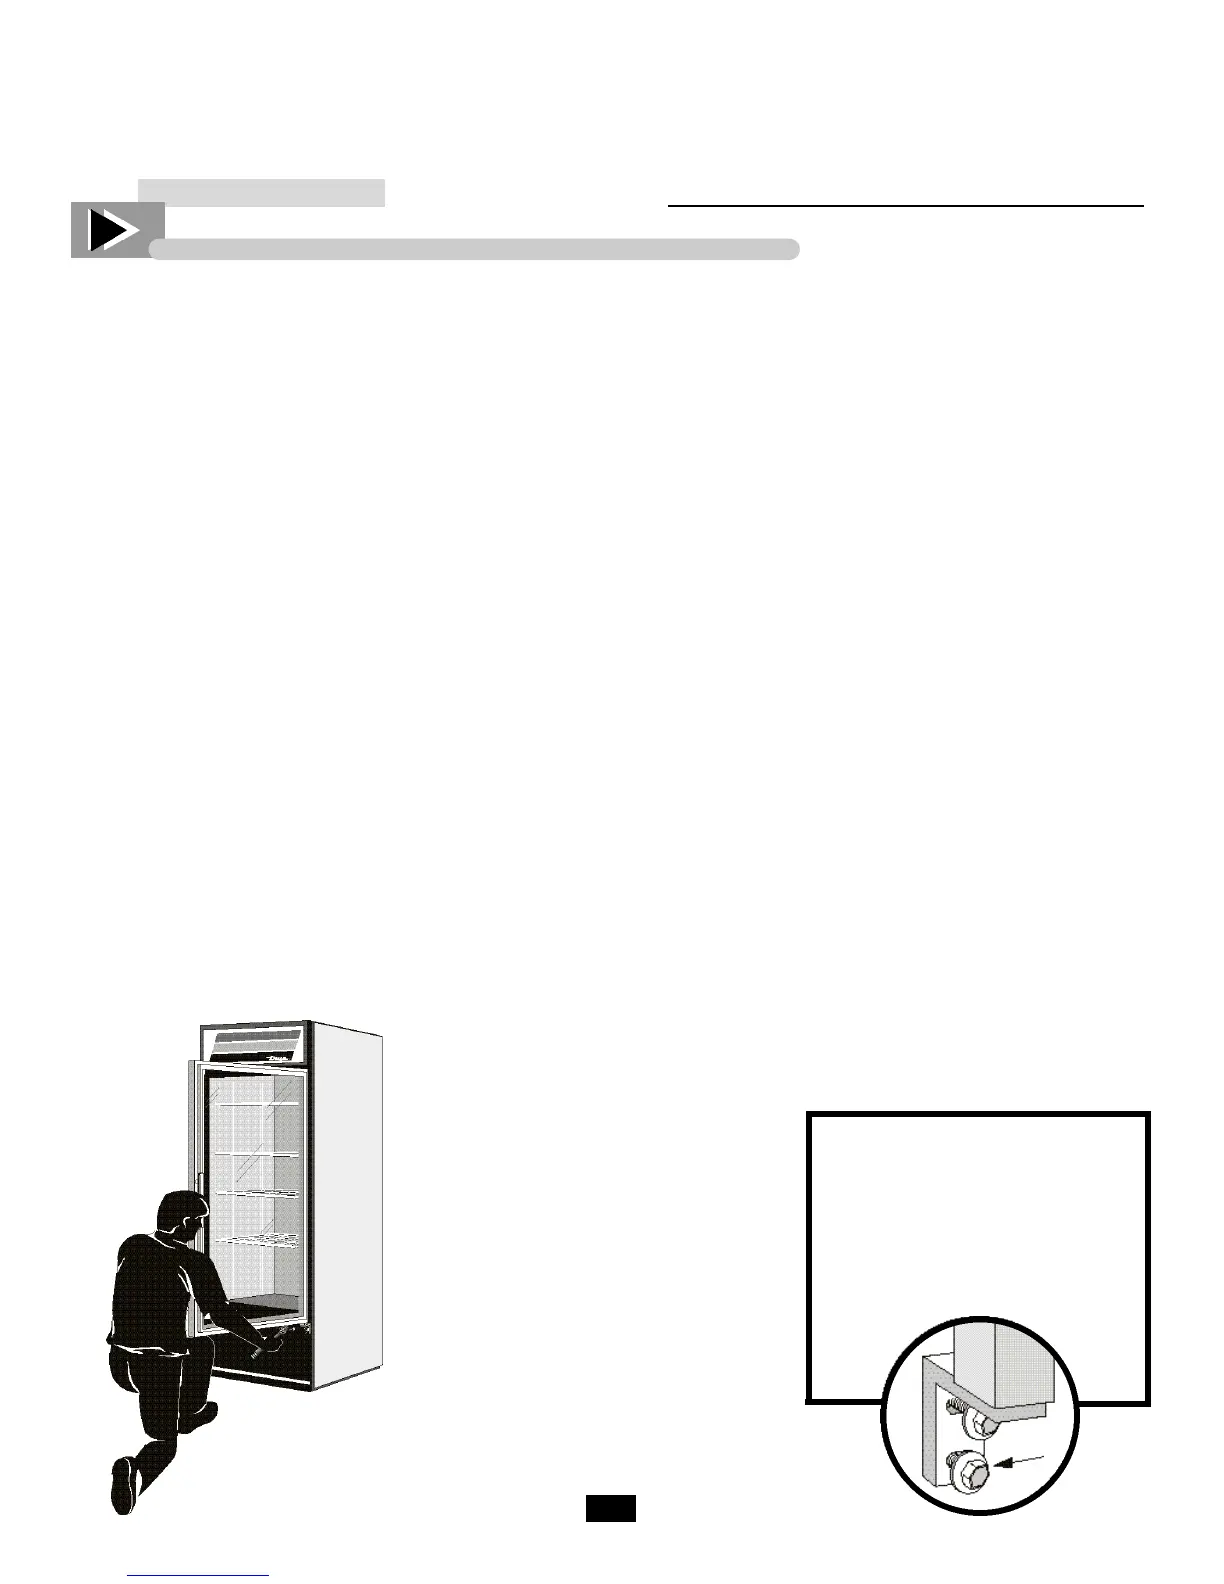
In a squatted position rest the bottom
of the open door on your left knee (for
right side door) as you face the outside
of the door. Create an upward pressure
and remove the two 3/8" bolts from the
bottom hinge assembly. Remove the
bottom hinge assembly. (figure 2)
___________ STEP 7 ___________
Remove the door and carefully place
door on a flat surface.
___________ STEP 8 ___________
Remove upper and lower brass bush-
ing from from the top and bottom of
door with a slotted screwdriver or nee-
dle-nosed pliers if, required.
NOTE:
It may be necessary to verify stop pin
location and door block material
for some models.
Or call 800-325-6152.
__________ STEP 9 ___________
Using a needle-nosed pliers, remove
the broken torsion spring from the bot-
tom of the door.
___________ STEP 10 ___________
Insert the new spring from the top of
the door ensuring that the end hooks
into the cross in the bottom door block.
The gap in the hook should be wide
enough to snugly fit.
___________ STEP 11 ___________
Assemble top hinge.
Place the hinge washer over the door
hinge shaft, slide into brass bushing
and fit into aluminum door block. (fig-
ure 1)
NOTE:
The slot at the base of the hinge
shaft must seat over the head of the
door hinge spring.
___________ STEP 12 ___________
Assemble bottom hinge.
Place the hinge washer over the bottom
hinge bracket, replace the thrust bear-
ing over the washer, slide this assem-
bly into the brass bushing and fit into
aluminum door bracket.
___________ STEP 13 ___________
While holding bottom hinge in place
lift door and slide top door hinge
together. Maintain vertical pressure by
resting door bottom on your knee
while squatting, or have someone
assist in order to re-attach lower hinge
to cabinet. Fasten hinge with 3/8"
bolts and washers.
___________ STEP 14 ___________
Adjust the spring tension by turning
c o u n t e r-clockwise (right door) to the
desired tension (approx. 1/2 turn).
Again use a 1/8" drill or drift punch to
adjust and replace stop pin.
NOTE:
If cabinet is equipped with
integrated door light be sure to
plug into ballast box.
NOTE:
Freezer doors have heater
wires which must be plugged
in before operation.
___________ STEP 15 ___________
Replace louvered grill and secure with
four screws.
Figure 2
To adjust door hang -
Loosen bolts from bottom hinge
assembly and lightly tap with plastic
or
rubber hammer.
When door hangs true with
cabinet, tighten bolts.
INSTALLATION INSTRUCTION
TORSION SPRING REPLACEMENT - SWING DOOR ...Continued

 Loading...


