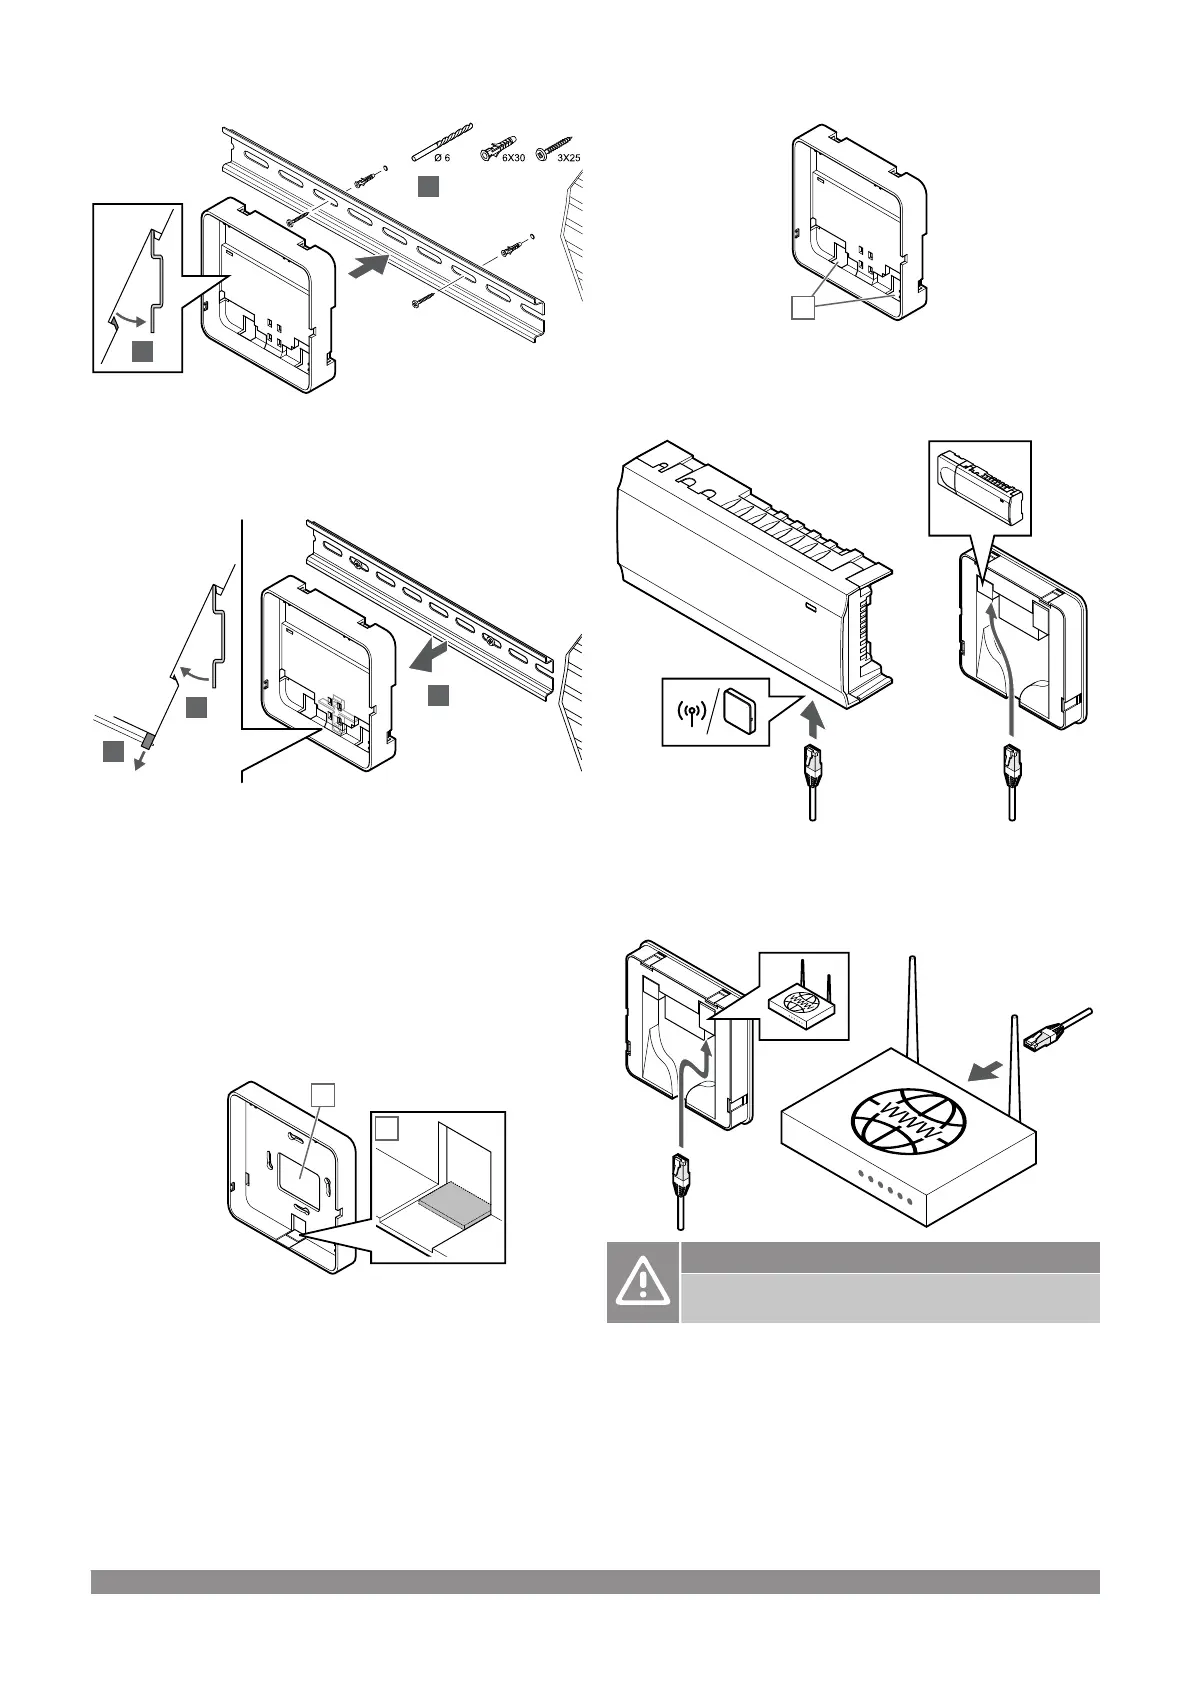
Using DIN-rail
1. Fasten the DIN rail to the wall using the screws and wall plugs.
2. Snap the optional communication module DIN-rail back mount to
the DIN rail.
Remove from DIN-rail
1. Use a screwdriver (or similar) and extend the springy plastic
catcher from the communication module back mount.
2. Angle the communication module back mount from the wall.
3. Remove the communication module back mount from the DIN
rail.
3. Route cables to communication module
The communication cable, and optional ethernet cable, is routed
differently to the communication module depending on which back
mount is being used.
Using standard back mount
Route cables to the communication module using one of two cable
entries.
A Back hole, mostly used when attached to wall box.
B Breakout plastic, mostly used when attached to a wall. Remove
the breakout plastic before mounting the back mount to the wall.
Using DIN-rail back mount
Route cables to the communication module using the cable entries
(A).
4. Connect the communication cable
Connect the supplied communication cable to the communication
module and room controller.
5. Connect the optional ethernet cable
Caution!
DHCP (IP address assignment) must be activated in the
router.
Connect an ethernet cable to the communication module and the
router.
This option is recommended if Wi-Fi is not available, or if the
communication module is placed in a location with poor Wi-Fi
reception.
Uponor Smatrix Wave PULSE
|
Installation and operation manual
|
25

 Loading...