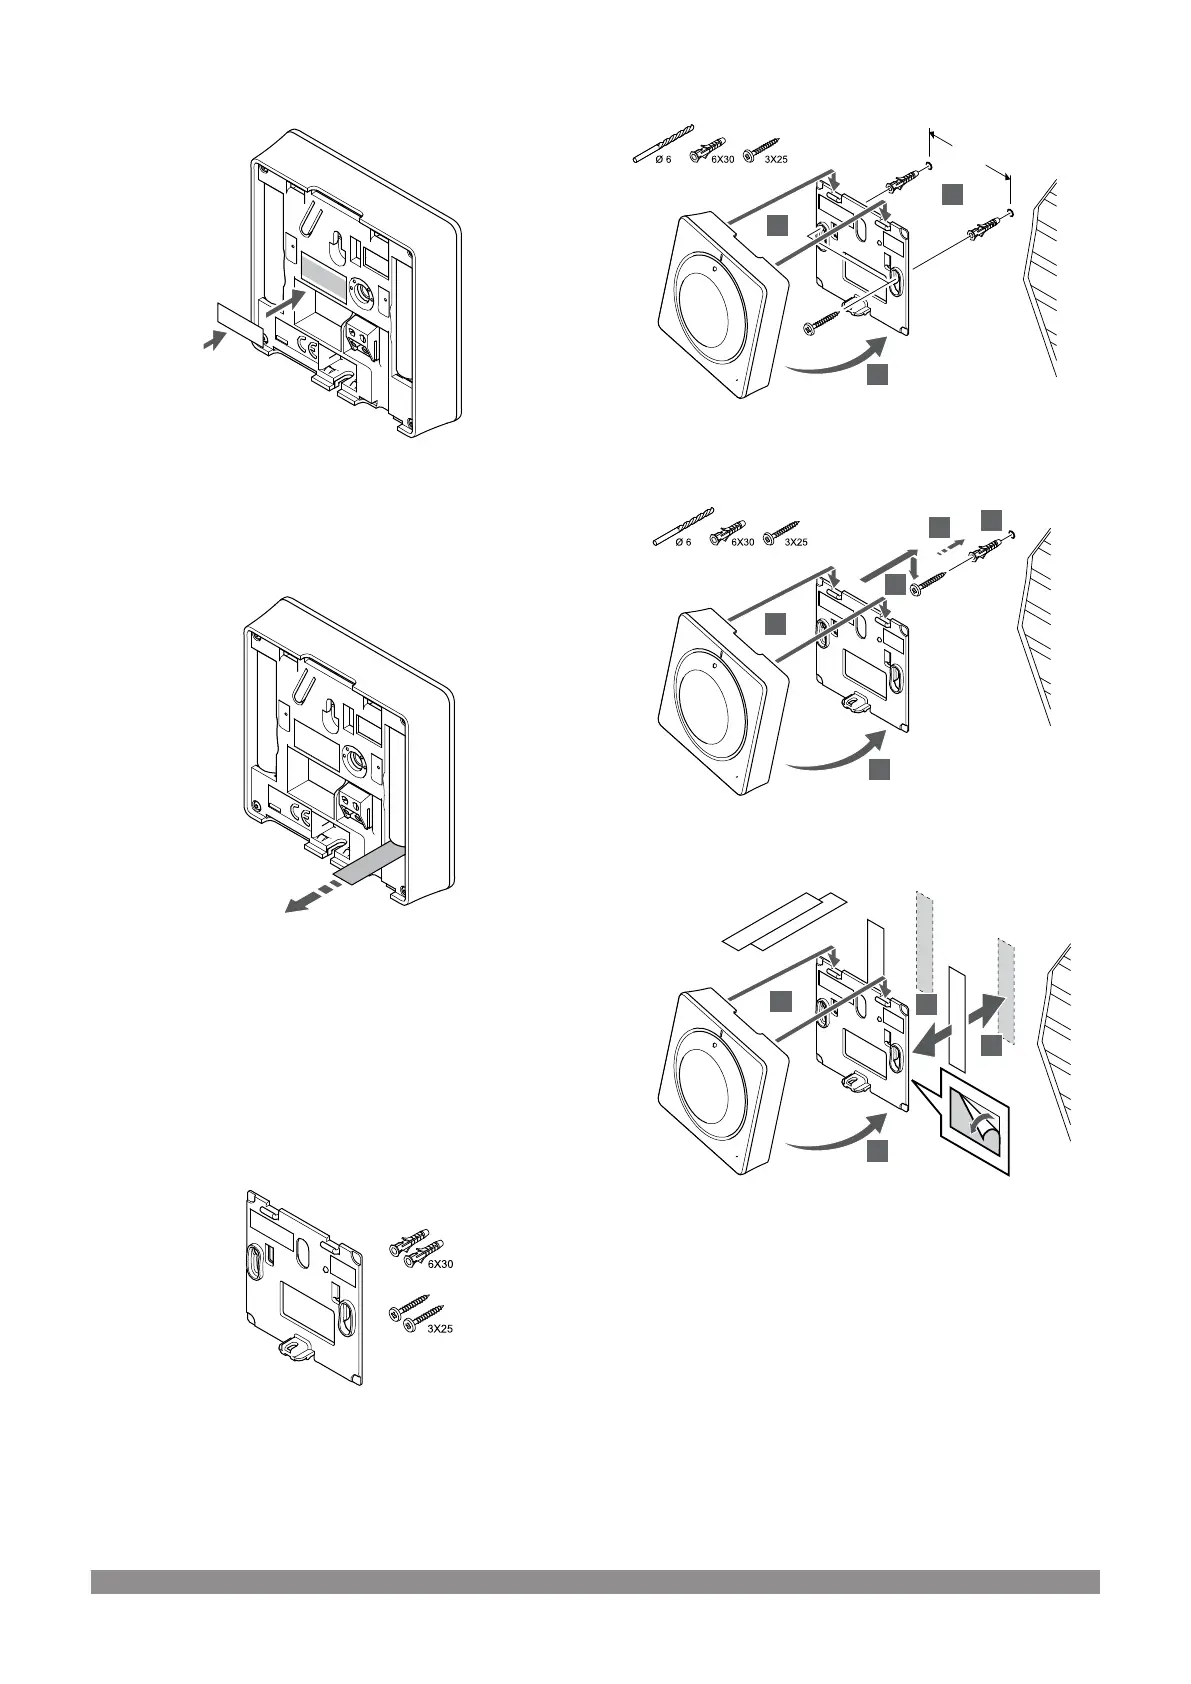
Label thermostat
Label the thermostat, where suitable, with the channel numbers they
are to control, for example, #02, #03. For a system with several room
controllers, add the ID of each room controller, for example, 1.02,
1.03, 2.02, 2.03.
Start the thermostat
Remove the plastic transportation strips from the batteries to start the
thermostat.
The thermostat use two alkaline 1.5 V AAA batteries which provides
about 2 years of battery life, as long as it is positioned within radio
range of the room controller. Ensure that the batteries are correctly
inserted in the thermostat.
The thermostat will perform a self test, for about 10 seconds, when
starting up. The system will be blocked for input and the thermostat
LED flashes during this period.
Attach thermostat to the wall
The thermostat is delivered in a kit with screws, wall plugs, and a wall
bracket, presenting several options of attaching the thermostat to the
wall.
Wall bracket (recommended)
Attach the thermostat to the wall using the wall bracket, screws and
wall plugs.
Screw and wall plug
Attach the thermostat to the wall using the screw and wall plug.
Adhesive strip
Attach the thermostat to the wall using the wall bracket and adhesive
strips.
40
|
Uponor Smatrix Wave PULSE
|
Installation and operation manual
 Loading...