VEMCO – VR100 Manual 28 May 2018 6
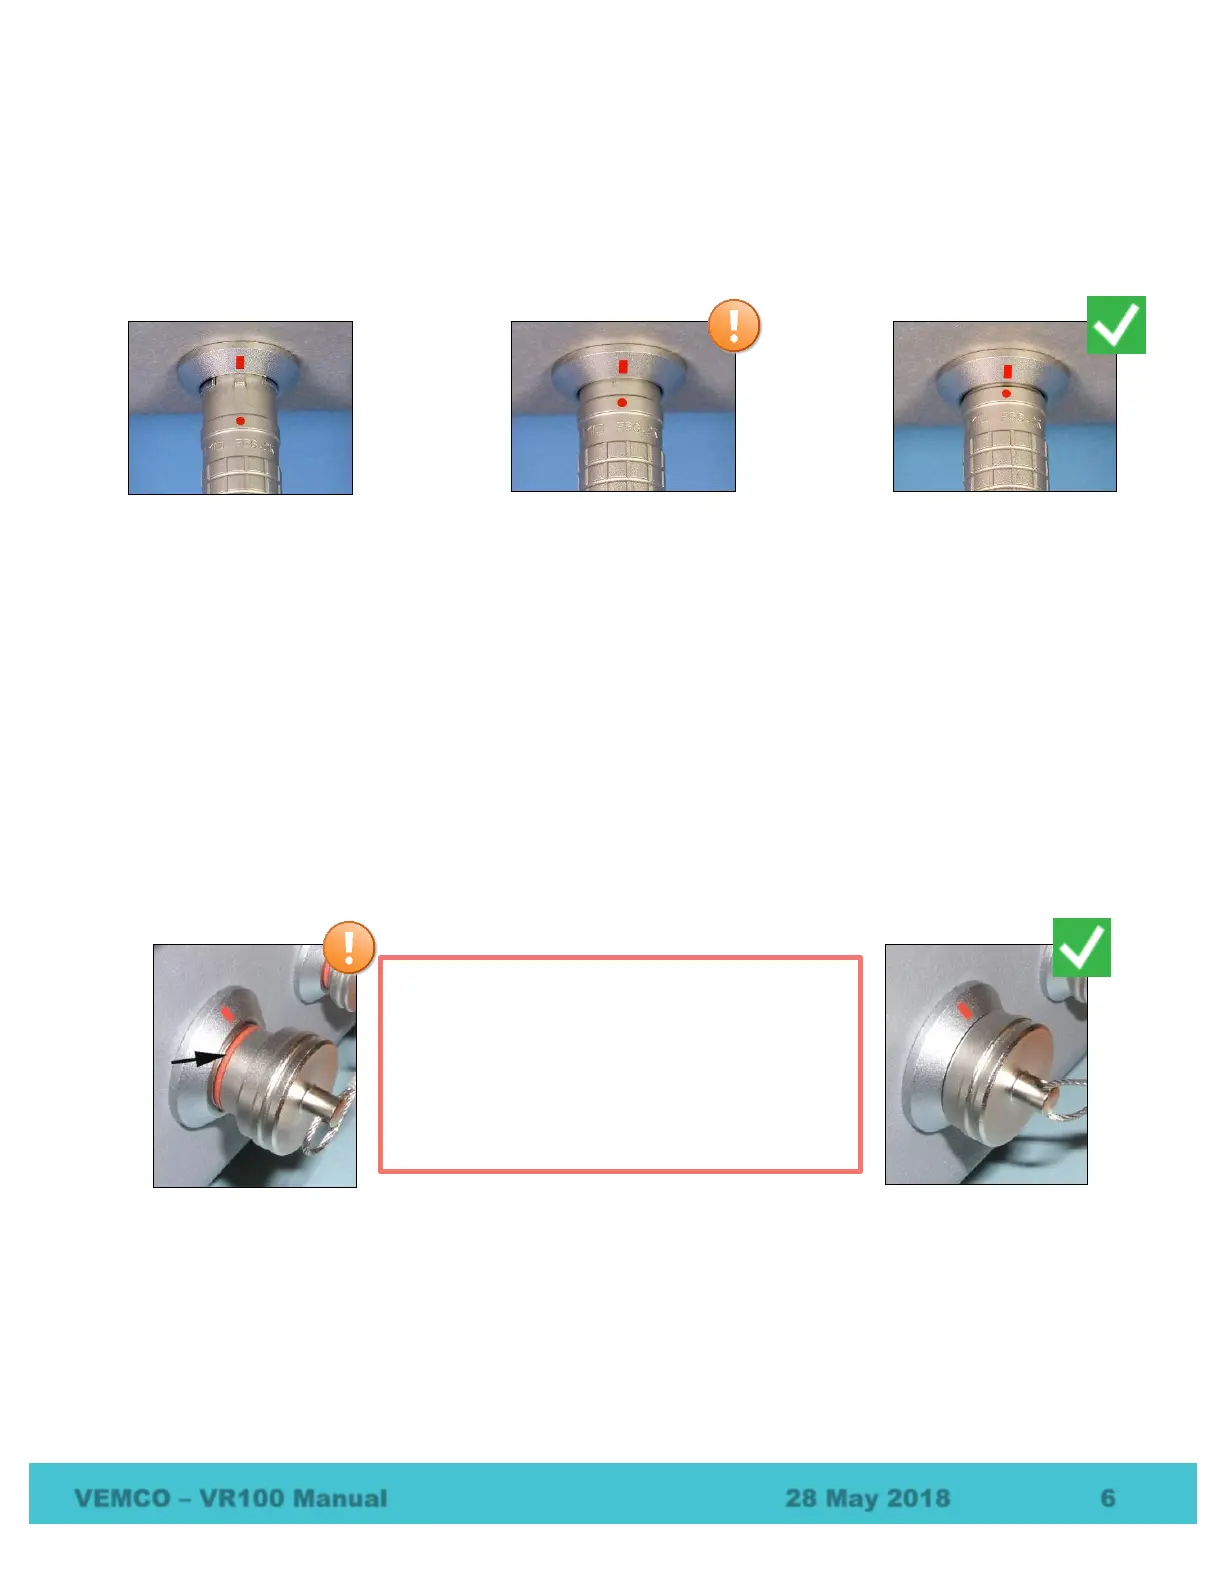
1.5.2 Inserting a connector
The red dot on the end of the connector must line up with the red line on the VR100’s connector, as shown in
the photo on the right. The connectors have unique grooves to prevent the wrong connector halves from
being placed together.
Line up the connector red dots, then gently but firmly push the connector in until it can go no further.
1.5.3 Installing protective caps
The connector’s protective cap is used to prevent water from entering the connector and damaging the
connector and possibly the receiver. With the cap properly in place, the VR100 is extremely splash-resistant.
To properly install a connector protective cap:
1. Select the proper cap. The caps are in two sizes, small and large:
a. The small caps are for the PC communication connector and the headphone connector.
b. The large caps are for the hydrophones and the battery charger.
2. Check that the O-ring on the cap (identified below) is clean and undamaged.
3. Insert the cap into the connector on the side of the VR100 case.
4. Press the cap into the connector until the lip of the cap is in contact with the connector ring on the VR100
case.
5.
Connector protective cap
–
not properly inserted
in connector (o-ring still
visible).
Connector protective cap
– properly inserted in
connector.
To protect against water damage and
corrosion, all protective caps must be in
place on the receiver and associated
accessories when not in use. The VR100
connections are considered watertight ONLY
when protective caps are in place or
components are properly mated.
Connector properly lined
up.
Connector inserted only
halfway.
Connector fully inserted.
 Loading...