VEMCO – VR100 Manual 28 May 2018 19
7. Review the summary screen to verify that the information is correct.
8. Press the right selection button for “Accept”.
9. Select the channel to be set up by either using the up/down arrows or pressing the corresponding
number on the keypad.
10. Press the left selection button for “Set on” to turn this channel on. If you don’t want to turn the
channel on at this time, perform steps 12 and 13 at a future time, or see section 2.3.5.
2.3.5 Turn a Channel ON
A channel must be turned on before it can be monitored (monitoring is
explained in section 4.2). To turn a channel on from the Main screen:
1. Select Config (see section 6.1.2.1).
2. Press “1” on the keypad.
3. Select the desired channel number on the keypad, or use the arrow
buttons to move the cursor to the desired channel (the curser is on the
“1” in the sample screen shown).
4. Select “Set On” by pressing the left selection button. An asterisk (∗) below the
channel number indicates that channel is on. In the screen shown at right, channels 2 and 5 are on.
A channel that is currently on is turned off by pressing the left selection button when the channel is
highlighted.
2.4 Testing
Before deploying tags, it is wise to test them with the VR100 to verify the
tags are operating properly and the VR100 is setup to detect them.
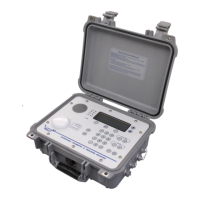
1. Turn on the VR100.
2. Select “Monitor” (left activation button).
3. Press the number of the keypad that correlates to the channel setup to hear this tag (see section 2.3).
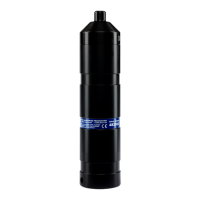
4. Activate the tag as explained in the information shipped with the
tag.
5. Place the tag near the VR100 hydrophone. For 69 kHz tags, place
the tag approximately 150 mm (6”) from the end of the hydrophone
as shown. A tag operating at 180 kHz should only be 50 mm (2”)
from the hydrophone.
6. Watch the Detection Indicator lights to see the selected channel
light flash. If the sound is enabled on the VR100, listen for the tag’s
pings.
7. Verify that the screen shows the tag has been correctly identified.
Perform air tests away from
electrical noise sources such
as motors, PC screens, or
fluorescent lights.
1 2 3 4 5 6 7 8
Asterisk indicates
channel is on
 Loading...