VEMCO – VR100 Manual 28 May 2018 44
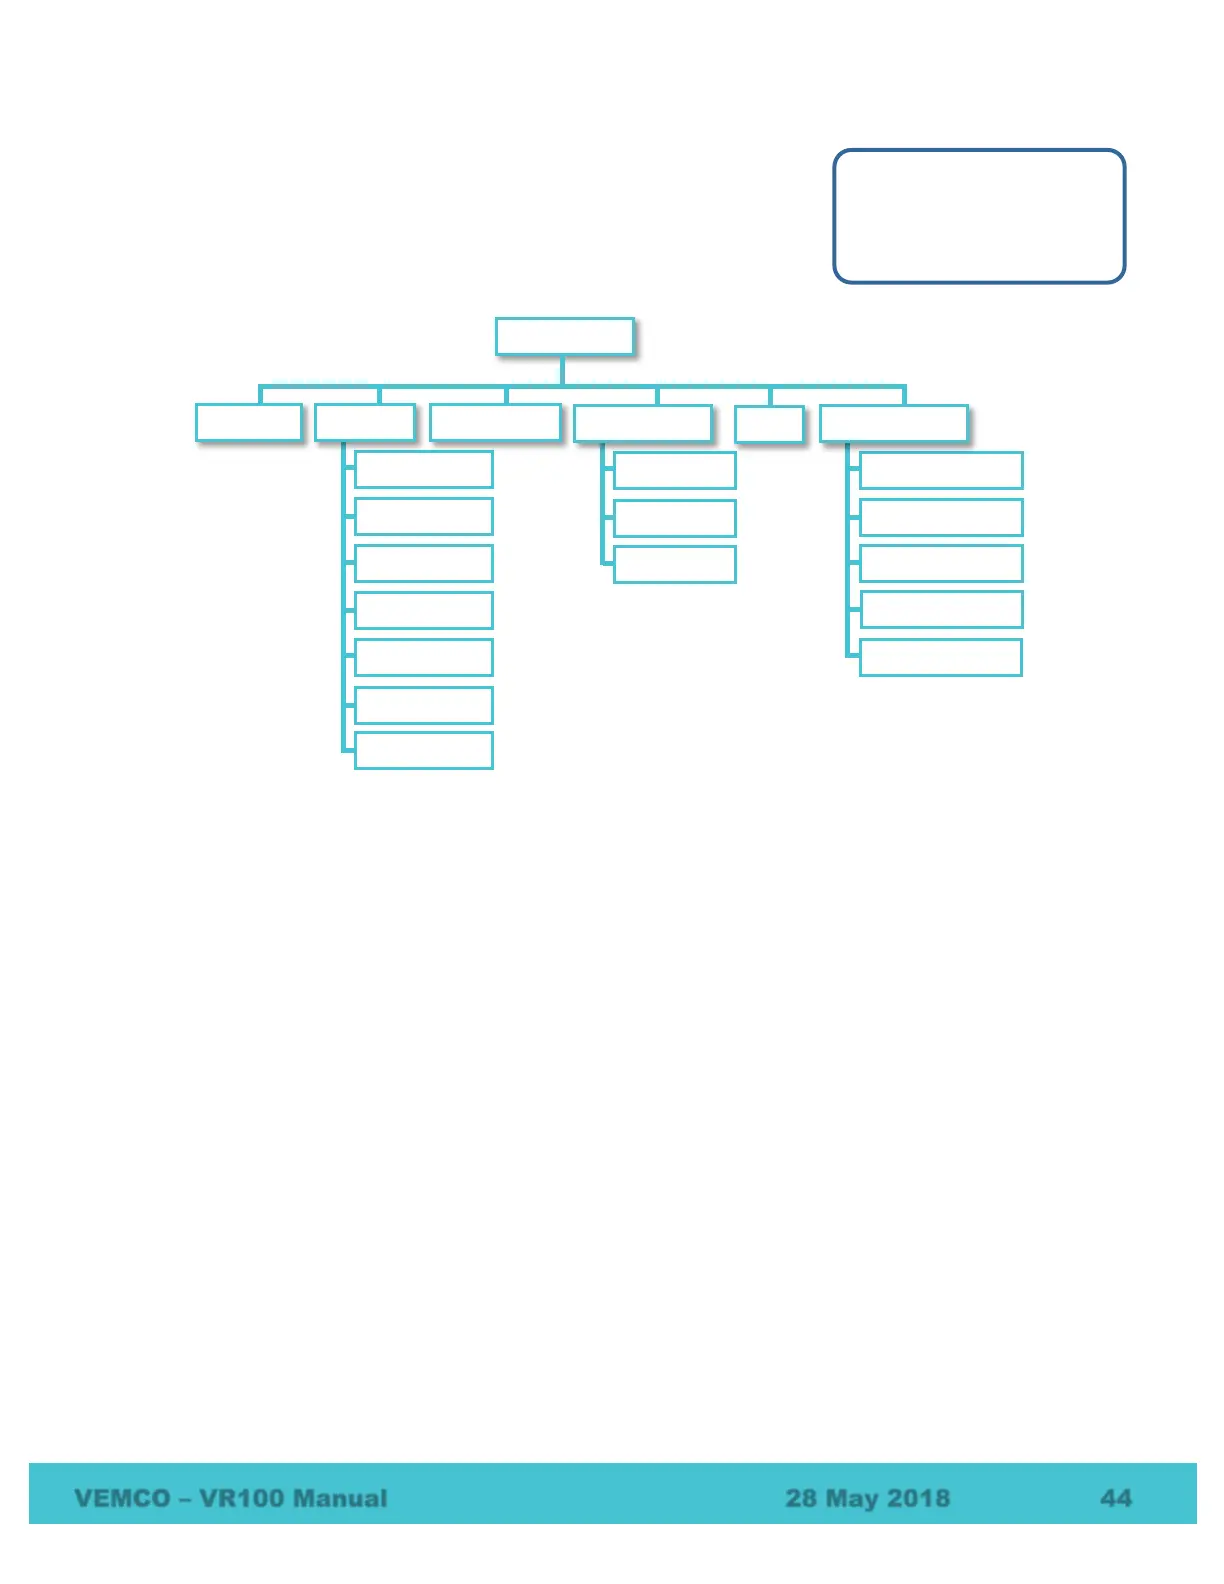
6.1.2 Configure Menu Structure
It is in the Configure menu that VR100 settings can be set, such as adjusting
the backlight, entering sensor tag information, or setting up a channel. The
structure of this menu is shown in the graphic below with explanations
following in this section.
1. Channel – Setup a channel (see section 2.3) or turn on an existing channel (see section 2.3.5).
2. System – setup or lookup VR100 hardware features
a. Time – select the UTC offset and local time (see section 2.1.2). More about time is found in section
6.7.
b. Contrast – allows the VR100’s screen contrast to be adjusted for better viewing
c. Backlight – backlight can be set to be on, off, or Smart. The Smart option turns the backlight on for
five seconds when a button is pressed on the keypad (see section 2.1.5.1).
d. Battery – view the status of the battery, including the voltage level (see section 4.3.1).
e. Units – select the units displayed with sensor data (see section 2.1.3).
f. Version – The version sub-menu contains information pertaining to this particular receiver, such as
the serial number and the firmware version number. This information is only needed if it is requested
during your communications with VEMCO.
g. Restore Def – restore the VR100 to the factory default settings. This removes all sensor tag settings
and clears the channel configurations. A confirmation window will appear to verify that this is the
desired action before the receiver is reset. This also restores default transponding parameters and
resets the transponding session (i.e. clears the list of found receivers). Do not perform other tasks on
the VR100 while the settings are being returned to the factory default values (approximately eight
seconds).
3. Coded Maps – view the codes spaces supported by each coded map. Coded maps and code spaces are
discussed in section 7.1.
1 Channel
2 System
3 Code Map