VEMCO – VR100 Manual 28 May 2018 7
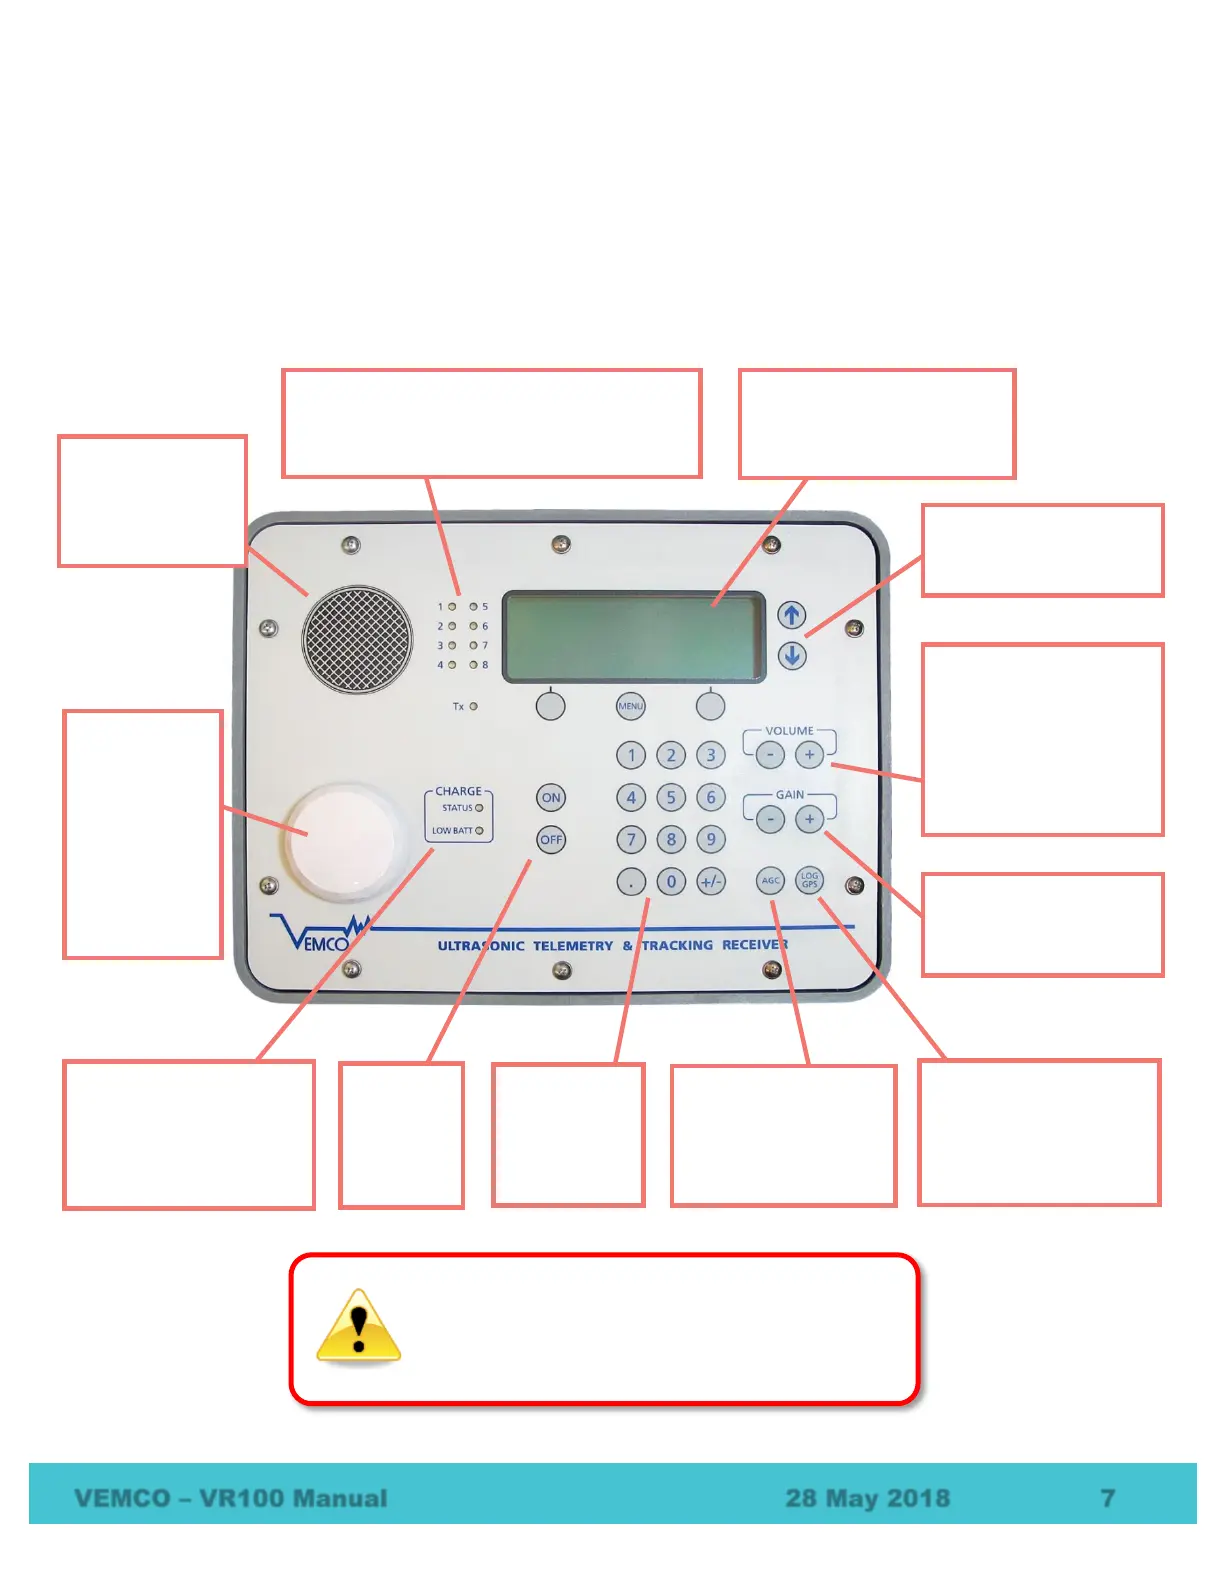
1.5.4 VR100 Front Panel
The VR100 receiver’s front panel allows the VR100 to be configured, allows deployed tags to be monitored,
and allows two-way acoustic communication with transponding receivers like the VR2AR – including
sending the release command. The panel uses soft press keys for all its data entry and controls, increasing the
receiver’s ability to operate in a moist environment. The soft buttons are easy to wipe clean but still give the
user a “click” that can be both heard and felt to verify the button has been pressed. The different aspects of
the VR100 front panel are identified in the photo below with brief explanations in the following sections.
Audio speaker:
broadcasts received
pings when in
Monitor mode
(section 4.2).
Detection indicators: these green lights flash
each time a ping is detected or transmitted. The
red “Tx” light is also on during transmitted pings.
Each light corresponds to a receiver channel.
buttons:
monitor tags and to configure
the VR100 (section 1.5.5)
the cursor through a
displayed list.
Volume control: increase
or decrease the volume of
the audio signal heard from
either the speaker or the
can be held down or
pressed repeatedly for a
Gain Controls: increase or
decrease the gain level in
steps of 6 dB (section
button and the next valid
GPS position is recorded to
the VR100’s memory
(section 7.2.5)
Gain Control” button
toggles between
automatic and manual
gain (section 4.2.3).
keypad: used
to enter
numbers
buttons:
turn the
VR100 on
or off.
indicators: these show
the status of the battery
charging process and
indicate when the battery
charge is low (section 5.2).
GPS antenna:
contained inside
the plastic
“puck” for
protection, it
receives GPS
signals when
the VR100 is
outdoors, even
with the case lid
closed.
Never remove the VR100’s front panel. There are
no user-serviceable parts inside. Removing the
front panel will void your warranty.
 Loading...