VEMCO – VR100 Manual 28 May 2018 73
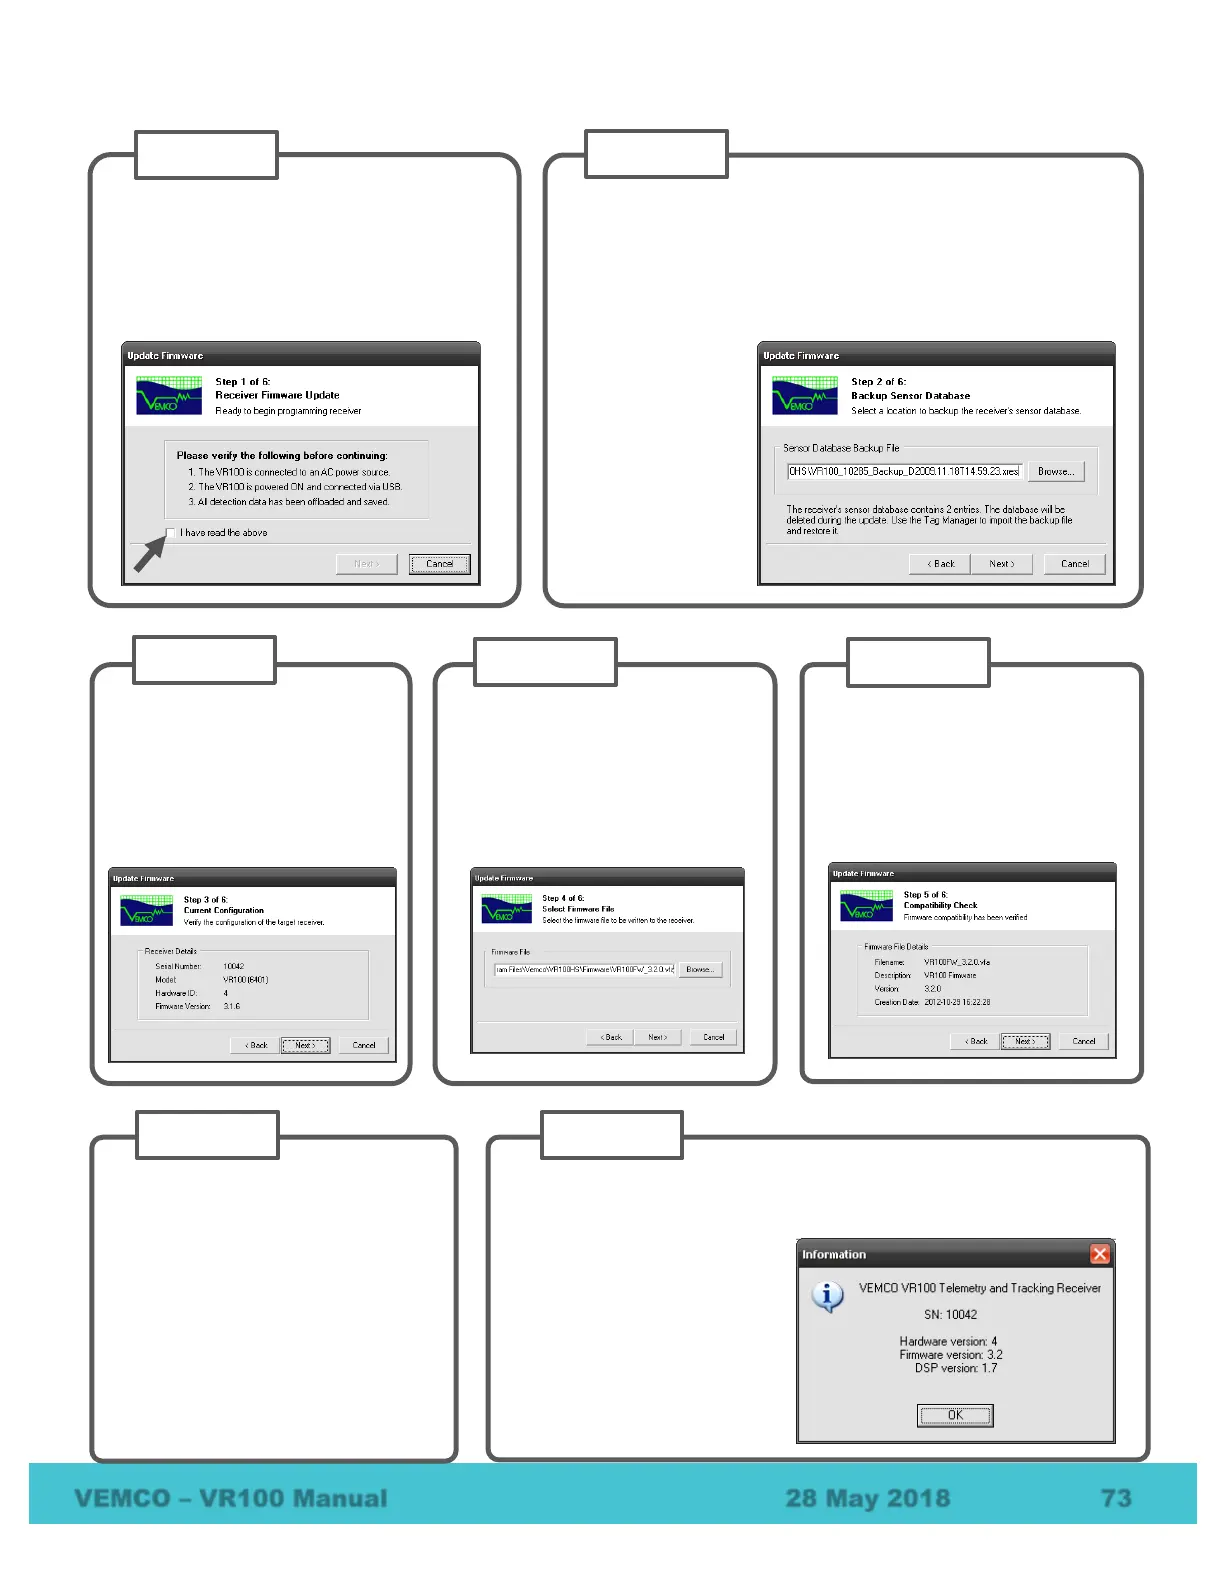
Confirm the current
configuration of the firmware
and hardware versions of the
VR100 receiver are displayed.
Click “Next” to continue.
Click the Browse button to
choose the new Firmware Image
file (.vfa). Only files with the
correct extension will be shown.
Click “Next” to continue.
Wait for the Compatibility Check
to pass. The VR100 software
tests the new firmware file before
it is sent to the VR100 receiver.
Click “Next” to continue.
Do not turn off receiver, disconnect
USB cable or close VR100 Software
during the update process. You will
be notified when the firmware update
has been completed successfully.
Verify that the VR100 is ready for a
firmware update. The wizard will not
allow you to proceed until you check the
box confirming that you have read the
instructions.
Backup the Sensor Database. If you would like to change
the file’s location, click the “Browse” button and select a new
location and/or filename. The sensor tag database in the
VR100 receiver may be erased during the firmware update.
If no sensor
information has
been entered into
the VR100, the
sensor database is
reported as empty.
Click “Next” to
continue.
Check the firmware version by opening the receiver in the Receiver
Management window, and selecting
Help/About VR100… from the
If you are using non-
standard coded tag maps or
continuous tags, please
verify channel configuration
settings on the receiver after
firmware update.