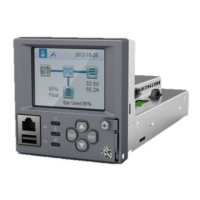
Vertiv™ NetSure™ Control Unit (NCU) User Manual
8 Replacement Procedures
8.1 NCU Replacement
DANGER! Follow all “Important Safety Instructions” found in the documentation provided with the system the NCU Controller
is installed in.
ALERT! NCU CONTROLLER HANDLING.
Installation or removal of the NCU Controller requires careful handling. To avoid possibility of NCU Controller damage from
static discharge, a static wrist strap grounded through a one megohm resistor should always be worn when handling the NCU
Controller. ESD-protective packaging material must also be used when carrying/shipping the NCU Controller.
NOTE!
Depending on your network security settings, when you remove a device that is connected to your network and
assign the same IP address to the replacement device, you may not be allowed to communicate with the replacement device
over the network. Contact your network administrator for assistance.
NOTE!
The controller does not turn off any relay when the controller is reset/replaced. If the relay is active when the
controller is reset/replaced, it will stay active whether or not the alarm condition still exists. If possible, the alarm condition
should be cleared before the controller is reset/replaced. If the alarm is not cleared, after starting the controller, it may be
necessary to manually trigger an alarm condition to clear all alarm relays.
The NCU is hot swappable. It can be removed and installed with the system operating and without affecting the output bus.
Procedure
1. Before performing this procedure, ensure the replacement NCU contains the same configuration file as the existing NCU.
Refer to the Configuration File Part Number Label on the side of the replacement NCU for the Configuration Part Number
(see Figure 8.1). If the existing controller is operational, navigate the menus to view its configuration file (MAIN SCREEN /
ESC).
Figure 8.1 NCU Configuration Label Location
2. Performing this procedure may activate external alarms. Do one of the following. If possible, disable these alarms. If these
alarms cannot be easily disabled, notify the appropriate personnel to disregard any future alarms associated with this system
while this procedure is being performed.
3. Connect an approved grounding strap to your wrist. Attach the other end to a suitable ground.
M830D
Configuration File
Part Number Label
Configuration File
Part Number Label

 Loading...