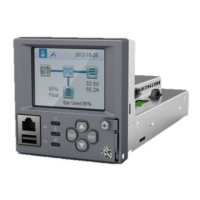
Vertiv™ NetSure™ Control Unit (NCU) User Manual
Set an ambient temperature sensor as the sensor which displays the ambient temperature on the Web Interface’s Homepage (see
“Setting Temperature Sensors” on page 39).
Enter values for the following parameters:
“BTRM Temp Sensor”, “BTRM Temp High 2”, “BTRM Temp High1”, “BTRM Temp Delta Over Ambient”, “BTRM Temp Delta Alarm”,
“BTRM Action” and “BTRM Voltage”.
2.9.41 Configuring the NCU Identification of Rectifiers and Assigning which Input Feed is
Connected to the Rectifiers
When rectifiers are all installed prior to applying power and starting the system, the order in which the NCU identifies the rectifiers is
by serial number (lowest serial number is Rect 1, next lowest is Rect 2, etc.). If you prefer the NCU to identify the rectifiers by position
in the system, perform the following procedure.
Upon power up, the NCU arbitrarily assigns Feed AC1, AC2, or AC3 to each rectifier. This assignment is used to display rectifier AC
input feed voltage(s). The User may reassign the feed to each rectifier per your specific installation by following the procedure below.
Local Menu Navigation:
None.
Web Menu Navigation:
See “Individual Rectifier Settings Page” on page 121 and set the Rectifier ID and AC Feed (repeat for every rectifier).
then
Settings Menu / Rectifiers Tab / “Confirm Rect ID/Feed”.
2.9.42 Configuring the NCU Identification of Solar Converters
When solar converters are all installed prior to applying power and starting the system, the order in which the NCU identifies the solar
converters is by serial number (lowest serial number is Solar Conv 1, next lowest is Solar Conv 2, etc.). If you prefer the NCU to identify
the solar converters by position in the system, perform the following procedure.
NOTE!
See also “Enabling Solar Mode” on page 38.
Local Menu Navigation:
None.
Web Menu Navigation:
See “Individual Solar Converter Settings Page” on page 124 and set the Solar Converter ID (repeat for every solar converter).
then
Settings Menu / Solar Converters Tab / Confirm Solar Converter ID.
2.9.43 Configuring the NCU Identification of Converters
When converters are all installed prior to applying power and starting the system, the order in which the NCU identifies the converters
is by serial number (lowest serial number is Conv 1, next lowest is Conv 2, etc.). If you prefer the NCU to identify the converters by
position in the system, perform the following procedure.
Local Menu Navigation:
None.
Web Menu Navigation:
See “Individual Converter Settings Page” on page 127 and set the Converter ID (repeat for every converter).
then
Settings Menu / “DC/DC” Converters Tab / Confirm Converter ID.