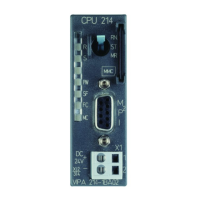
Manual VIPA CPU 21x Chapter 5 Deployment CPU 21x-2BT02 with H1 / TCP/IP
HB103E - Rev. 05/45 5-13
Hardware configuration
Precondition: SIMATIC manager from Siemens starting V. 5.1 and
SIMATIC NET
• Start the SIMATIC manager from Siemens with a new project.
• Add a new System300 station via Insert > Station > SIMATIC 300-
Station.
• Activate the station "SIMATIC 300" and open the hardware configurator
by clicking on "Hardware".
• Configure a rack (Simatic300 > Rack-300 > Profile rail).
• For all CPUs 21x from VIPA are configured as CPU 315-2DP, you select
the CPU 315-2DP with the order no. 6ES7 315-2AF03-0AB0 in the
hardware catalog.
This is to find under Simatic300 > CPU-300 > CPU 315-2 DP.
• If needed parameterize the CPU res. the modules. The parameter
window is opened at double click on the depending module.
• Attach the System "VIPA_CPU21x" to the subnet. The respective
entries are located in the hardware catalog under PROFIBUS DP >
Additional Field Devices > IO > VIPA_System_200V. Assign Profibus
address 1 to this slave.
• Place the VIPA CPU 21x-2BT02 that you want to deploy at the 1
st
slot of
the configurator.
• Include your System 200V modules in the location sequence starting
from plug-in location 1.
• Save your project.
The transfer of the hardware configuration happens together with the user
application.
User application
• Create a communication channel between CPU and CP by means of the
SYNCHRON block.
• Program the according SEND and RECEIVE blocks for initializing send
and receive orders.
• Program the blocks SEND_ALL res. RECEIVE_ALL for data transfer.
... continue
fast introduction

 Loading...