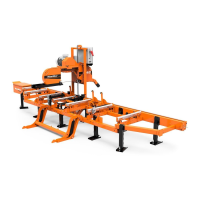
Sawmill Operation
Loading, Turning And Clamping Logs
4
4-5 60HDdoc102619 Sawmill Operation
4.2 Loading, Turning And Clamping Logs
To Load Logs
1. Move the saw carriage to the front end of the frame.
CAUTION! Before loading a log, be sure the cutting head is moved far
enough forward so the log does not hit it. Failure to do so may result in
machine damage.
CAUTION! Be sure the log clamp, turning arm and toe boards are
adjusted out of the path of the log before loading a log onto the bed.
Failure to do so may result in machine damage or cause misalignment.
2. Raise the side supports on the sawmill bed to prevent the log from falling off the side of the bed.
3. Use cant hooks or loading equipment to move the log to the foot of the loading arms.
4. Roll the log onto the loader so that it is approximately centered with the sawmill bed. The log turner
will operate much easier if the log is centered on the sawmill bed.
5. Raise the loader lever to raise the log onto the sawmill bed. Simply let the loader rise until the log
rolls onto the mill bed.
6. Raise the clamp up/down lever to raise the clamp up to prevent the log from rolling of the bed.
7. Lower the loading arm. You can leave it about halfway down while squaring the log. If you do so, you
can use the loading arm to collect boards with bark being sawn on them.
WARNING! After loading the log onto the mill raise the log clamp up to
p r e v e n t t h e l o g f r o m r o l l i n g o f t h e b e d .
To Turn Logs
1. Raise the turner lever to engage the log turner arm. Let the arm rise until it touches the log and starts
to turn it.
2. Spin the log against the side supports until it is turned the way you want it for the first cut. If you want
to turn the log more, do the following steps.
3. Engage the clamp by raising the clamp in/out lever. Clamp the log against the side supports.
4. Lower the turner lever to lower the turner arm below the log.
5. Raise the turner arm to get a new bite on the log.

 Loading...