Sawmill Alignment
Complete Alignment Procedure
7
7-40 60HDdoc102619 Sawmill Alignment
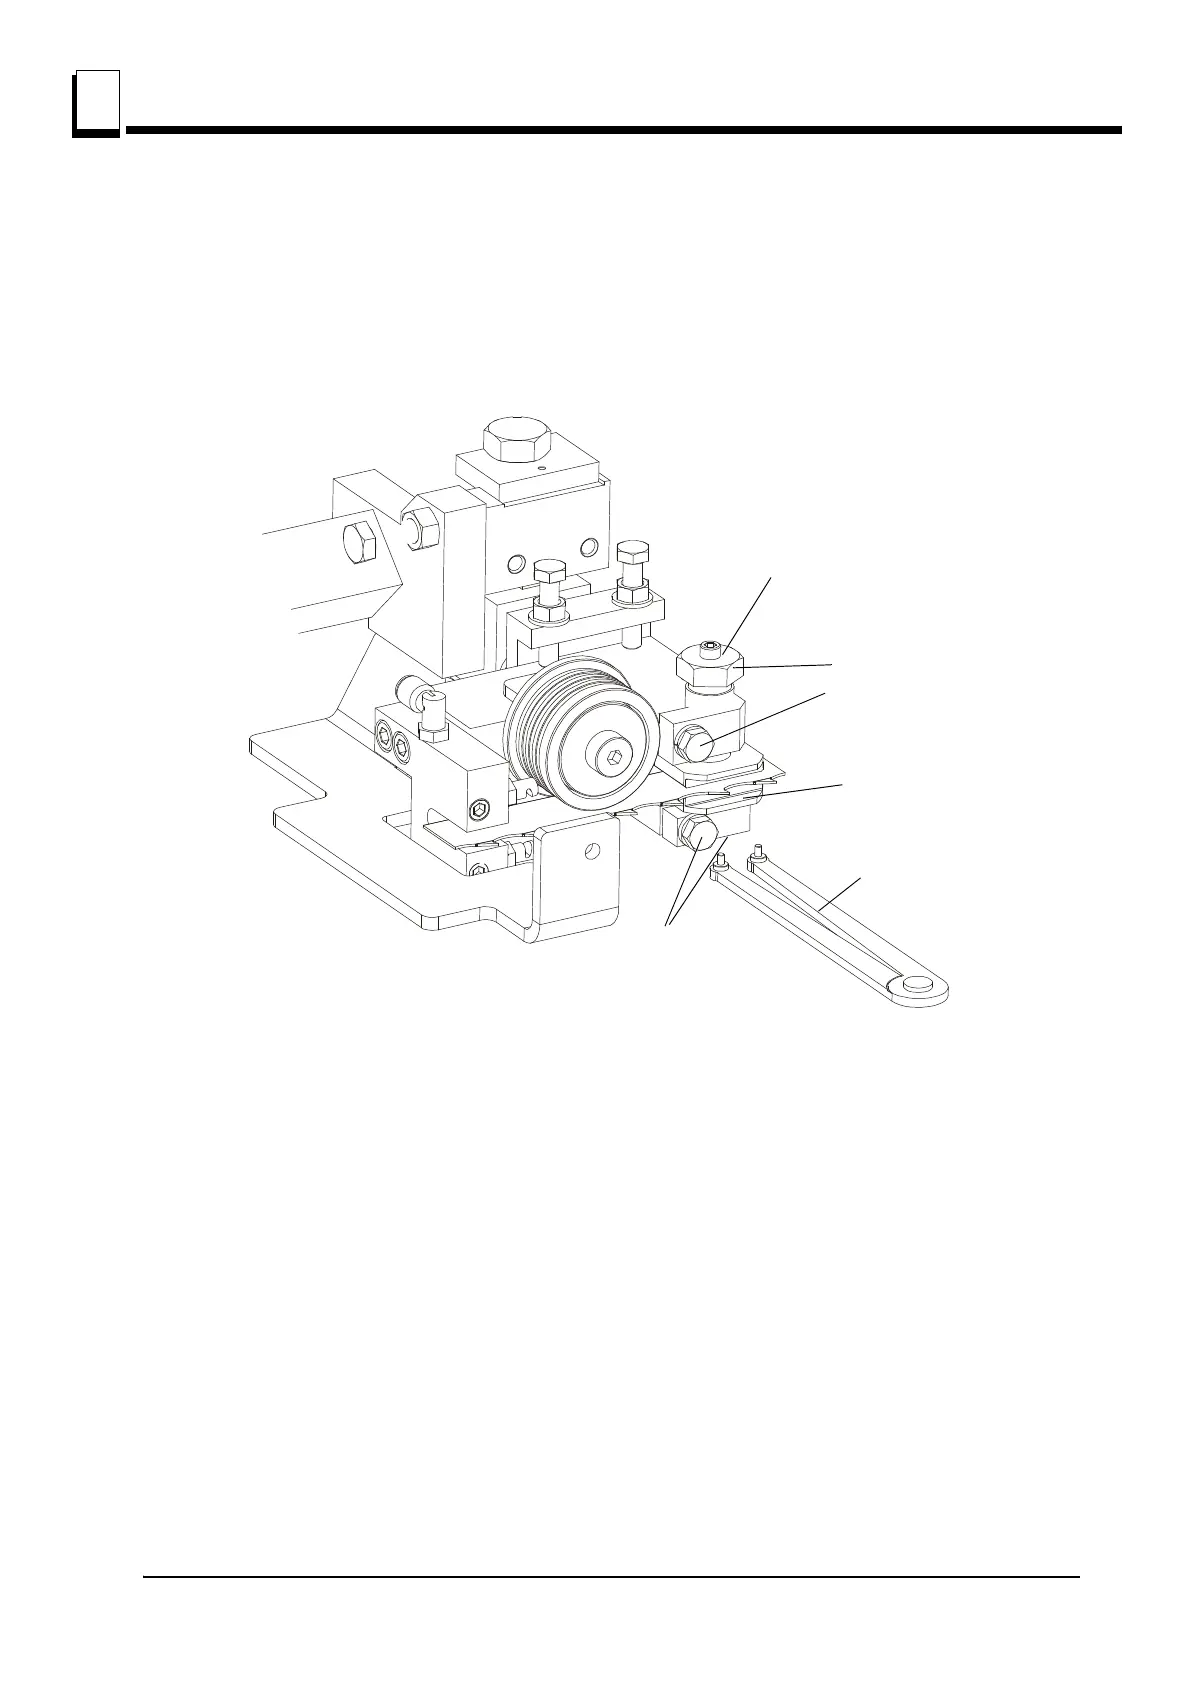
Blade Disk Adjustment
1. Remove the blade and remove the alignment bars from the blade guide assemblies. Install new
or reconditioned bottom guide disks to both blade guide assemblies (leave mounting bolts loose).
Use the provided bottom disk adjustment tool to lower the bottom disk all the way down. Install,
tension and track the blade.
See Figure 7-41.
2. Use the bottom disk adjustment tool to raise the bottom disk to 0.3- 0.5 mm from the blade. Use the
provided shim to set the distance from the disk to the blade. Tighten the bottom disk mounting bolt
and clamp bolt.
3. Turn the top disk adjustment bolt clockwise to lower the top disk to 0.3- 0.5mm from the blade (using
the shim as a guide). Tighten the top disk mounting bolt and clamp bolt.
4. After tightening the clamp bolt, recheck the distance from the top disk to the blade and readjust if
necessary.
FIG. 7-41
Tighten mounting
bolt and clamp bolt
Use bottom disk
adjustment tool to
raise bottom disk
Tighten mounting
bolt and clamp bolt
Turn adjustment bolt
clockwise to lower
top disk
Disk (0.3-0.5 from
blade)

 Loading...