Sawmill Alignment
Complete Alignment Procedure
Sawmill Alignment 60HDdoc102619 7-33
7
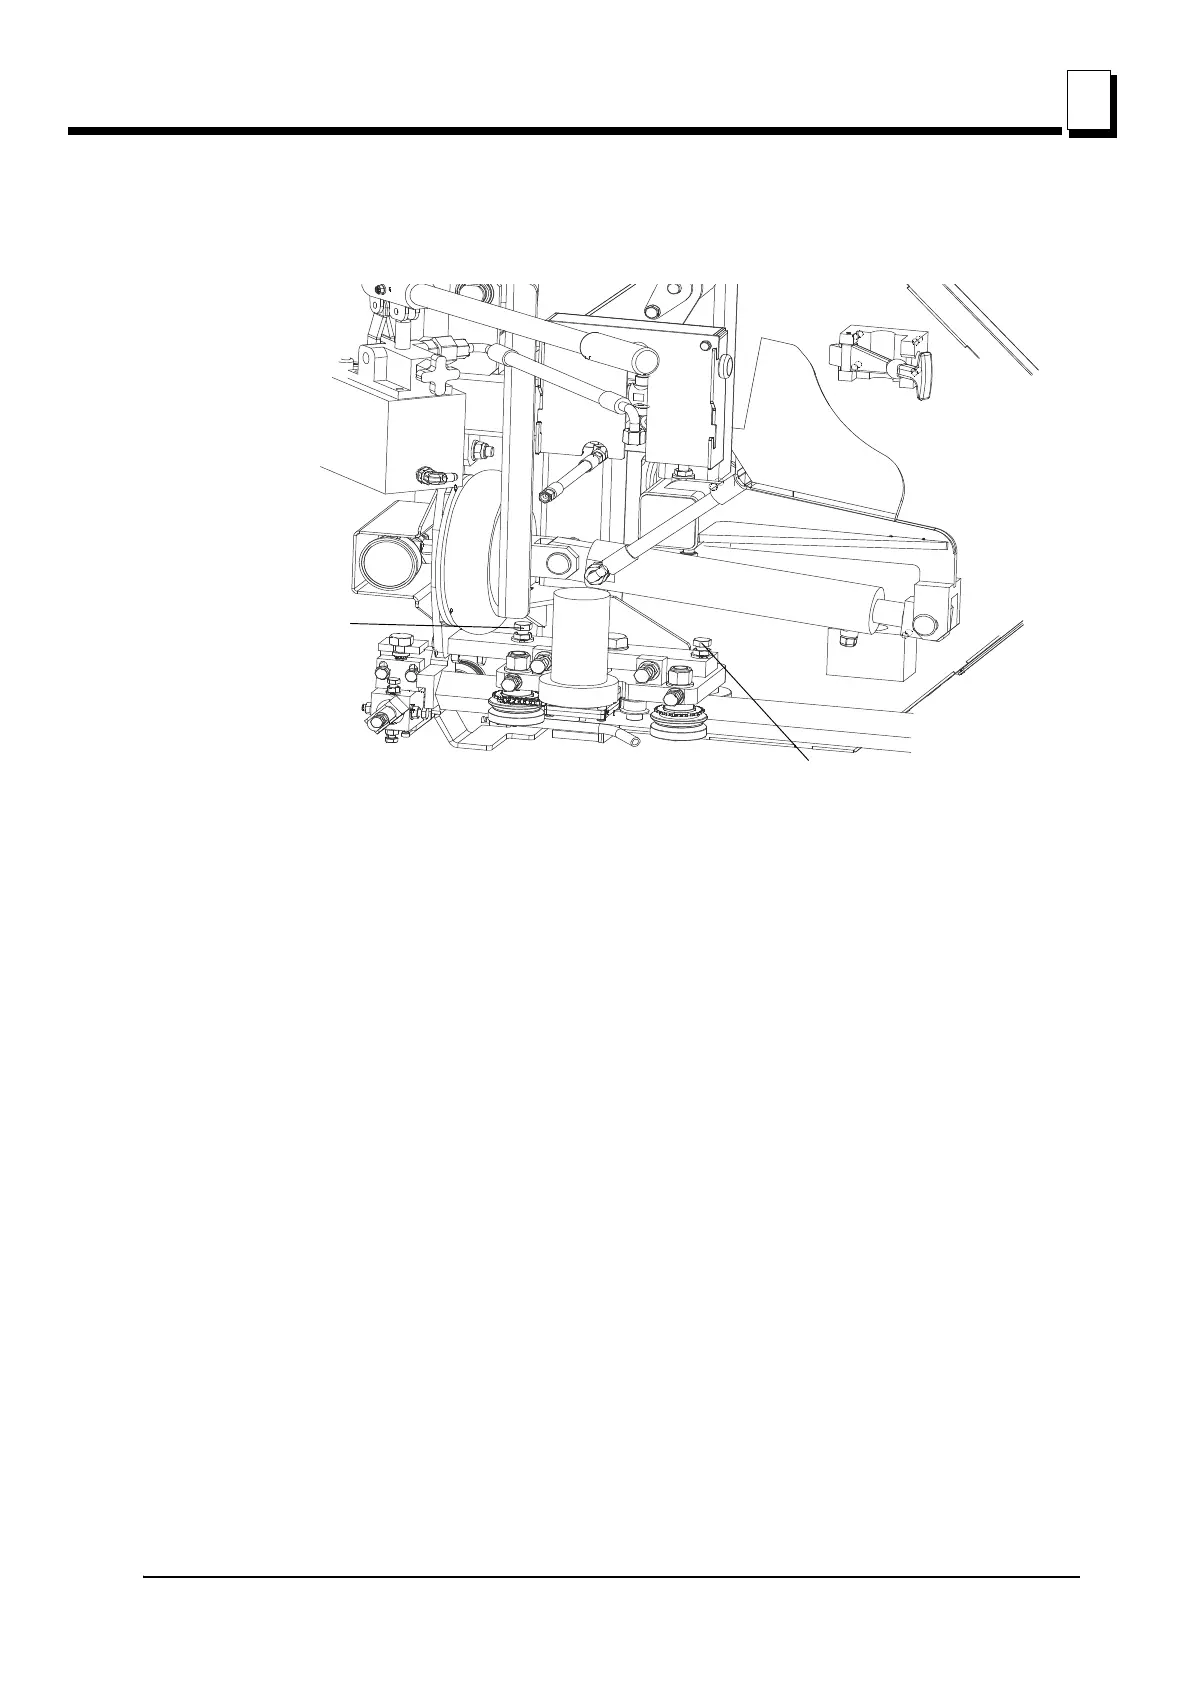
See Figure 7-33. Loosen the vertical adjustment bolt jam nuts. To tilt the blade guide arm down,
loosen the rear bolt and tighten the front bolt. To tilt the blade guide arm up, loosen the front bolt and
tighten the rear bolt. Retighten the jam nuts and recheck the blade guide arm vertical tilt.
Blade Guide Deflection
Perform the following steps to achieve proper blade deflection with the blade guides.
1. Raise the carriage until the blade is 375 mm above a bed rail. Measure the actual distance with a
tape from the top of the rail to the bottom of the blade.
See Figure 7-34.
Loosen the clamp bolts. Turn the top adjustment bolt counterclockwise to lower the assembly until
the blade guide roller deflects the blade down until the bottom of the blade measures 369 mm from
FIG. 7-33
Front Vertical
Adjustment Bolt
Rear Horizontal
Adjustment Bolt

 Loading...