3-24 IM 760301-01E
3.12 Setting the Date/Time
Procedure
START STOP
REMOTE
CAL
MOTOR
SET
CURSOR NULL
MENU STORE SET
MENU
LOWER ITEM LOWER FORM ALL
USER SET
DISPLAY
ITEM & ELEMENT
RESET SET
PAGE PAGE
SCALING
HRM SET
MEASURE
SYNC SOURCE
AVG
LINE FILTER
FREQ
FILTER
FILE
PRINT
MISC
STORE
IMAGE SAVE
HELP
NUMERIC
WAVE
OTHERS
ITEM
FORM
U / I / P
WP/q/
TIME
USER
ELEMENT
UPDATE
RATE
HOLD
SINGLE
INTEG
LOCAL
SHIFT
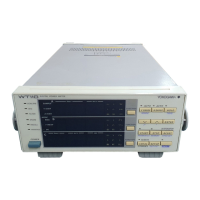
To exit the menu during operation, press ESC located above
the soft keys.
In the procedural explanation below, the phrase “press the
cursor keys” may be used. This phrase refers to the
procedures for selecting items and entering values and
character strings. For details on the procedures, see section
3.14.
Cursor keys
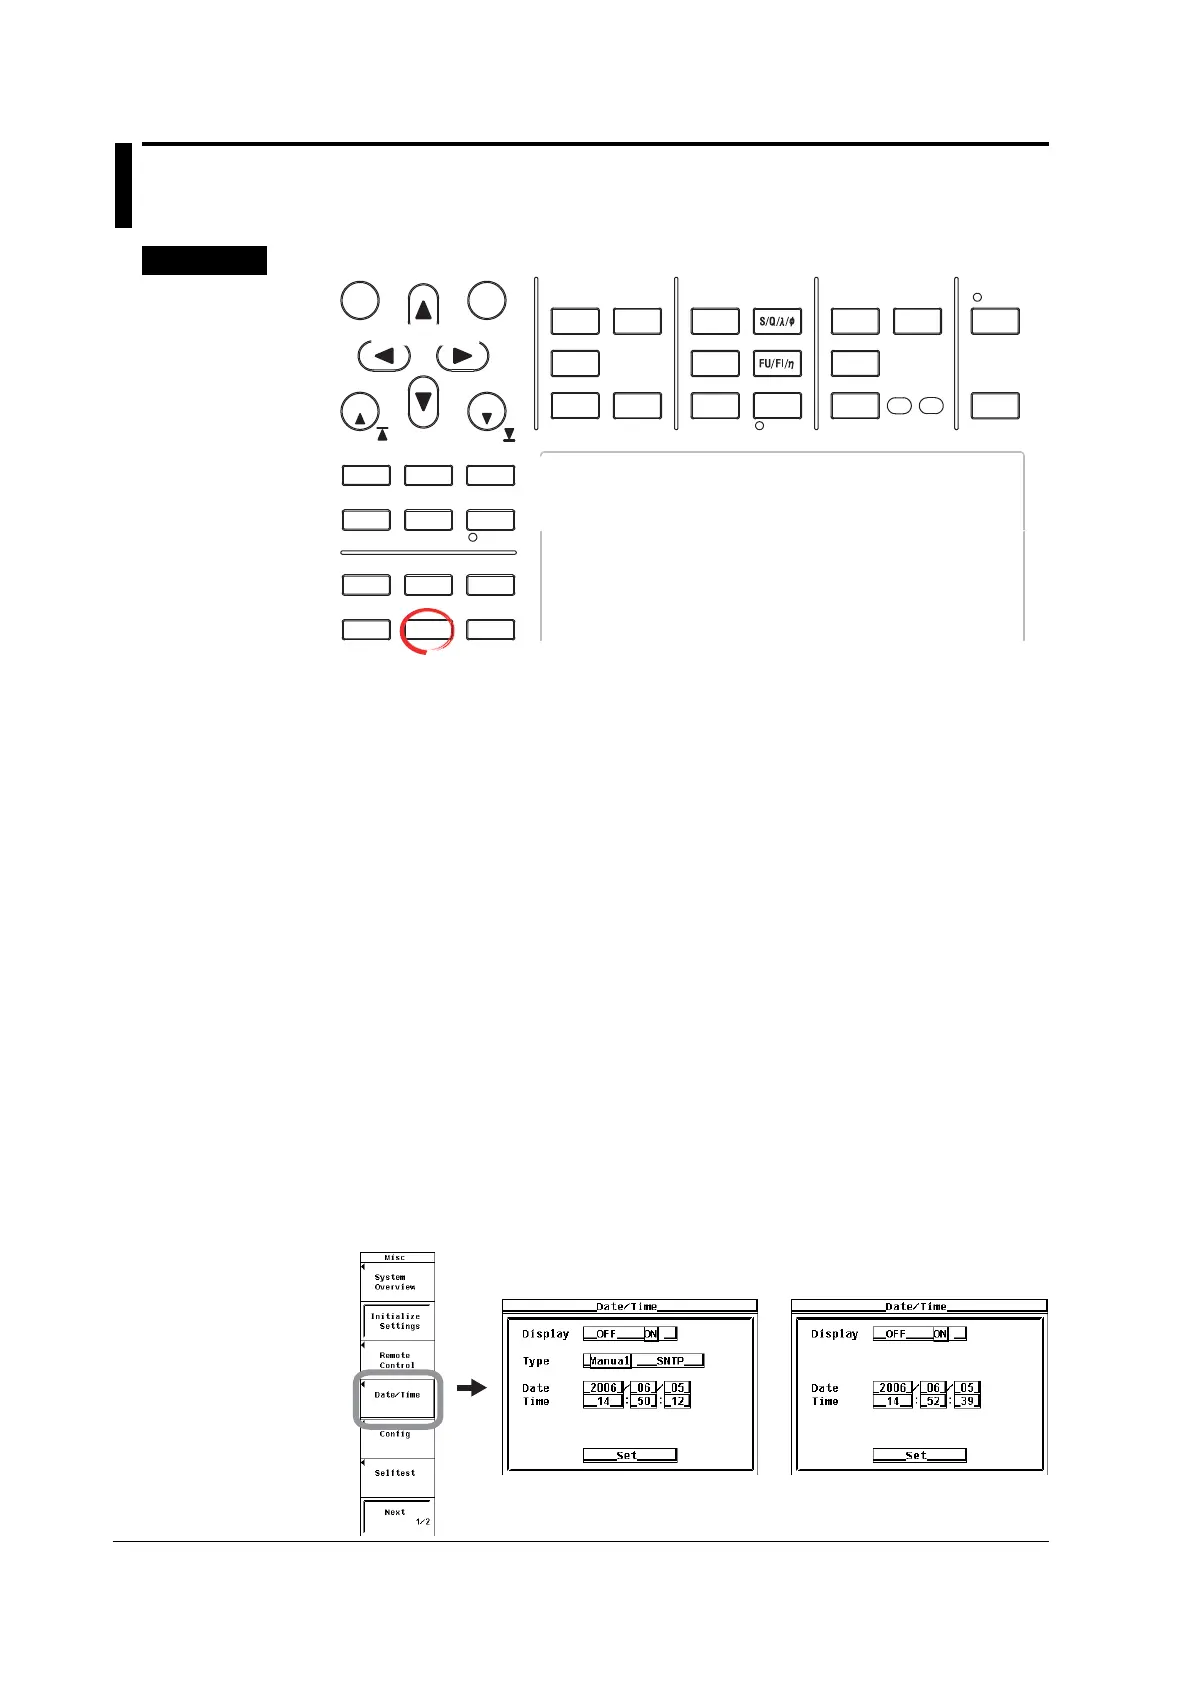
1. Press MISC to display the Misc menu.
2. Press the Date/Time soft key to display the Date/Time dialog box.
• Turning ON/OFF the Date/Time Display
3. Press the cursor keys to select Display.
4. Press SET to select ON or OFF.
• Setting the Date or Time Manually
If the Ethernet interface option is installed, proceed to step 5.
If it is not, proceed to step 7.
5. Press the cursor keys to select Type.
6. Press SET to set Type to Manual.
7. Press the cursor keys to select the Date (year, month, and day) or Time (hour,
minute, second) box.
8. Press SET to display the entry box.
9. Press the cursor keys to set the year, month, date, hour, minute, or second that
you selected in step 5.
10. Press SET or ESC to close the box.
11. Repeat steps 5 to 8 to set the entire year, month, date, hour, minute, and
second.
12. Press the cursor keys to select Set.
13. Press SET. If ON was selected in step 4, the new date and time are displayed in
the lower right corner of the screen. If the procedure is aborted without pressing
SET, the new settings are not reflected on the display.
If the Ethernet interface
option is installed
If the Ethernet interface option
is not installed
 Loading...