In
case
the analyzer cell is equipped with the optional metal
seal:
g
Prepare
the new special metal seal according to the figure
below or using the seal former,
F
110
g
The
ends of the metal seal
must
only
cross
once (no twist). Check
that the ends
cross
near one of the six
screws
holes, one end on
either side of the hole.
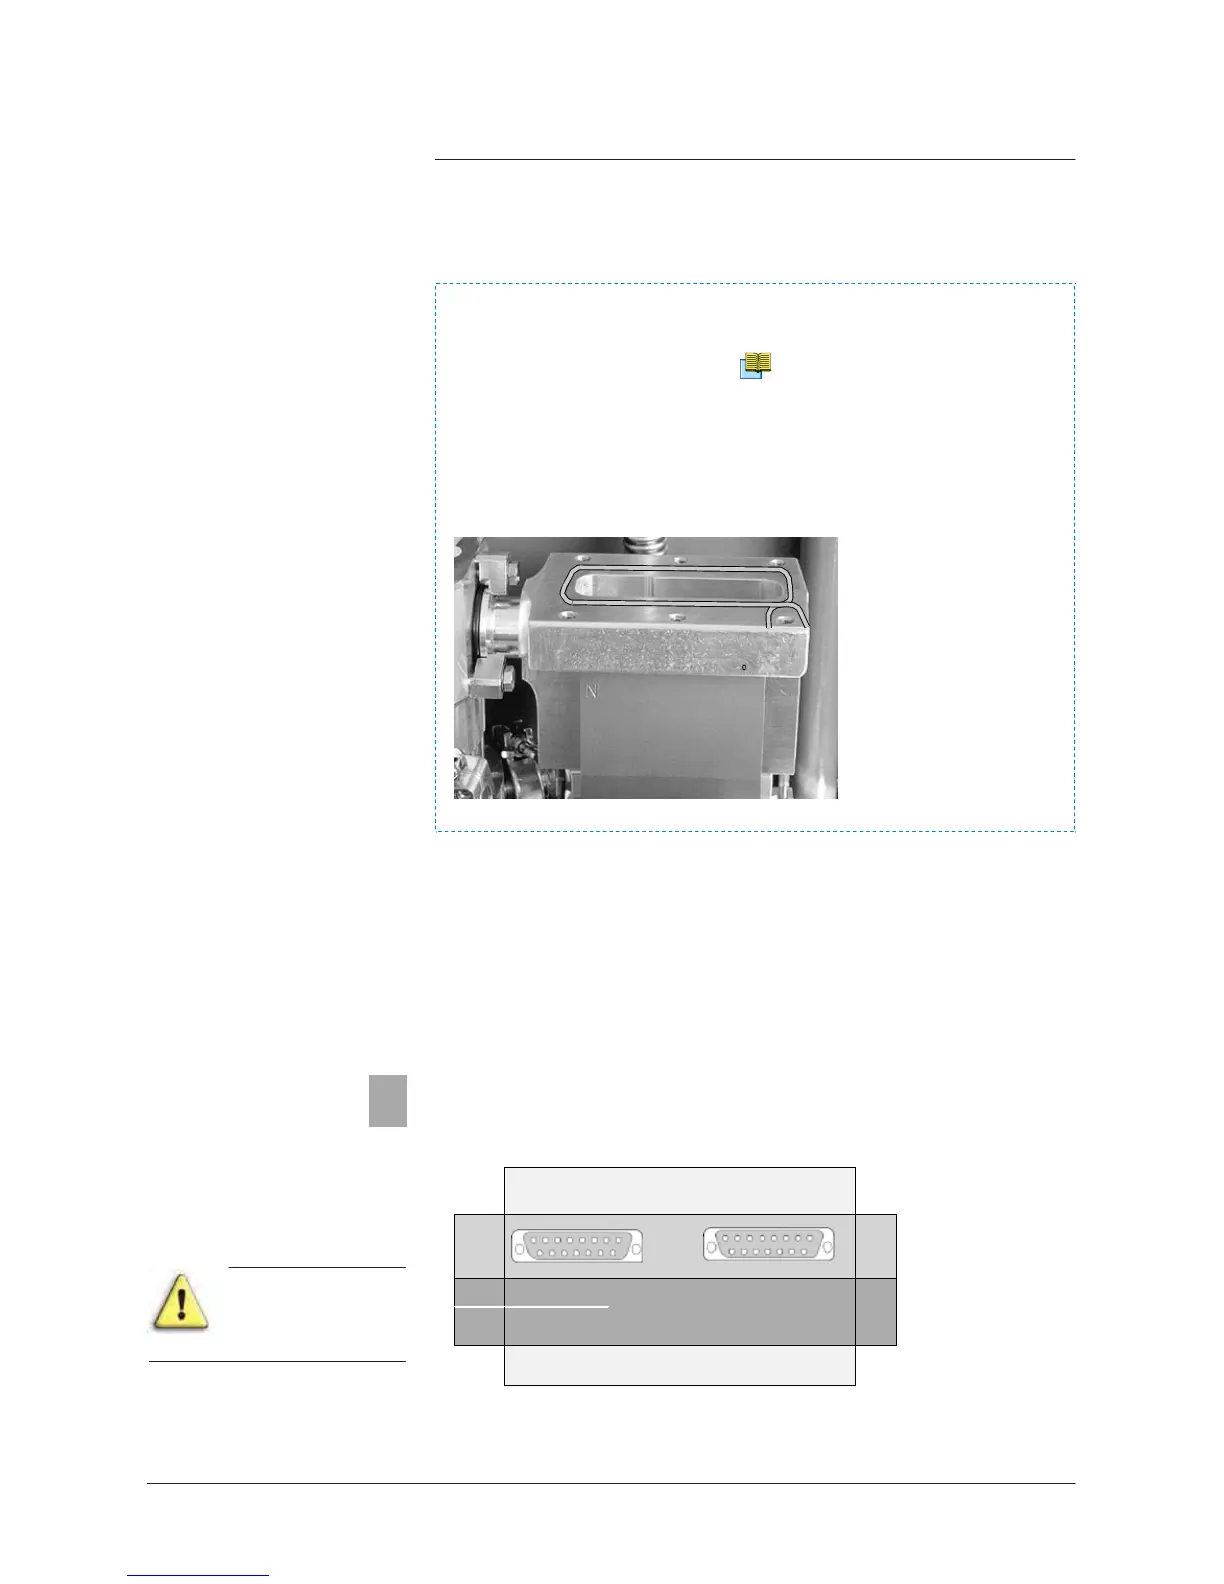
Place
the metal seal on the cell body seal
seat.
g
Install
the flange, taking care to lower it into the duct without
touching the sides.
g
Install
the 6 screws.
Tighten
all
the
securing screws
5
g
T
ighten
the
screws
with their
washers
in the
sequence
shown
below to a torque of 0.7 m.daN for the special
elastomer
seal
(0.8 m.daN or 8 ft. lbs for the metal seal).
CAUTION
Don’t take off the
black sticker
6
screws
tightening order
6
/
8