Connector disassembly
Check
valve
disassembly
n While holding the banjo
fitting
use
the
l
6
mm flat
wrench,
unfasten
and release
the upper
connector
using the
l
4
mm flat wrench.
n
Perform
the
same
procedure
for the lower connector.
Unscrew
and
remove
the 6 CHc M 5-20 casing cover screws.
CAUTION
Head
covers
and
valves
may
come
with the casing cover:
proceed
delicately and identify the valve position on the head
cover.
Diaphragm
disassembly
n
Remove
the top part of the casing (casing cover, head covers).
n Separate the head
covers
from the casing cover.
n
Remove
and discard the
used
valves.
n Clean the valve
seats
with alcohol.
Refer
to F10
(User’s
manual
of diaphragm pumps).
Using a seal extractor tool, lift two opposite
sides
of the diaphragm
and
insert
the diaphragm wrench.
Note:
For
the following
maintenance
step, proceed delicately
because,
the adjusting washer installed under the diaphragm may
fall into the pump
body.
n
Press
the diaphragm wrench to the
attachment
disk and then
unfasten
and
carefully
remove
the
attachment
disk/
diaphragm/support disk and adjusting
washer subassembly.
n Separate the diaphragm from the
clamping disk and the support disk and
discard. Clean the adjusting washer.
n Clean the diaphragm
seats
with alcohol.
See
sheet F10
(User’s
manual of
diaphragm pumps).
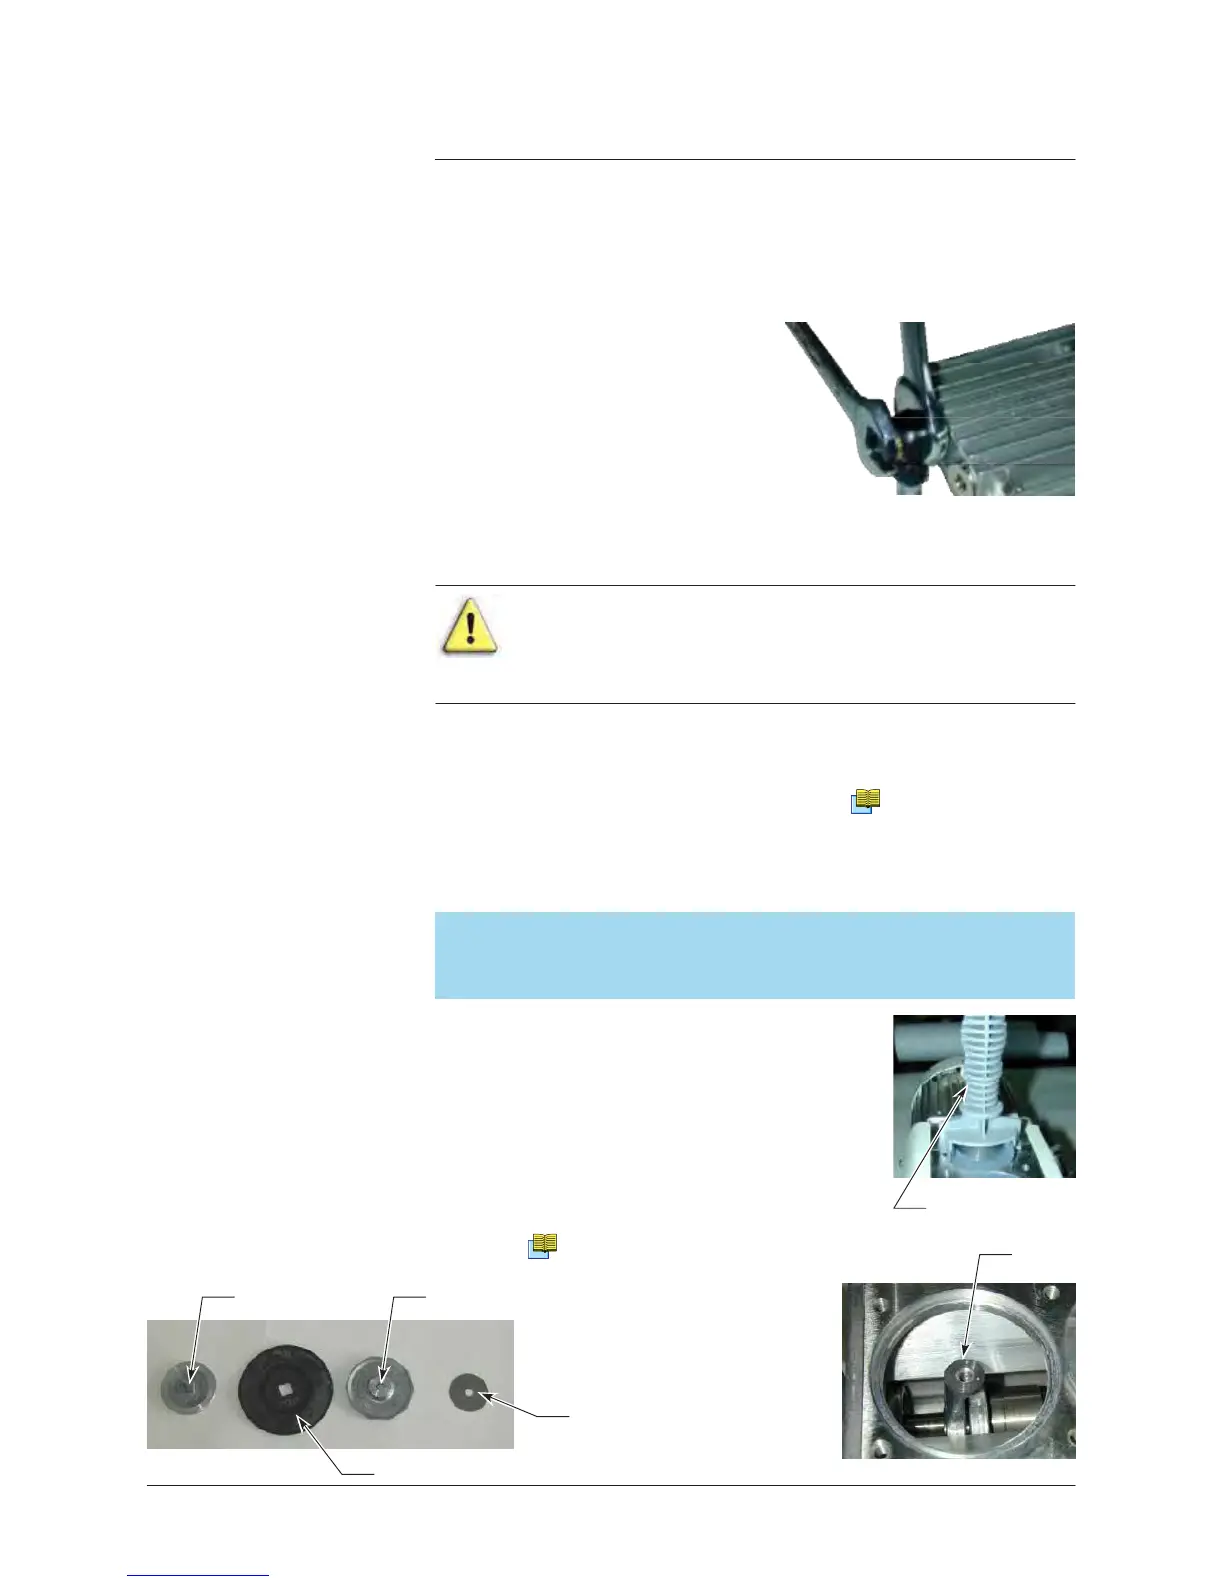
Clamping disk Disk support
Diaphragm wrench
Rod
Adjusting
washer
2/4
Diaphragm