EasyManuals Logo

Advanced Instruments OsmoPRO Service Manual

Advanced Instruments OsmoPRO
139 pages
To Next Page IconTo Next Page
To Previous Page IconTo Previous Page
Page #113 background imageLoading...
Page #113 background image
112100RPM Rev0
(OsmoPRO Service Manual)
Page 3 of 5
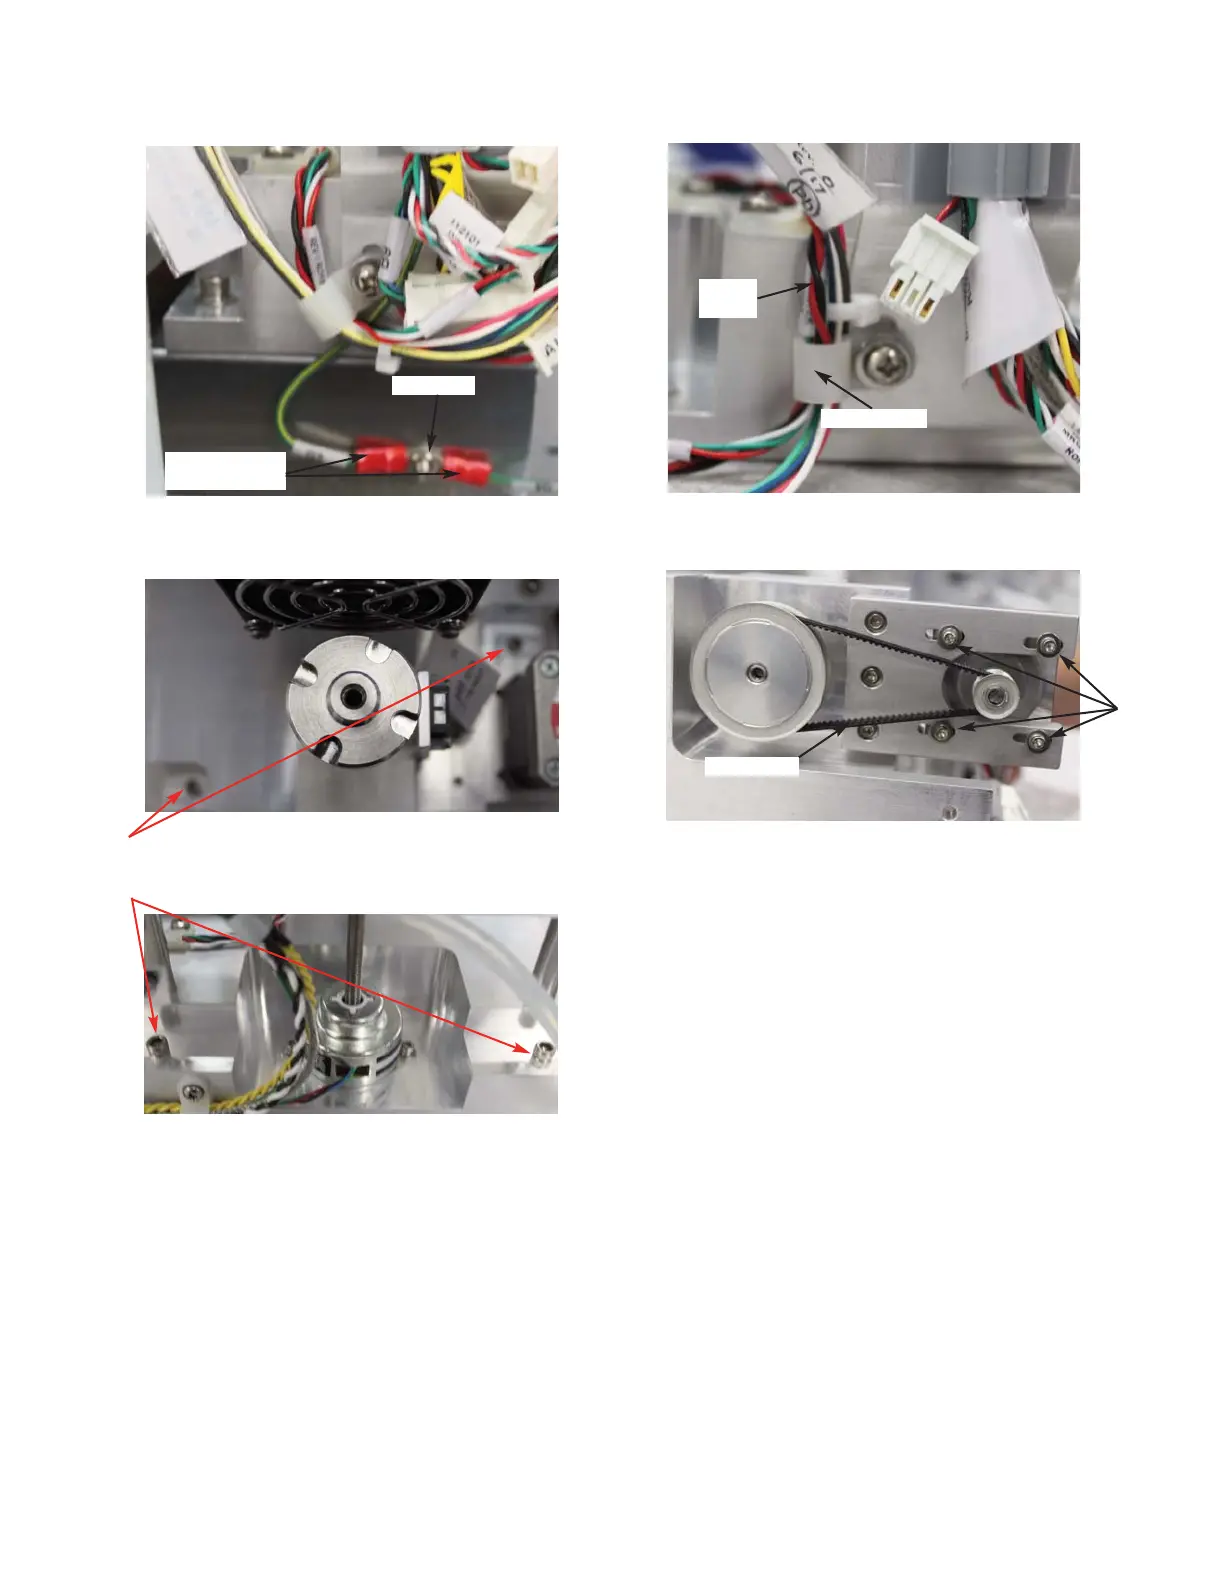
14. Remove the four screws and washers
that mount the Turntable Motor to the
Turntable Motor Mounting Plate. Slide
the Timing Belt off of the Pulley located
on the Turntable Motor Shaft (
Figure 9).
15. Remove the Pulley from the Turntable
Motor Shaft.
16. Install the Pulley onto the replacement
Turntable Motor Shaft. The Pulley must
be flush with the end of the Shaft (
Figure
10
).
Figure 7A
Figure 8
Figure 9
Figure 6
SPG & BPG
Ring Terminals
Figure 7B
Four Socket
Head Cap
Screws
Hex Nut
Timing Belt
Four
Screws
Cable Clamp
Wire
Leads

Table of Contents

Questions and Answers:

Question and Answer IconNeed help?

Do you have a question about the Advanced Instruments OsmoPRO and is the answer not in the manual?

Advanced Instruments OsmoPRO Specifications

General IconGeneral
BrandAdvanced Instruments
ModelOsmoPRO
CategoryMeasuring Instruments
LanguageEnglish

Related product manuals