12 Maintaining the NPD
To Replace the NPD Bead Assembly
194 Maintaining Your GC
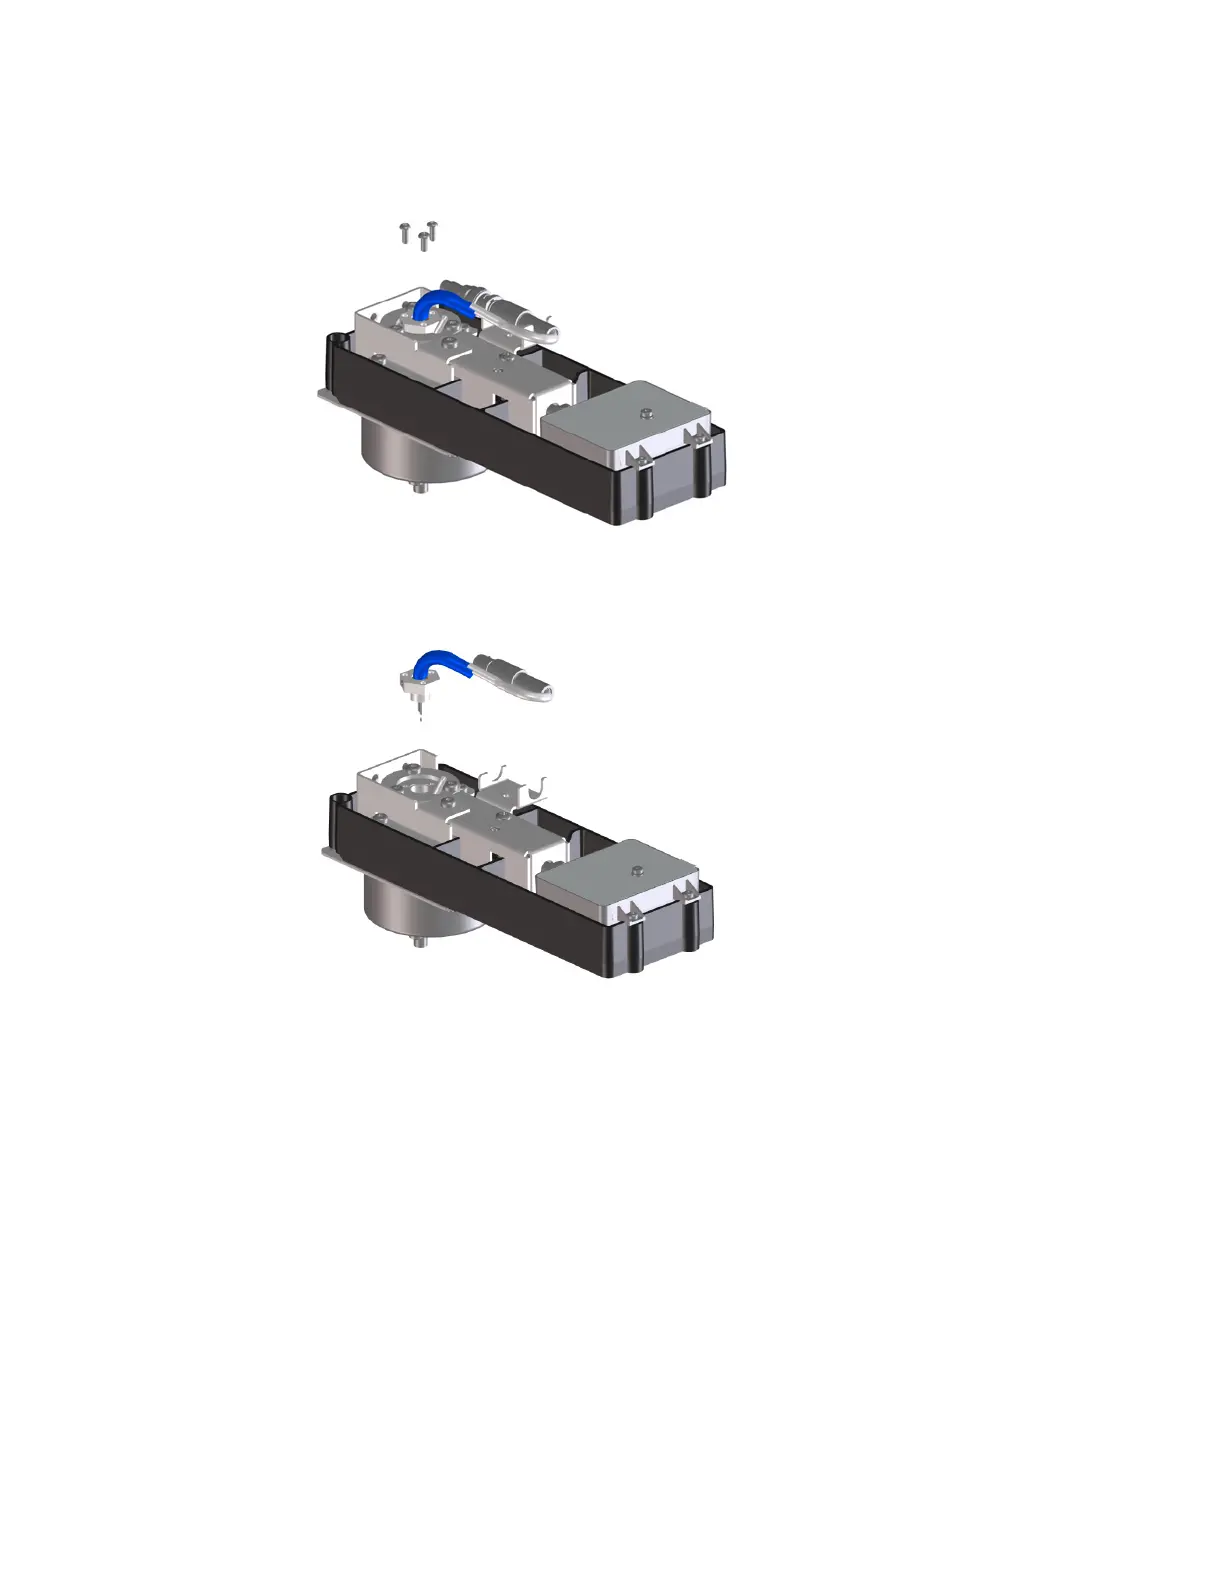
9 Remove the 3 T-10 Torx screws from the bead assembly.
10 Gently lift up and remove the old bead assembly. Avoid bumping the bead on the sides of
the collector.
11 Remove the protective cap covering the new bead.
12 Mount the new bead assembly on the NPD lid. Be careful not to bump the bead on the
sides of the lid or collector.
13 Replace the screws. Finger-tighten the first screw; tighten the remaining screws normally
and then completely tighten the first screw. Do not overtighten the screws.
14 Carefully bend the bead assembly so it will mate with the bead power cable.
15 Reconnect the bead assembly cable to the NPD cable and twist the ring to lock the
connection.

 Loading...


