Service Guide E8361-90001 7-59
PNA Series Microwave Network Analyzers Repair and Replacement Procedures
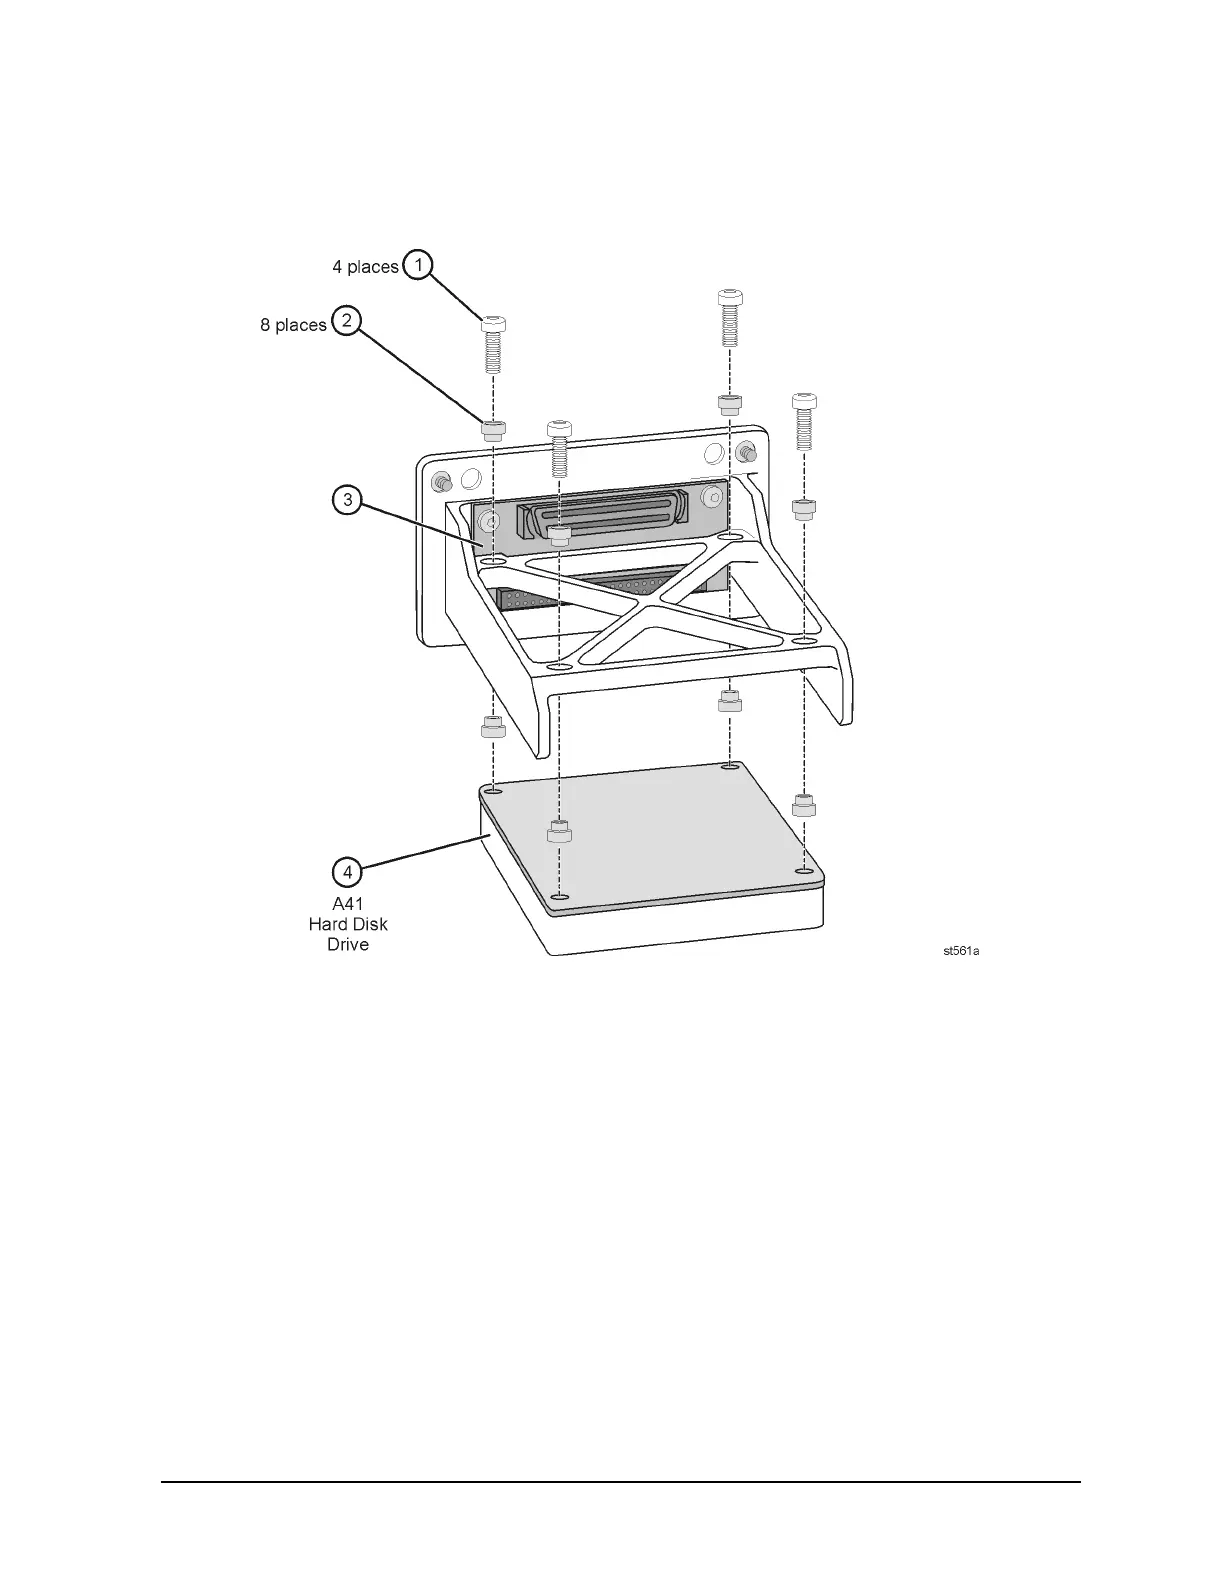
E8361A Removing and Replacing the A41 Hard Disk Drive
Figure 7-28 Hard Disk Drive Assembly (Exploded View)
Replacement Procedure
Installing the New A41 Hard Disk Drive
Refer to Figure 7-28.
1. With the disk drive bracket right-side up (it is shown upside down in Figure 7-28),
insert four bushings (item
②) into the four holes in the bracket.
2. Connect the new hard disk drive (item
④) to the interface board (item ③) by pushing it
firmly into the connector on the interface board. Take special care to align the
connector pins. Applying power to a misaligned connection can permanently
damage the hard disk drive.
3. While holding the disk drive in place, turn the bracket over and insert the other four
bushings (item
②), into the other side of the same four holes specified in step 1.
 Loading...


