IV-16
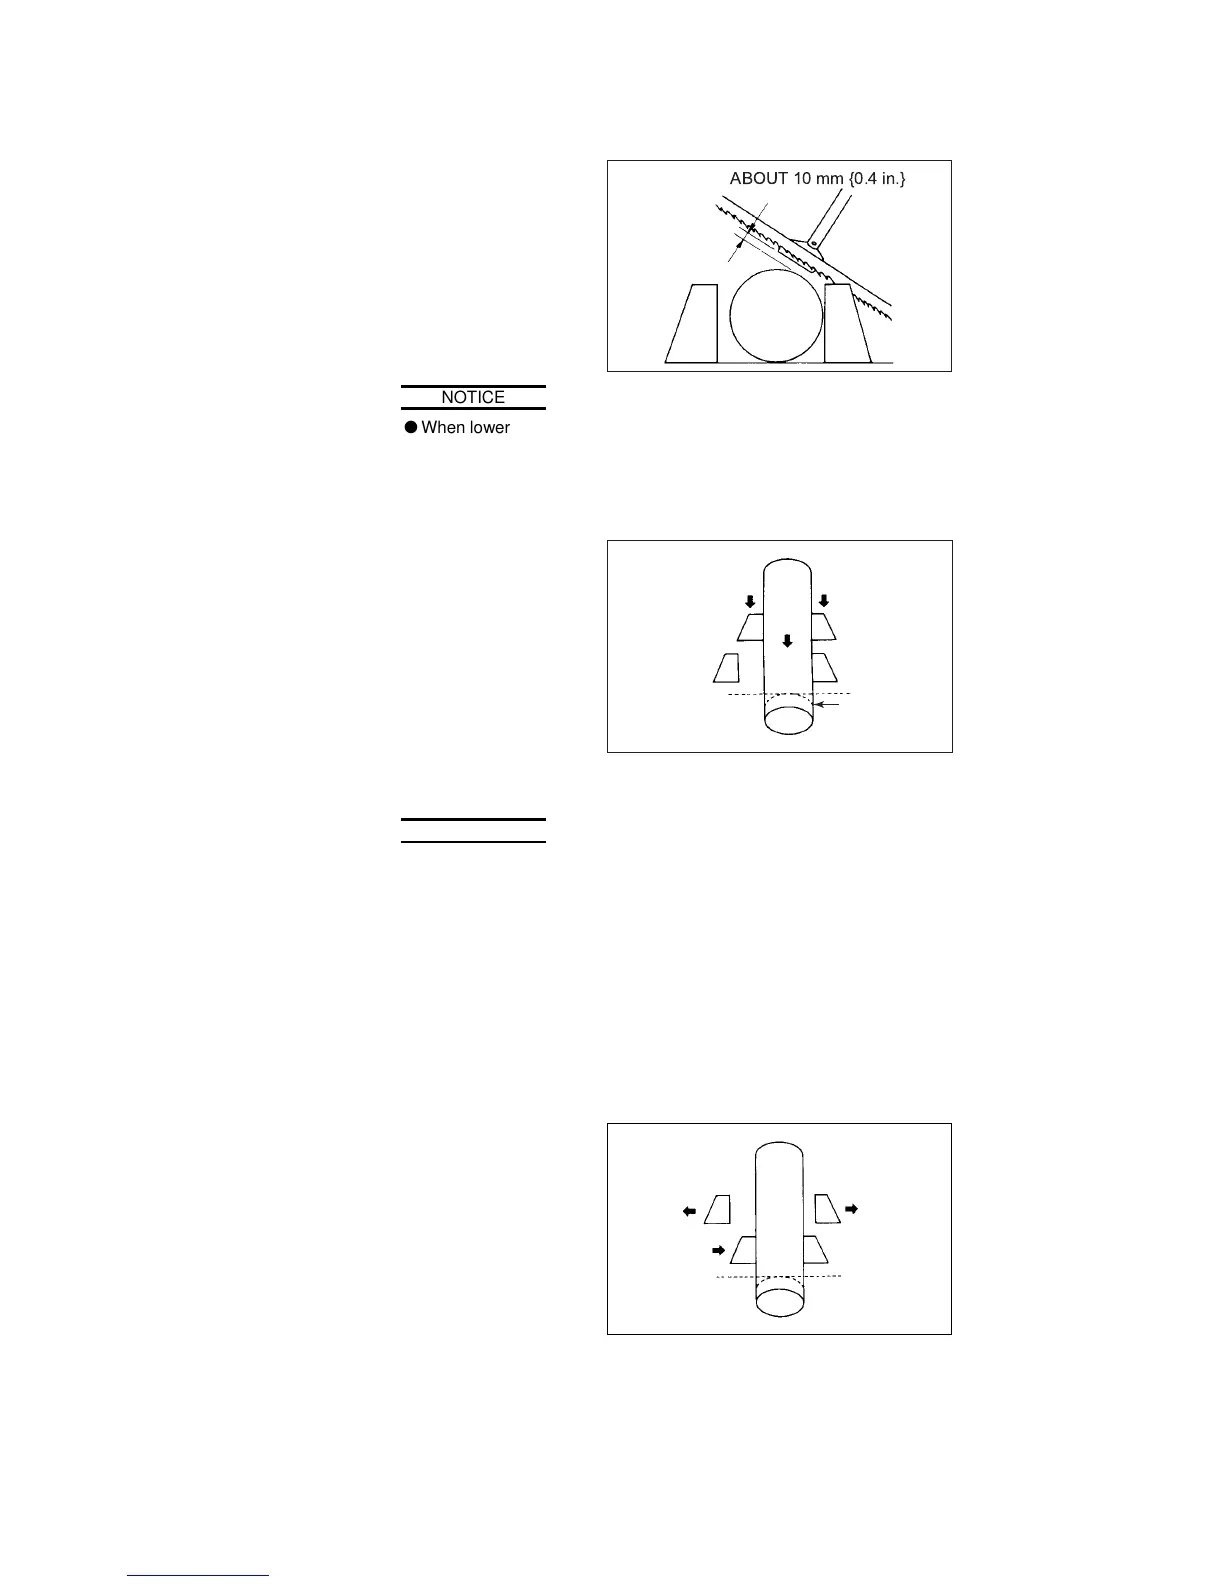
7 Intermittently press
the BLADE DOWN
button to lower the
sawhead slowly until
the quick approach
feeler comes to about
10 mm {0.4 in.} above
the top surface of the
work.
NOTICE
O When lowering the sawhead, take care so that the quick approach feeler
does not touch the work. If the quick approach feeler is lowered too
close to the work, it may touch the work when the work is moved. Be
sure to ensure a clearance of about 10 mm {0.4 in.}.
8 Press and hold the
REAR VISE
FORWARD button
until the cutting line of
the work comes right
below the saw blade.
If necessary, press
and illuminate the
REAR VISE SLOW
button to move the
rear vise at the low
speed.
SAW BLADE
RUNNING LINE
CUTTING
LINE
NOTE
O When trimming the head end of the work in automatic operation, align
the cutting line with the saw blade running line, and start the machine in
the MANUAL mode. When the AUTO/MANUAL switch is turned to
AUTO after the sawhead has started lowering, the machine can operate
automatically without counting the head-end trim.
If you do not trim the head end of the work, align the first cutting line with
the saw blade running line, and start the machine in the AUTO mode.
In this case, the work is not automatically fed for the first cutoff length.
9 If the cutoff length is longer than the rear vise feed stroke of 400
mm {15.748 in.} during manual operation, repeat steps 2, 3, 4, 5, 6,
and 8 above in that order.
10 When the work
positioning operation
is completed, press
and hold the FRONT
VISE CLOSE button
to clamp the work with
the front vise.
11 Press and hold the
REAR VISE OPEN
button to open the
rear vise.